
How to Grow Aloe Vera: Complete Guide
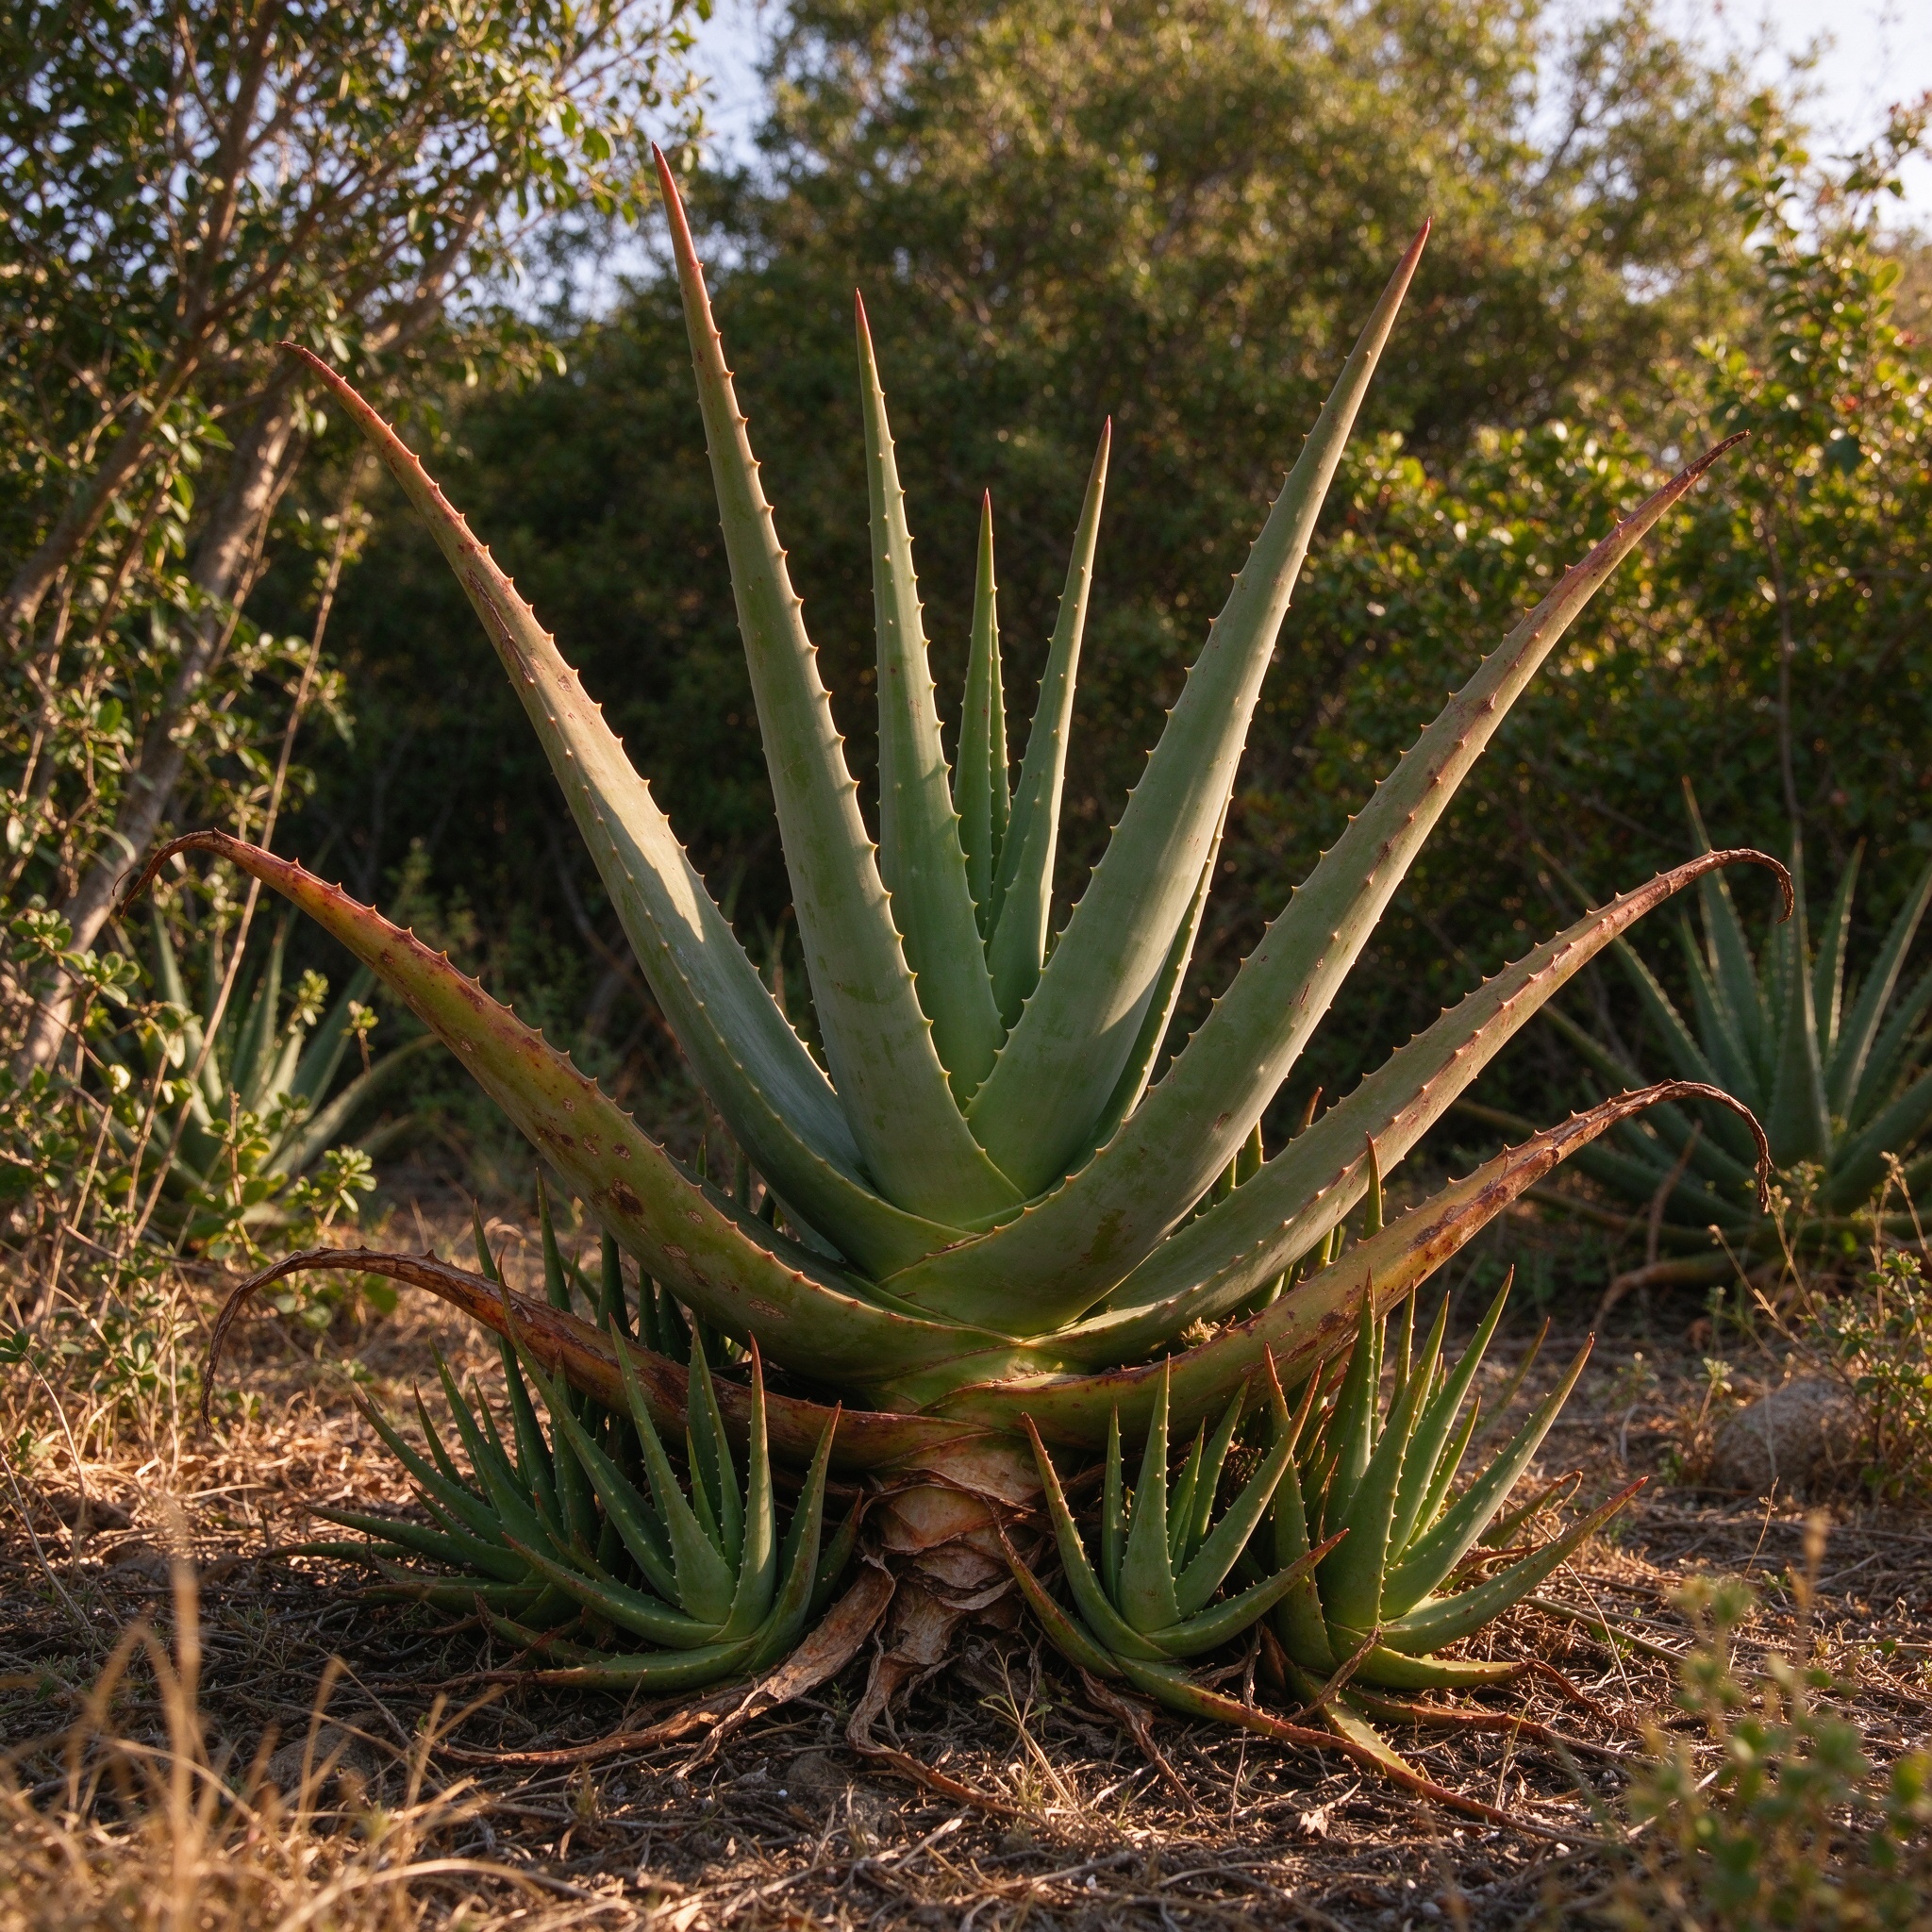
- •Aloe vera is an evergreen, stemless or short-stemmed succulent in the Asphodelaceae family, native to the Arabian Peninsula and now grown worldwide as a houseplant and outdoor perennial in frost-free regions.
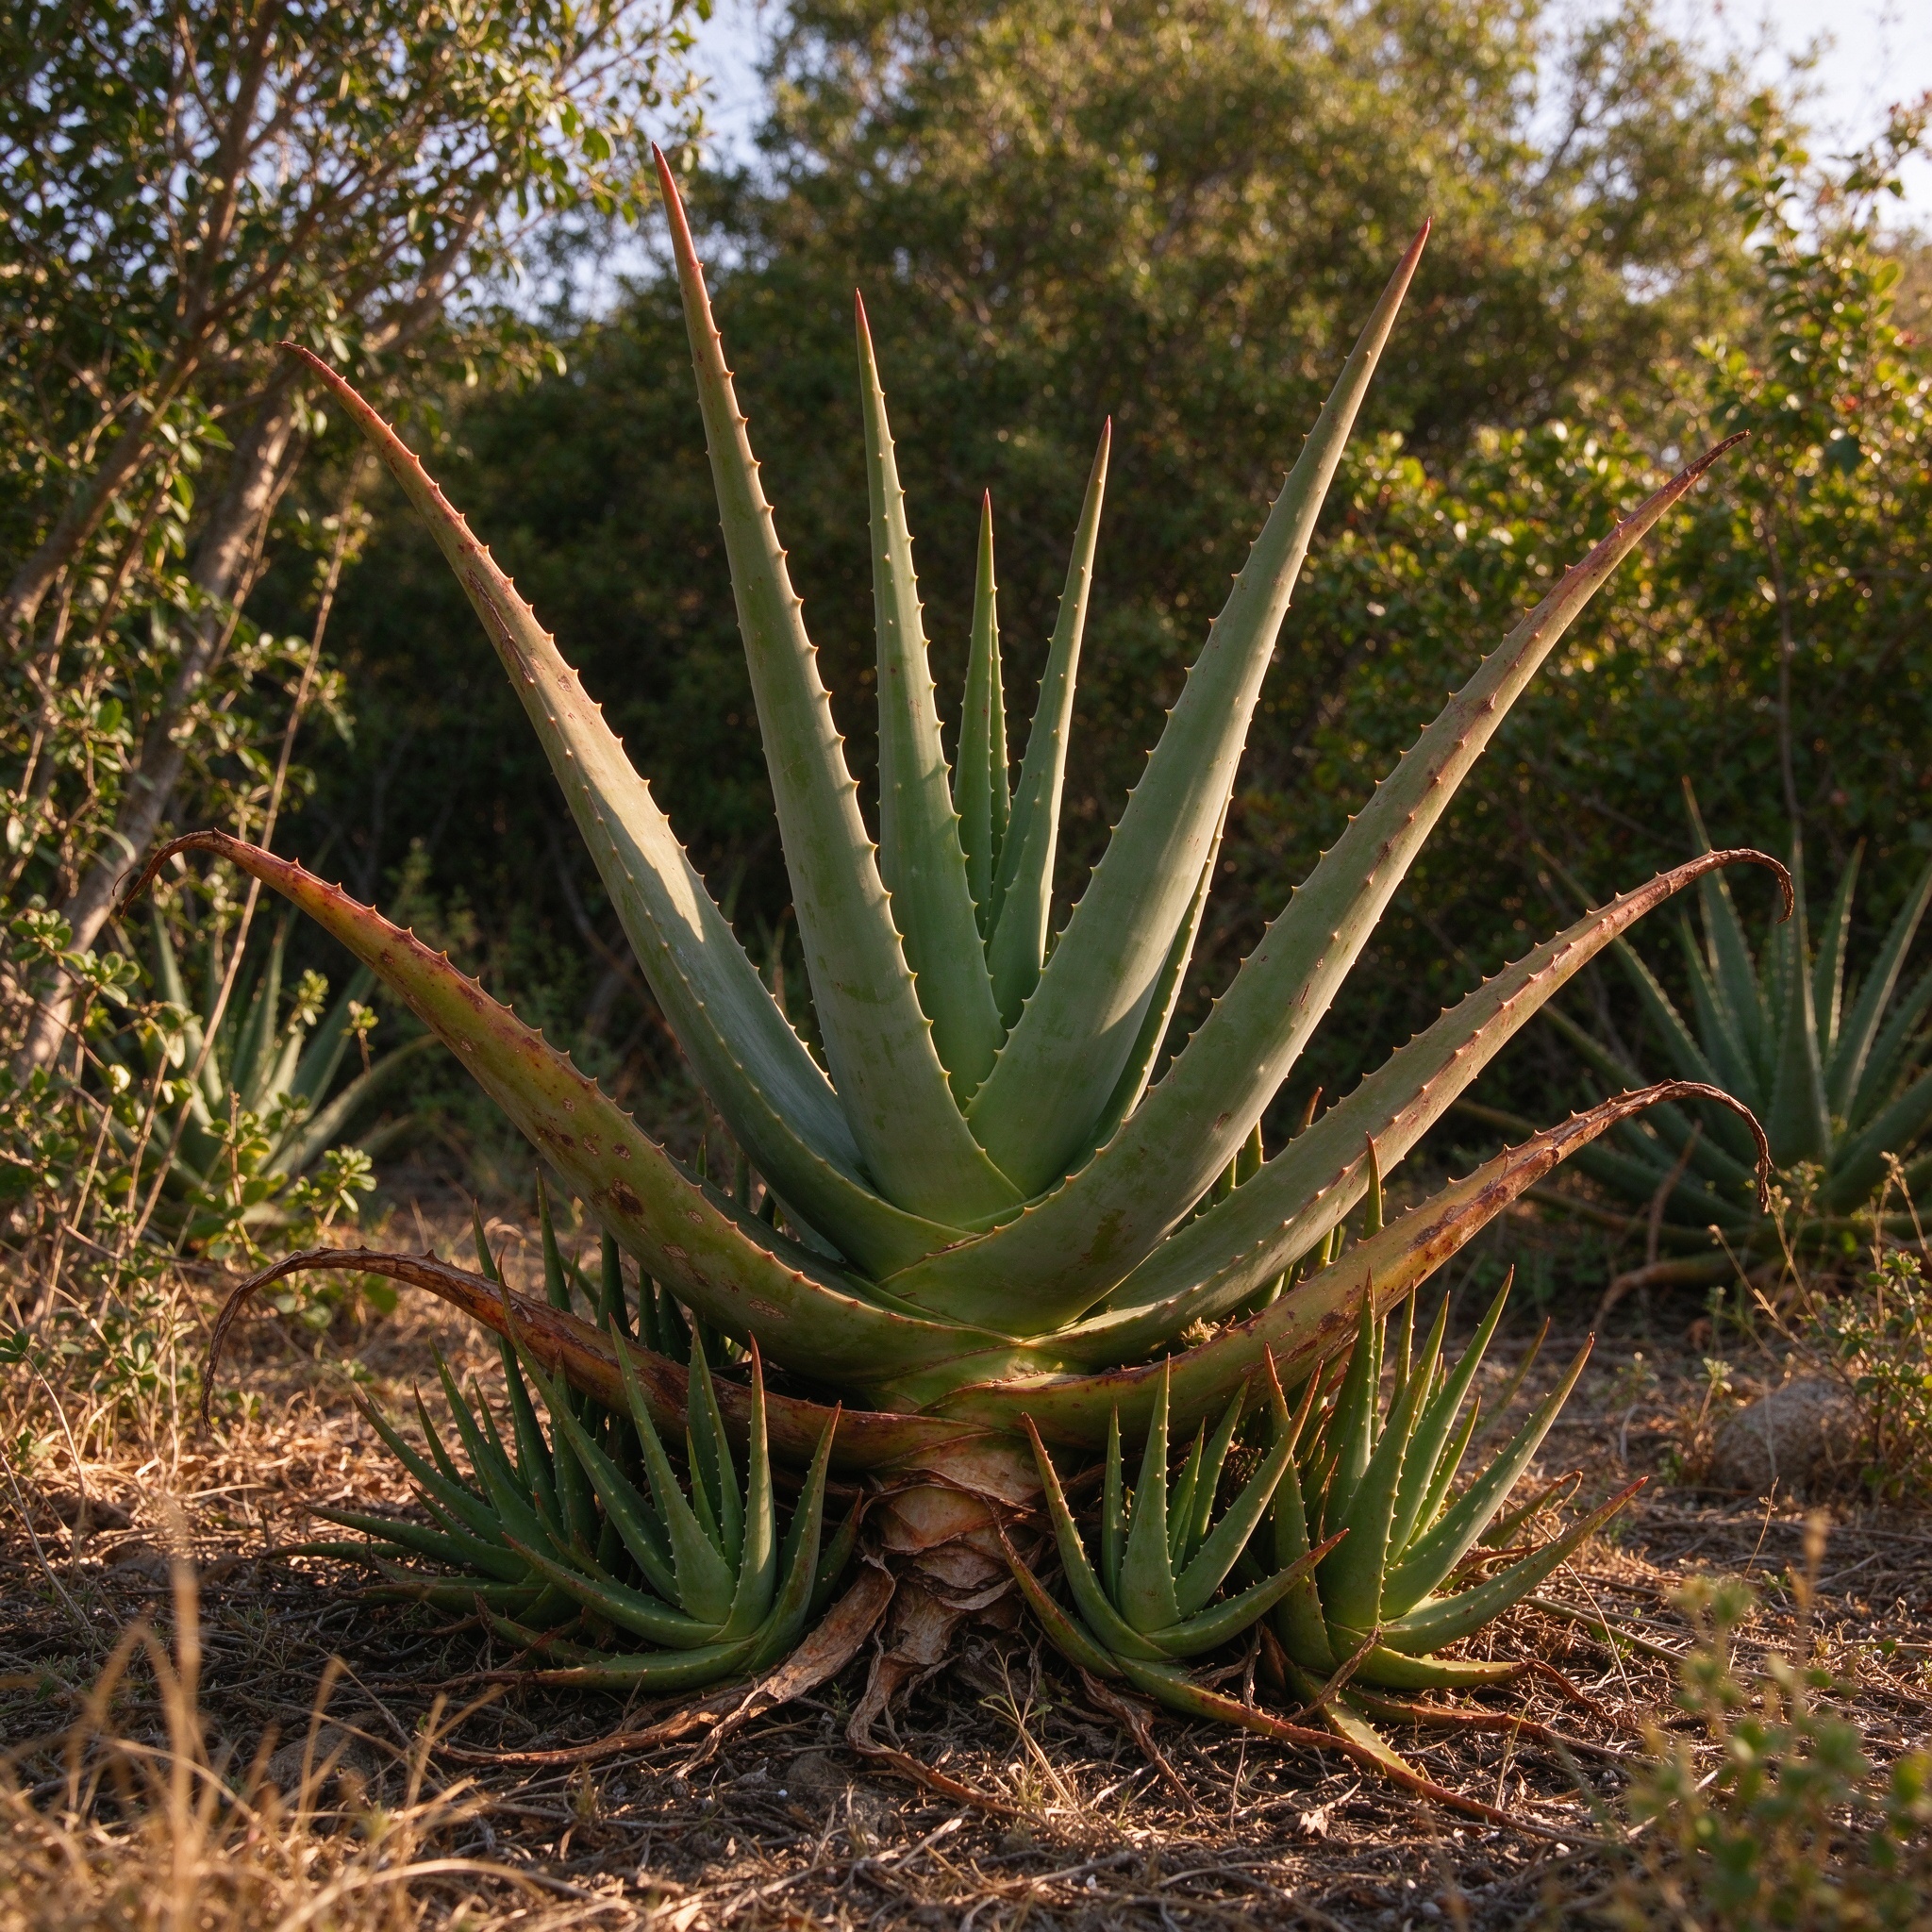
- •Its thick, lance-shaped, gray-green leaves grow in a basal rosette edged with small pale teeth, and mature plants send up slender spikes of tubular yellow-orange flowers.
- •The clear gel inside each leaf has been used for centuries on cuts, burns, and skin irritation, which is why aloe is often called the medicine plant.
📋 Quick Facts
Scientific Name: Aloe vera
Family: Asphodelaceae
Category: Succulent
USDA Zones: 9-11
Light:
- •Aloe wants full sun to partial shade: at least six hours of bright light a day indoors near a south- or west-facing window, and outdoors four to six hours of direct sun with light afternoon shade in the hottest climates.
- •Too little light makes leaves stretch and weaken; too much scorching summer sun can bleach or yellow the foliage.
Water:
- •Water deeply but infrequently: soak the pot thoroughly, let all excess water drain away, and wait until the soil is completely dry before watering again.
- •In summer this usually means about once every two weeks; in winter, when growth slows, once a month is often enough.
- •Overwatering — especially soggy soil in a pot without drainage — is the single most common cause of death.
Temperature:
- •Aloe is hardy outdoors only in USDA zones 10 through 12, where winter lows stay above about 32°F (0°C).
- •It prefers room temperatures between 55°F and 80°F (13–27°C) indoors.
- •Any frost will blacken and collapse the leaves, so container-grown plants in cold climates must come inside before the first freeze.
Soil:
- •Use a fast-draining, slightly sandy succulent or cactus mix.
- •A reliable homemade blend is two parts standard potting soil, one part perlite or pumice, and one part coarse horticultural sand or grit.
- •Soil pH can be neutral to slightly acidic; rich, water-retentive potting loam is a poor choice because it stays wet around the roots.
Harvest:
- •Harvest a mature outer leaf any time of year by slicing it cleanly at the base with a sharp knife; the gel can be used immediately, refrigerated for about a week, or frozen in ice-cube trays for up to six months.
- •Wait until the plant is at least three years old before regular harvesting so the rosette stays vigorous.
Common Problems:
- •The dominant problem is overwatering leading to root and leaf rot, which shows up as brown, mushy leaves or sudden collapse.
- •Pests include mealybugs, aphids, and scale; diseases include leaf spot, aloe rust, and sooty mold.
- •Leaf yellowing can also mean too much direct sun, while drooping can mean either too little water or insufficient light.
⚠️ Pet Safety Warning
This plant is toxic to both cats and dogs.
Contains saponins, toxic to cats and dogs. Causes vomiting, depression, diarrhea.📅 When to Plant
- •Spring through early summer is the best window to buy, repot, or divide aloe, because the plant is entering its active growth phase and recovers fastest from root disturbance.
- •Fall is the second acceptable window in warm climates.
- •Aloe is grown from offsets or division, not from seed; there is no frost-sowing concept, and in cold-winter regions it must stay potted so it can be moved indoors before temperatures approach freezing.
🌱 Growing Stages
 1
Acclimation after purchase or repotting
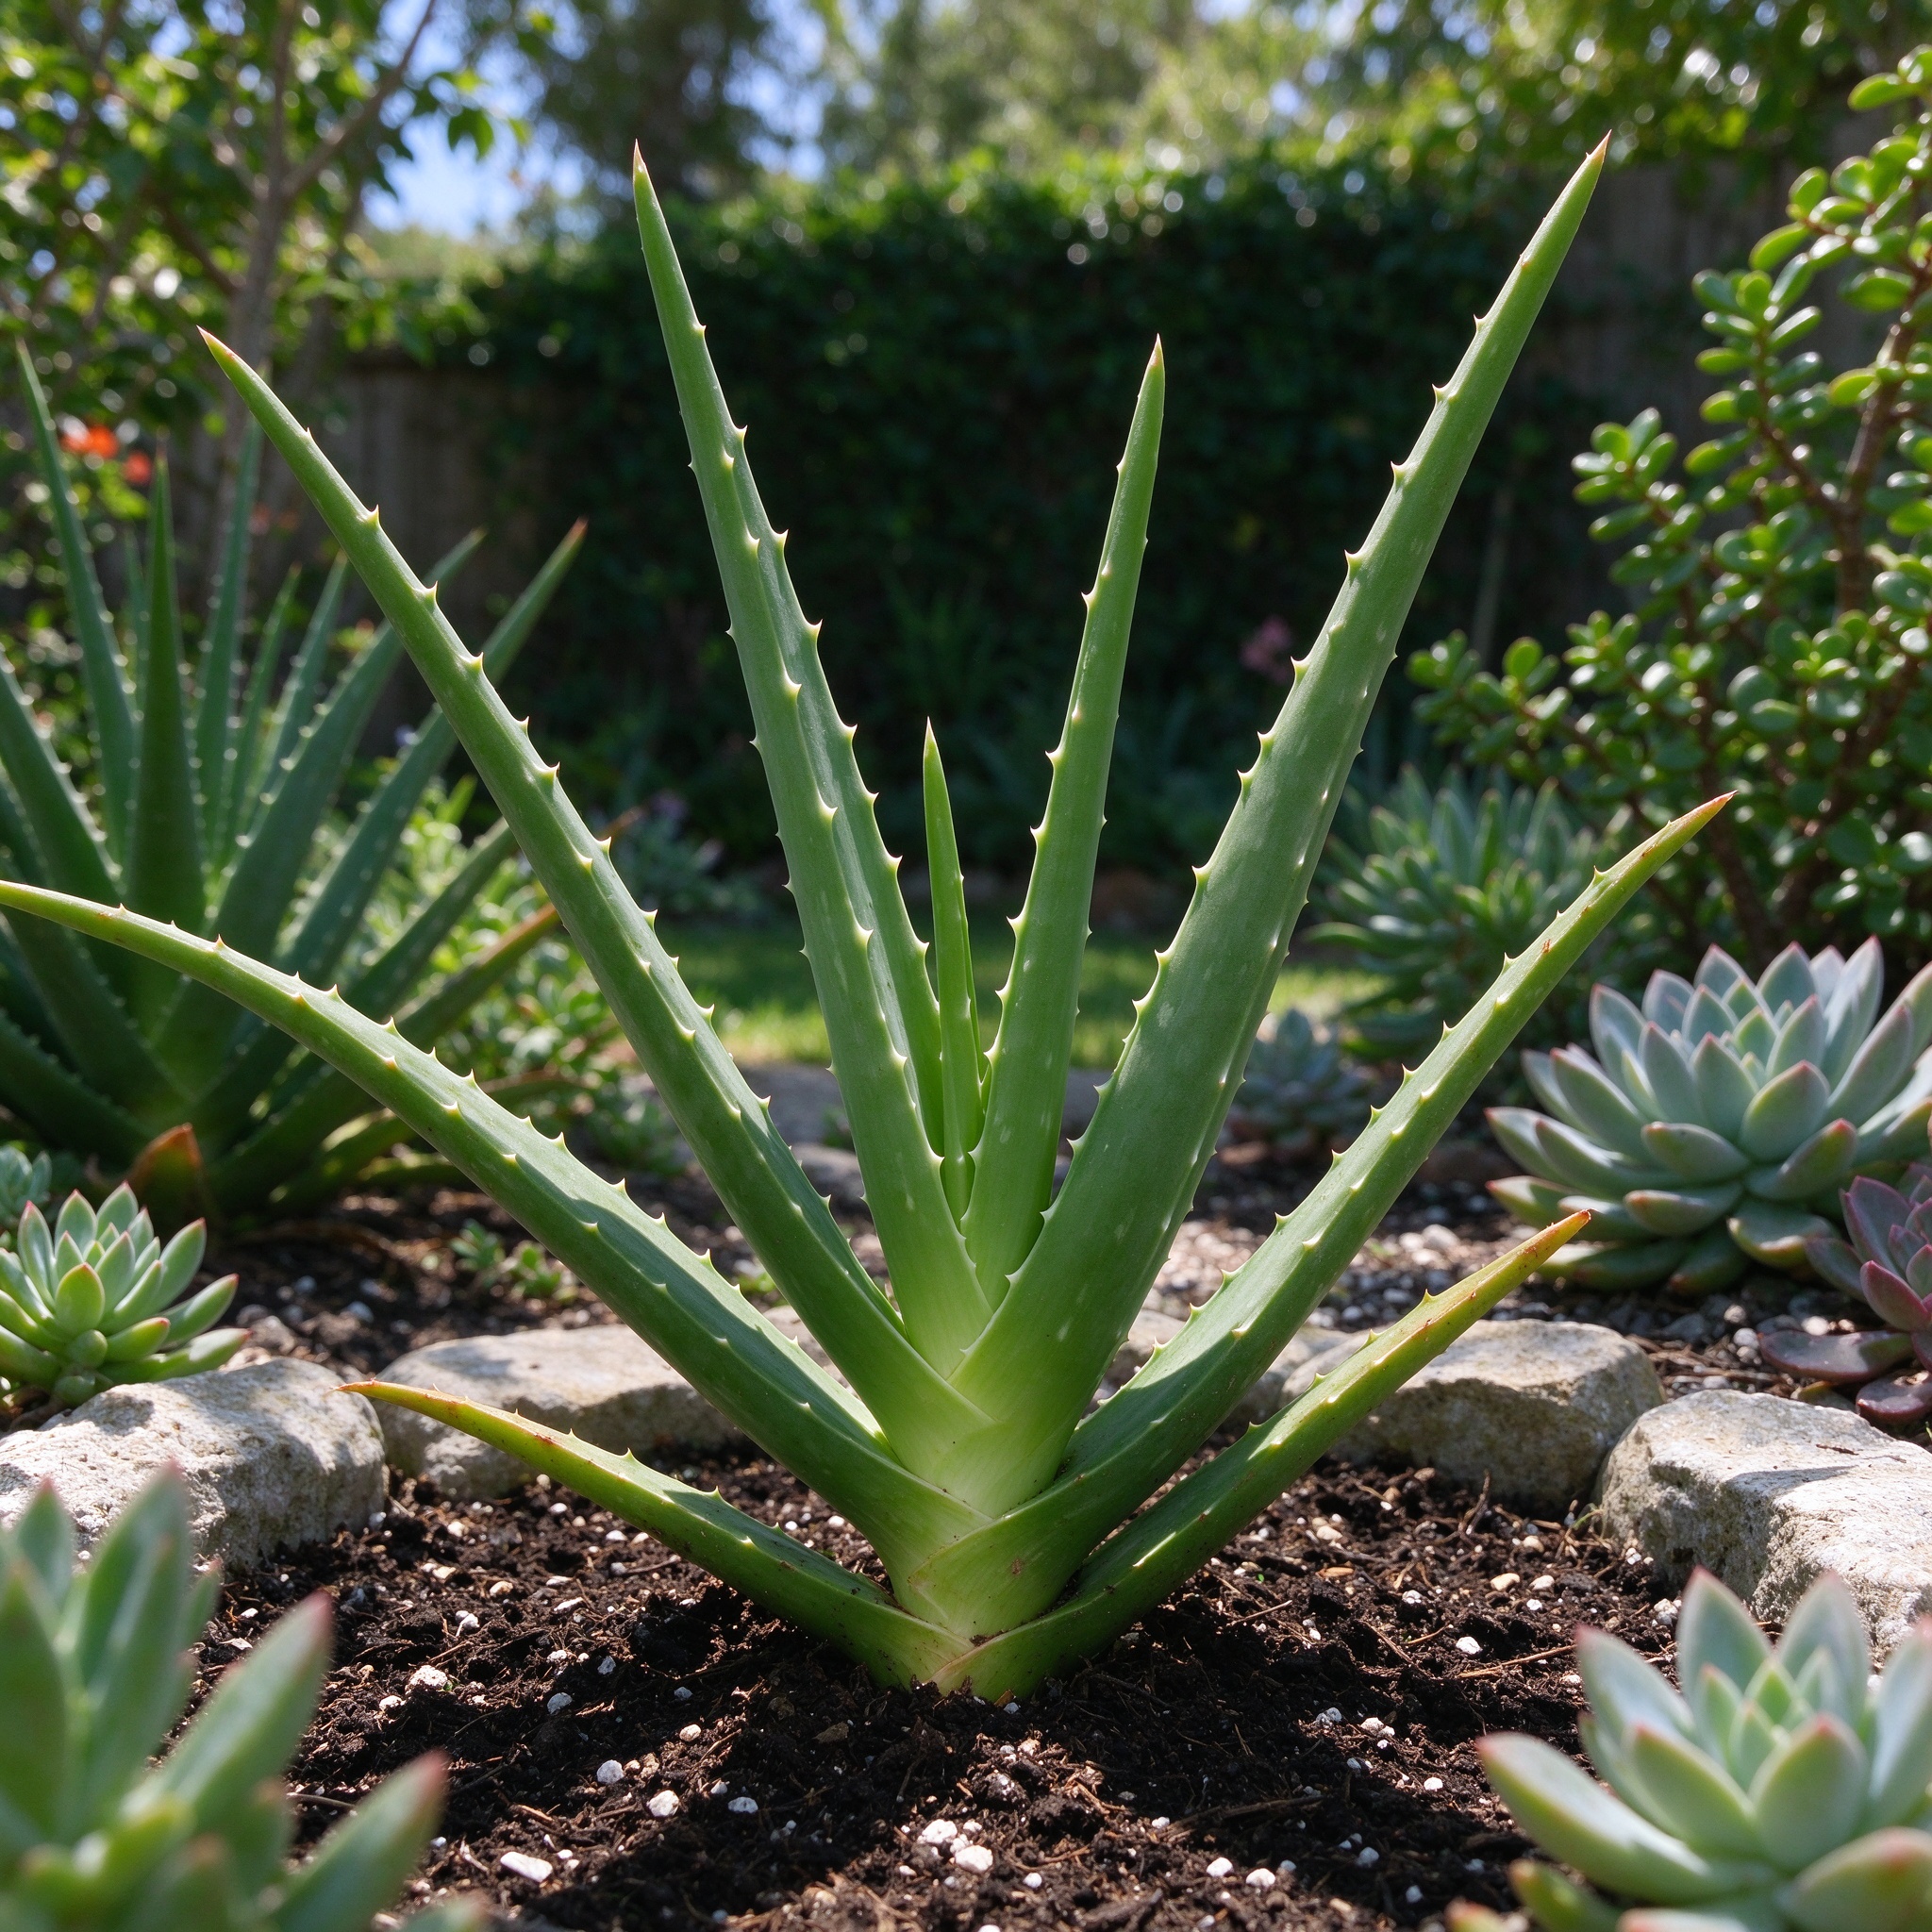
(First 2–4 weeks)- •A newly bought or repotted aloe is recovering from root disturbance and should not be watered heavily.
- •Give it one settling drink, then let the soil dry, and place it in bright indirect light rather than blazing full sun.
- •Leaves may look a little softer for a couple of weeks; this is normal while new roots grow into the fresh mix.
 2
Active rosette growth
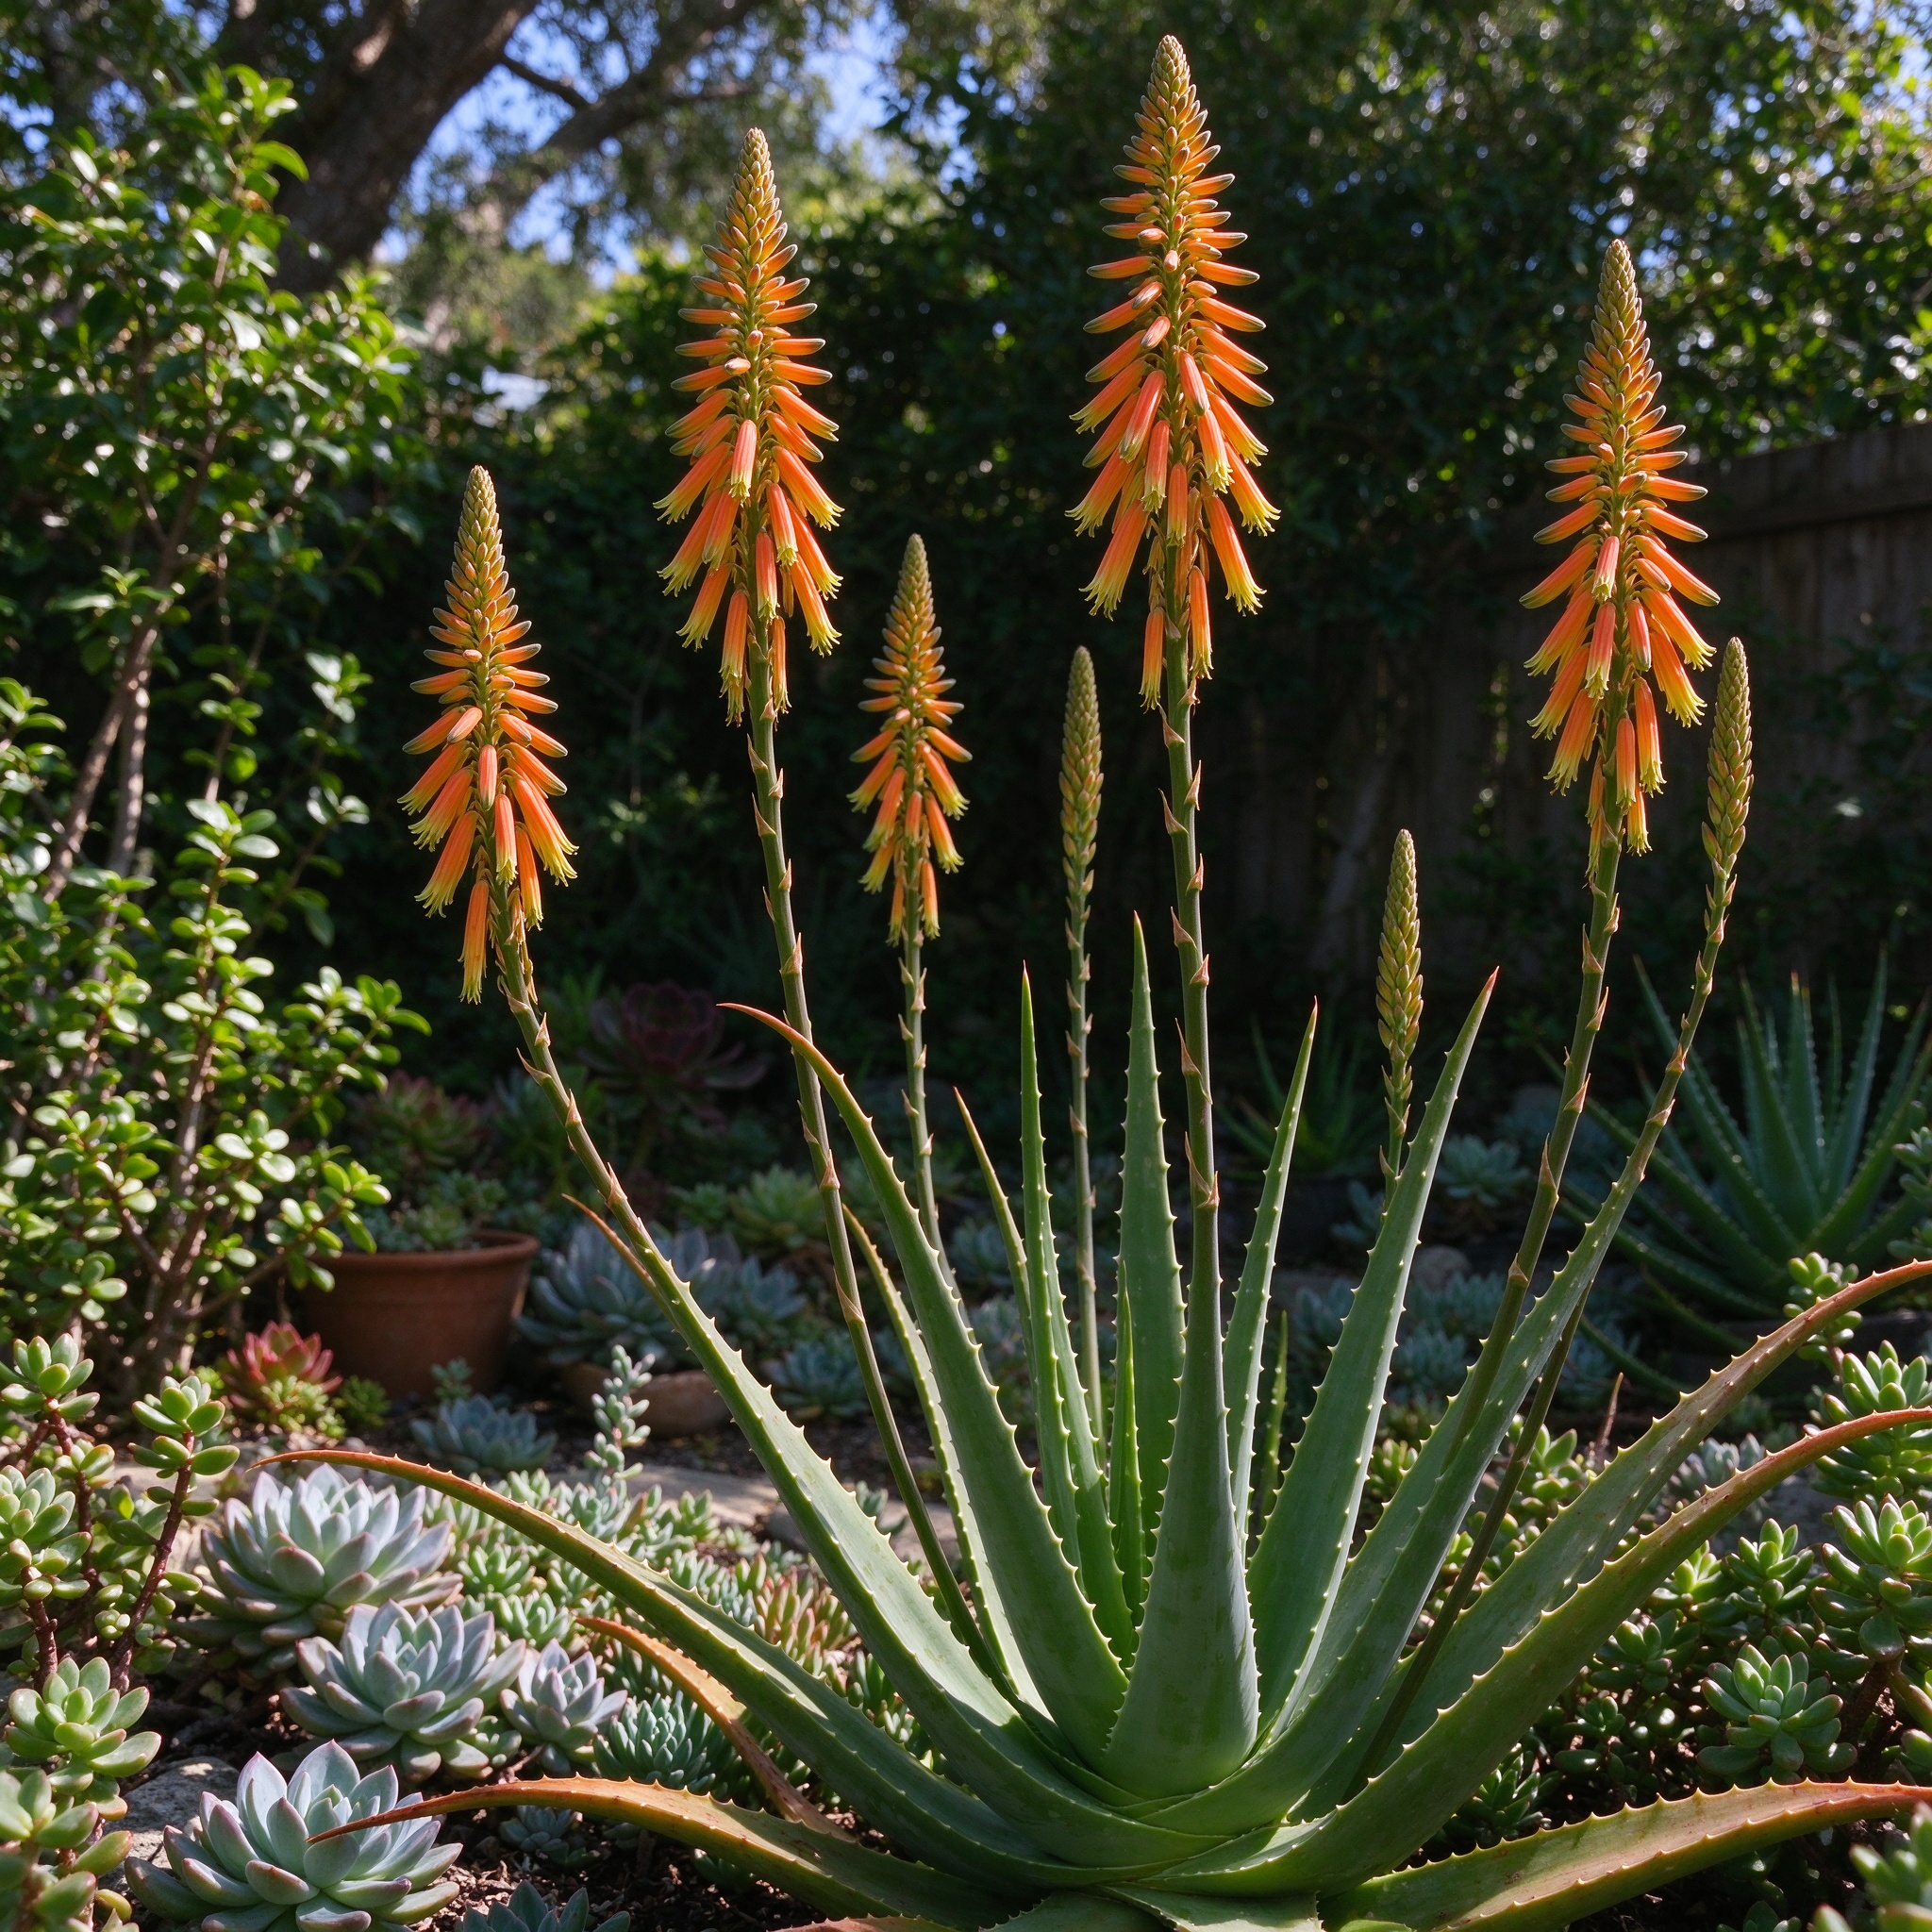
(Spring through summer, roughly March–September)- •During the warm, bright months the aloe produces new fleshy leaves from the center of the rosette and often sends out small offsets around the base.
- •This is the time for normal dry-and-soak watering, one light feeding in spring, and the harvest of mature outer leaves.
- •Growth slows dramatically if light falls below six hours a day.
 3
Winter rest
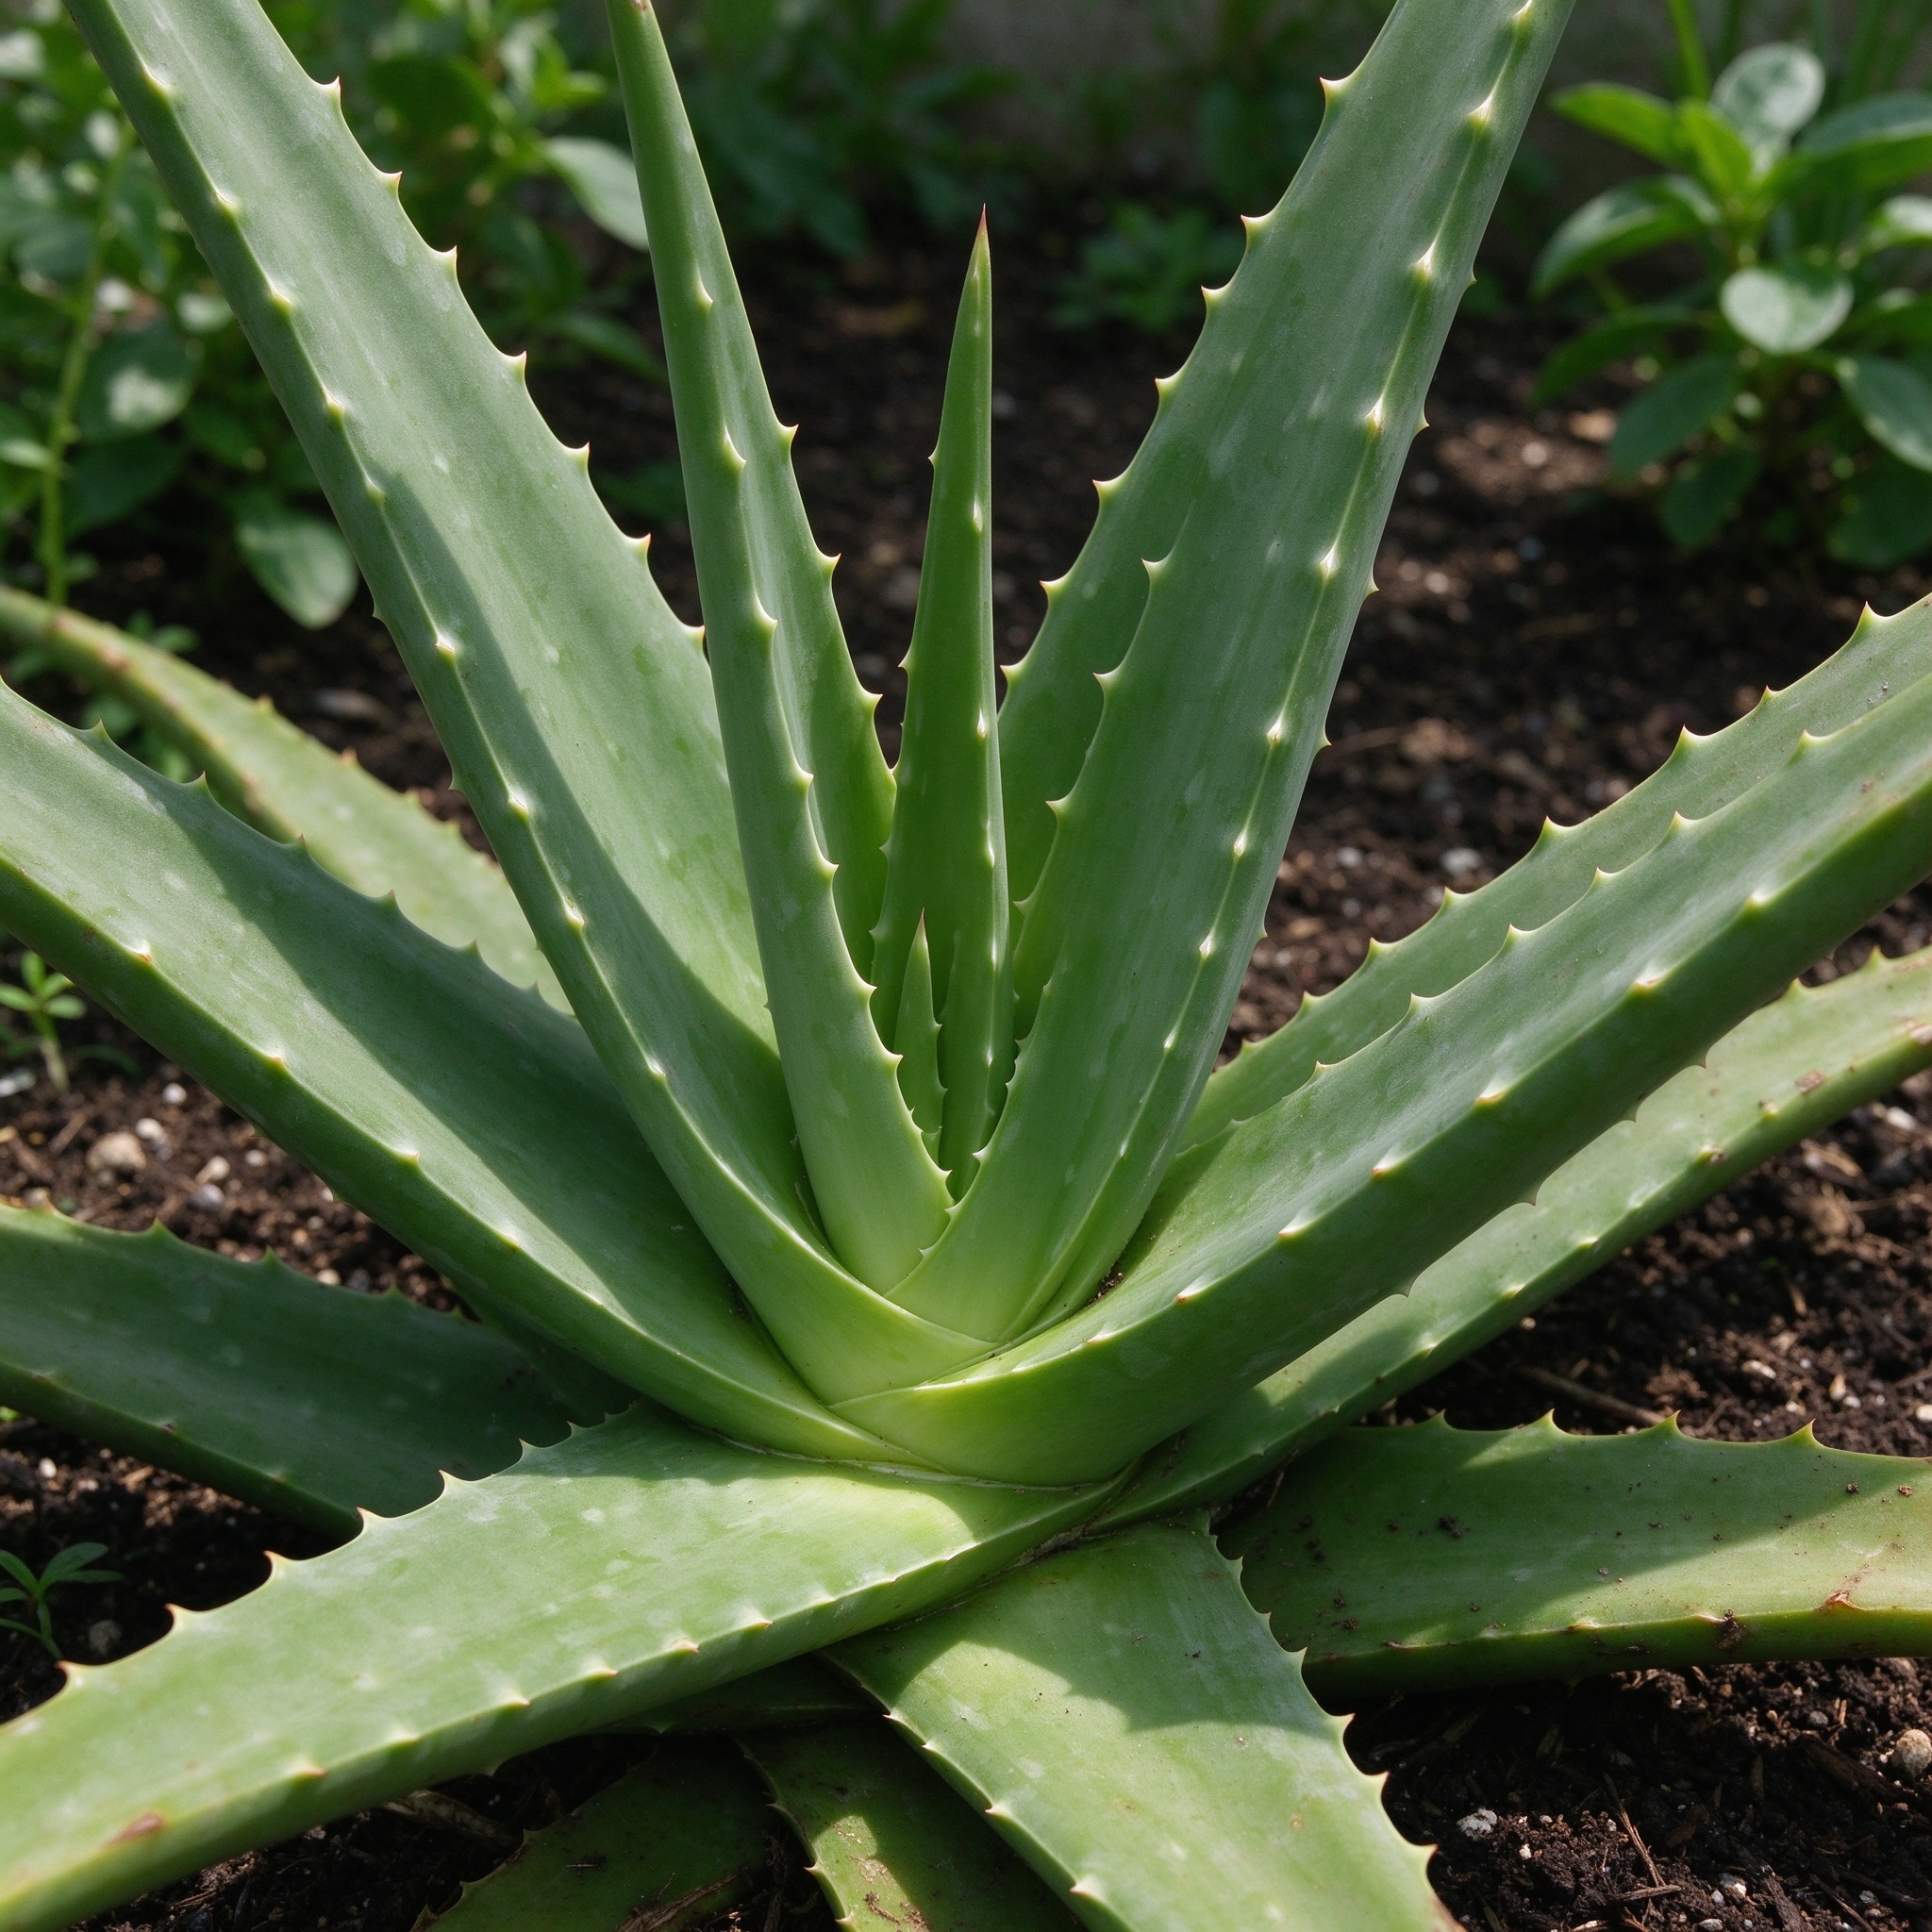
(Roughly October through February)- •Short days and cooler nights put the aloe into a slow rest.
- •Water only enough to keep the leaves from shriveling — about once a month — stop fertilizing entirely, and keep the plant above 55°F (13°C).
- •It is also the season when overwatering damage shows up, so err on the dry side and move the pot away from cold window glass.
 4
Flowering and offset propagation
(Spring, once the plant is at least 3 years old)- •Mature rosettes send up slender spikes of tubular yellow-orange flowers that attract bees and hummingbirds.
- •After flowering the mother plant continues producing offsets, which is the easiest way to propagate: twist or cut a pup with a bit of stem, let it callus for a few days, and pot it in dry gritty mix, watering lightly only after roots form.
💧 Detailed Care Guide
☀️ Light Requirements
- •Aloe wants full sun to partial shade: at least six hours of bright light a day indoors near a south- or west-facing window, and outdoors four to six hours of direct sun with light afternoon shade in the hottest climates.
- •Too little light makes leaves stretch and weaken; too much scorching summer sun can bleach or yellow the foliage.
💧 Watering
- •Water deeply but infrequently: soak the pot thoroughly, let all excess water drain away, and wait until the soil is completely dry before watering again.
- •In summer this usually means about once every two weeks; in winter, when growth slows, once a month is often enough.
- •Overwatering — especially soggy soil in a pot without drainage — is the single most common cause of death.
🌡️ Temperature
- •Aloe is hardy outdoors only in USDA zones 10 through 12, where winter lows stay above about 32°F (0°C).
- •It prefers room temperatures between 55°F and 80°F (13–27°C) indoors.
- •Any frost will blacken and collapse the leaves, so container-grown plants in cold climates must come inside before the first freeze.
🌱 Soil & Fertilizer
Soil:
- •Use a fast-draining, slightly sandy succulent or cactus mix.
- •A reliable homemade blend is two parts standard potting soil, one part perlite or pumice, and one part coarse horticultural sand or grit.
- •Soil pH can be neutral to slightly acidic; rich, water-retentive potting loam is a poor choice because it stays wet around the roots.
Fertilizer:
- •Aloe is a light feeder.
- •Fertilize only once a year, in spring, with a balanced liquid houseplant food diluted to half strength; some growers skip fertilizer entirely and their plants thrive.
- •Never feed in fall or winter, and keep fertilizer off the leaves to avoid brown tip burn.
📝 Step-by-Step Planting Guide
- 1
Choose a pot with real drainage holes
- •Pick a pot only 1 to 2 inches wider than the plant's root ball — aloes dislike oversized pots that hold wet soil.
- •Terracotta is the classic choice because it breathes, dries the root zone faster than plastic, and is heavy enough to keep a top-heavy rosette from tipping.
- •Whatever material you choose, the bottom must have at least one genuine drainage hole; cachepots without holes should only be used as decorative sleeves, and you must pour out any water that collects after every watering.
- 2
Mix a fast-draining succulent soil
- •Use a commercial cactus and succulent potting mix, or make your own from two parts ordinary potting soil, one part perlite or pumice, and one part coarse horticultural sand or crushed granite.
- •The mix should feel gritty between your fingers and pour freely; if it clumps and stays dark for days after watering, it is too rich and too wet.
- •This open structure is the single best insurance against root rot, which kills far more aloes than drought ever will.
- 3
Plant at the same depth it was growing
- •Gently lift the aloe from its nursery pot, supporting the leaves so you do not snap them, and tease loose some of the old mix from the roots.
- •Set it in the new pot at exactly the same depth it grew before — never bury the lowest leaves — and fill around the roots with fresh mix, firming lightly with your fingertips.
- •If the plant has a bare, exposed stem, bury just enough to cover it so the rosette sits stable; do not mound soil up into the center of the leaves.
- 4
Water in, then switch to dry-and-soak
- •After planting, give the aloe one thorough soaking so water runs out the bottom, then let the pot dry out completely before you water again.
- •In summer this rhythm is roughly once every two weeks; in winter, when growth slows, stretch it to about once a month.
- •Always empty the saucer immediately so the roots are never sitting in standing water.
- •When in doubt, wait an extra day — aloes store water in their leaves and easily survive a missed watering.
- 5
Settle the plant into bright light
- •Put the freshly potted aloe in a bright spot with at least six hours of indirect or gentle direct sun; a south- or west-facing windowsill indoors is ideal.
- •If you are moving a houseplant outdoors for summer, acclimate it over 7 to 10 days — start with morning sun only and gradually increase exposure — otherwise the leaves will sunburn and turn pale.
- •Keep it away from cold drafts, air-conditioning vents, and heater vents, and bring it back indoors before any overnight temperature near freezing.
🌱 Recommended Varieties
Reliable, hard-to-kill starter aloes
- •Start with straight species Aloe vera 'Barbadensis Miller' — the classic medicinal aloe with broad, spotted gray-green leaves and the thickest gel.
- •Aloe vera 'China' (often sold as A. barbadensis var.
- •chinensis) is a compact, low-to-the-ground selection with narrower leaves that tolerates average home light.
- •Both forgive missed waterings and respond well to the dry-and-soak routine.
Small-tabletop and windowsill aloes
- •For small spaces try Aloe vera 'Minima', a tight rosette under eight inches wide that fits a 4-inch pot.
- •Aloe 'Pink Blush' carries pale horizontal stripes and a pink edge, while Aloe 'Dragon's Tooth' has stout, dark teeth along the leaf margins.
- •These compact forms stay tidy on a sunny kitchen window and are excellent for dish-garden combinations.
Showier species aloes for enthusiasts
- •Once you have the basics down, branch into related species: Aloe aristata (lace aloe) has white fringe and tiny teeth, Aloe maculata (soap aloe) bears spotted leaves and tall coral flowers, and Aloe polyphylla (spiral aloe) arranges its leaves in a dramatic geometric spiral.
- •All need the same gritty mix and bright light, but they demand perfect drainage and dry winter rest.
🪴 Growing in Containers
- Terracotta is the default choice:
- •Porous clay dries the root zone quickly, prevents the soggy soil that causes rot, and is heavy enough to keep a top-heavy rosette from tipping.
- •It is the material aloes have been grown in for centuries.
- Pick a pot only 1–2 inches wider than the root ball:
- •Aloes have modest roots.
- •An oversized pot holds extra wet soil that the plant cannot use, which is a classic setup for root rot.
- •Young plants do fine in 4- to 6-inch pots and only need to move up when roots fill the pot.
- Every container must have a drainage hole:
- •A hole in the bottom is non-negotiable.
- •Decorative cachepots without holes can be used only as sleeves; always take the inner nursery pot out to water, drain it fully, and set it back inside, never letting water pool in the outer pot.
- Use a cactus mix, not rich potting loam:
- •Commercial succulent and cactus mixes are formulated to drain quickly.
- •If you blend your own, lean toward extra perlite, pumice, or coarse sand; water-retentive mixes designed for foliage houseplants will keep aloe roots too wet.
- Moveable pots for cold climates:
- •Gardeners outside zones 10–12 should grow aloe in a light, sturdy pot rather than planting it in the ground.
- •That way it can summer on a patio and come indoors before frost. Add a pebble tray under the pot indoors to raise humidity without wetting the soil.
✂️ Pruning & Maintenance
- ✓
Harvest outer leaves as needed
- •Cut a mature outer leaf cleanly at the base with a sharp knife whenever you need gel.
- •Always take from the outside of the rosette; never strip the center, where new leaves are forming.
- ✓
Remove yellowed or damaged leaves
- •Any leaf that has turned brown, mushy, or badly spotted should be cut off at the base.
- •Leaving decaying foliage invites rot, fungus gnats, and disease spores into the crown.
- ✓
Trim flower stalks after bloom
- •Once the tubular flowers finish and the spike turns brown, cut it off at the base so the plant does not waste energy on seed.
- •A clean cut close to the rosette keeps the plant looking tidy.
- ✓
Thin offsets to keep the rosette uncluttered
- •When pups crowd the mother plant, twist or cut some of them away to use as new starts.
- •Leaving too many offsets in one small pot exhausts the soil and keeps the crown perpetually wet and crowded.
🐛 Pest & Disease Control
Common Pests
Mealybugs
Symptoms: Tiny, cottony white masses gather in the leaf axils and on the undersides of leaves; leaves may yellow and lose plumpness, and sticky honeydew can coat nearby growth.Control:- •Dab visible clusters with a cotton swab dipped in 70% isopropyl alcohol, then wipe the leaf axils with a damp cloth.
- •For heavy infestations spray the whole plant with insecticidal soap or neem oil, and isolate the aloe from other houseplants until the pests are gone.
- •Check the drainage hole and pot rim, where mealybugs often hide.
Aphids
Symptoms: Clusters of soft green, brown, or black insects cling to new growth and the flower stalk, distorting leaves and leaving shiny honeydew that can grow sooty mold.Control:- •Spray the aphids off with a strong stream of lukewarm water, repeating every few days.
- •If that is not enough, apply insecticidal soap or neem oil to both leaf surfaces.
- •Because aloe is often used for skin care, always wait at least a week after any spray before harvesting a leaf, and wash the leaf thoroughly before use.
Scale insects
Symptoms: Small, flat brown or tan bumps attach to leaves and stems, often in rows along the midrib; the plant weakens, turns yellow, and may be dusted with honeydew or sooty mold.Control:- •Scrape off adult scales with a fingernail or a plastic knife, then wipe the leaves with a diluted alcohol-and-water cloth.
- •Treat the whole plant with horticultural oil or neem to kill the tiny crawlers that follow.
- •Repeat every two weeks for several cycles, because eggs under the shells hatch over time.
Spider mites
Symptoms: Fine pale speckles stipple the leaf surface, and in dry, warm rooms you may see delicate webbing between leaves; the foliage takes on a dull, bronzed, dusty look.Control:- •Rinse the leaves with lukewarm water to knock off mites and webbing, then raise humidity around the plant by grouping it with other houseplants or setting the pot on a pebble tray.
- •Treat persistent outbreaks with insecticidal soap or neem, and avoid moving the aloe into hot, dry direct sun where mites thrive.
Common Diseases
Root and stem rot (Phytophthora / Pythium)
Symptoms: Lower leaves turn brown, mushy, and translucent; the base of the stem softens and may smell; pulling a leaf reveals brown, squishy roots instead of firm pale ones.Control:- •Stop watering immediately and tip the pot on its side to drain.
- •If the rot has not reached the crown, repot the plant in completely dry, fresh cactus mix and wait a week before watering.
- •If the crown is soft, cut off healthy top rosettes, let them callus for a few days, and root them in dry gritty mix.
Leaf spot (fungal / bacterial)
Symptoms: Round, brown or tan lesions with yellow halos appear on leaf surfaces, often starting where water has sat overnight or where a leaf was bruised.Control:- •Cut out spotted leaves at the base with a clean knife and improve air circulation around the rosette.
- •Water the soil, not the leaves, and avoid wetting foliage in the evening.
- •Severe cases can be treated with a copper-based fungicide labeled for houseplants, but improving watering habits is the real cure.
Aloe rust
Symptoms: Reddish-brown, raised pustules break through the leaf surface, especially on older leaves; the marks are permanent and spread slowly in warm, humid conditions.Control:- •Remove heavily affected leaves and keep foliage dry by watering only at the soil line.
- •Increase space between plants and lower humidity by improving ventilation.
- •Fungicides are only partially effective; the key is to reduce leaf wetness and avoid splashing soil onto leaves.
Sooty mold
Symptoms:- •A black, powdery film coats the leaf surface.
- •It does not directly infect the leaf but blocks light and looks unsightly; it is almost always a side effect of aphid or scale honeydew.
Control:- •Wipe leaves with a damp, soft cloth or a diluted mild soap solution.
- •The real fix is to control the underlying sap-sucking insects — mealybugs, aphids, or scale — because sooty mold returns whenever honeydew does.
- •Once the insects are gone, new leaves grow clean.
Anthracnose leaf blight
Symptoms: Sunken, orange-tan lesions spread along the leaf margins, often with tiny black fungal dots in the center; affected leaves yellow and collapse from the tip backward.Control:- •Trim and destroy infected leaves, and let the soil dry out between waterings.
- •Avoid wetting the crown when you water, and make sure the pot has good air movement.
- •In persistent cases apply a copper fungicide, but the most important step is moving the plant out of constantly damp, shaded conditions.
🍅 When to Harvest
- •Harvest a mature outer leaf any time of year by slicing it cleanly at the base with a sharp knife; the gel can be used immediately, refrigerated for about a week, or frozen in ice-cube trays for up to six months.
- •Wait until the plant is at least three years old before regular harvesting so the rosette stays vigorous.
❓ Frequently Asked Questions
- 1
Is aloe vera safe to grow around cats and dogs?
- •No.
- •Aloe vera is listed as toxic to cats, dogs, and horses by ASPCA-style references because of anthraquinone glycosides in the latex just under the skin; ingestion can cause vomiting, diarrhea, lethargy, and red urine.
- •Keep the pot on a high shelf or a closed sunny windowsill out of pet reach, and if you suspect your pet has chewed a leaf, contact a veterinarian promptly.
- •The gel inside a healthy leaf is used on human skin, but that does not make the plant safe for animals.
- 2
How often should I water my aloe vera?
- •Water thoroughly, then wait until the soil is completely dry before watering again.
- •In a typical heated home in summer this works out to roughly every two weeks; in winter, when light is weak and growth slows, you may only need to water once a month.
- •Always check with your finger an inch into the soil — if it feels even slightly cool or damp, wait.
- •Overwatering, not underwatering, kills most aloes, and any pot must drain freely with no standing water in the saucer.
- 3
Why are my aloe leaves turning brown and mushy?
- •Brown, mushy, translucent leaves are almost always the sign of overwatering and early root rot.
- •The soil has stayed wet too long, usually because the pot lacks a drainage hole, the mix is too rich, or you watered before the soil dried out.
- •Tip the pot aside, let the soil dry out completely, and if the base of the stem is soft, cut off the healthy top, let it callus for a few days, and re-root it in dry gritty cactus mix.
- 4
How do I harvest and use aloe gel?
- •Pick a mature outer leaf — never take the small new center leaves — and slice it cleanly at the base with a sharp knife.
- •Stand the cut end up for a moment so the bitter yellow latex drains away, then peel or slice off the green skin and use the clear inner gel directly on skin.
- •Store leftover gel in a sealed container in the refrigerator for about a week, or freeze it in ice-cube trays for up to six months.
- •Always test a small patch of skin before using the gel on sensitive areas.
- 5
Why is my aloe not flowering?
- •Aloe vera flowers only on mature plants — typically at least three years old — and even then mainly when it gets enough light.
- •A sunroom, a bright south window, or a summer spent outdoors in filtered sun is the usual trigger.
- •If your plant is young or grown in a dim corner, it will focus on leaf growth and may not bloom for several more years.
- •Once mature, established rosettes send up slender spikes of tubular yellow-orange flowers in spring.
- 6
Can I leave my aloe vera outside in winter?
- •Only if you garden in USDA zones 10 to 12, where winter lows stay above freezing.
- •Any frost will blacken and collapse the fleshy leaves, and the damage cannot be reversed.
- •In every colder climate aloe is best grown in a pot so you can bring it indoors before the first freeze and place it in a bright, cool room.
- •If you put it outside for summer, acclimate it gradually to direct sun and move it back inside well before nighttime temperatures approach 50°F (10°C).
- 7
Why are my aloe leaves turning red or pink at the tips?
- •A red or pink flush on aloe leaves is usually a stress response rather than a nutrient deficiency.
- •The most common trigger is sudden strong sun: moving a plant from a shaded spot onto a hot south windowsill bleaches and reddens the foliage as a sunburn reaction.
- •Drought stress and, less often, root stress from overwatering can also redden the leaves.
- •Move it a couple of feet back from the hottest glass, acclimate it to brighter light over a couple of weeks, and check the soil: if it has been bone dry, soak it; if it is soggy, the roots need fresh, dry mix.
- •A soft natural blush on a healthy, firm plant in bright light is harmless, but brown crispy tissue means actual sunburn.
- 8
Why is my aloe vera growing tall and skinny?
- •Stretched, skinny growth with wide gaps between leaves and pale green color means the aloe is reaching for light.
- •Aloe vera wants at least six hours of bright light a day near a south or west window; in a dim room it etiolates, leaves grow narrow and weak, and the rosette loses its compact shape.
- •Move it to the brightest window you have and rotate the pot monthly so all sides receive light.
- •If the stem has already stretched badly, cut the healthy top rosette with a clean knife, let the cut callus over for a few days, and root it in dry succulent mix; the remaining base will send up new pups.
- 9
Why are my aloe leaves soft and wrinkly?
- •The two symptoms read in opposite ways.
- •Wrinkled, shriveled leaves that feel firm rather than soft mean the plant is thirsty: aloes store water in their leaves, and when the soil stays dry too long the foliage puckers.
- •Give a deep soak and the leaves plump back within a few days.
- •Leaves that are soft, mushy, translucent, or brown at the base mean the opposite: overwatering and root rot.
- •In that case stop watering, unpot, trim brown and mushy roots, and repot in a fast-draining cactus mix in a pot with drainage.
- •When in doubt, squeeze a leaf: firm and wrinkled = thirsty; soft and squishy = overwatered.
Source:
NC State Extension Gardener Plant Toolbox — https://plants.ces.ncsu.edu/images/plants/aloe-vera/
NC State Extension Gardener Plant Toolbox — https://plants.ces.ncsu.edu/images/plants/aloe-vera/
The Old Farmer's Almanac — https://www.almanac.com/plant/aloe-vera
The Old Farmer's Almanac — https://www.almanac.com/plant/aloe-vera
Photo credit: NC State Extension
Images courtesy of NC State Extension under CC BY license. Thank you to the photographers who make these educational images available.
License: CC BY-NC 2.0 / CC BY 4.0