
How to Grow Black-eyed Susan: Complete Guide
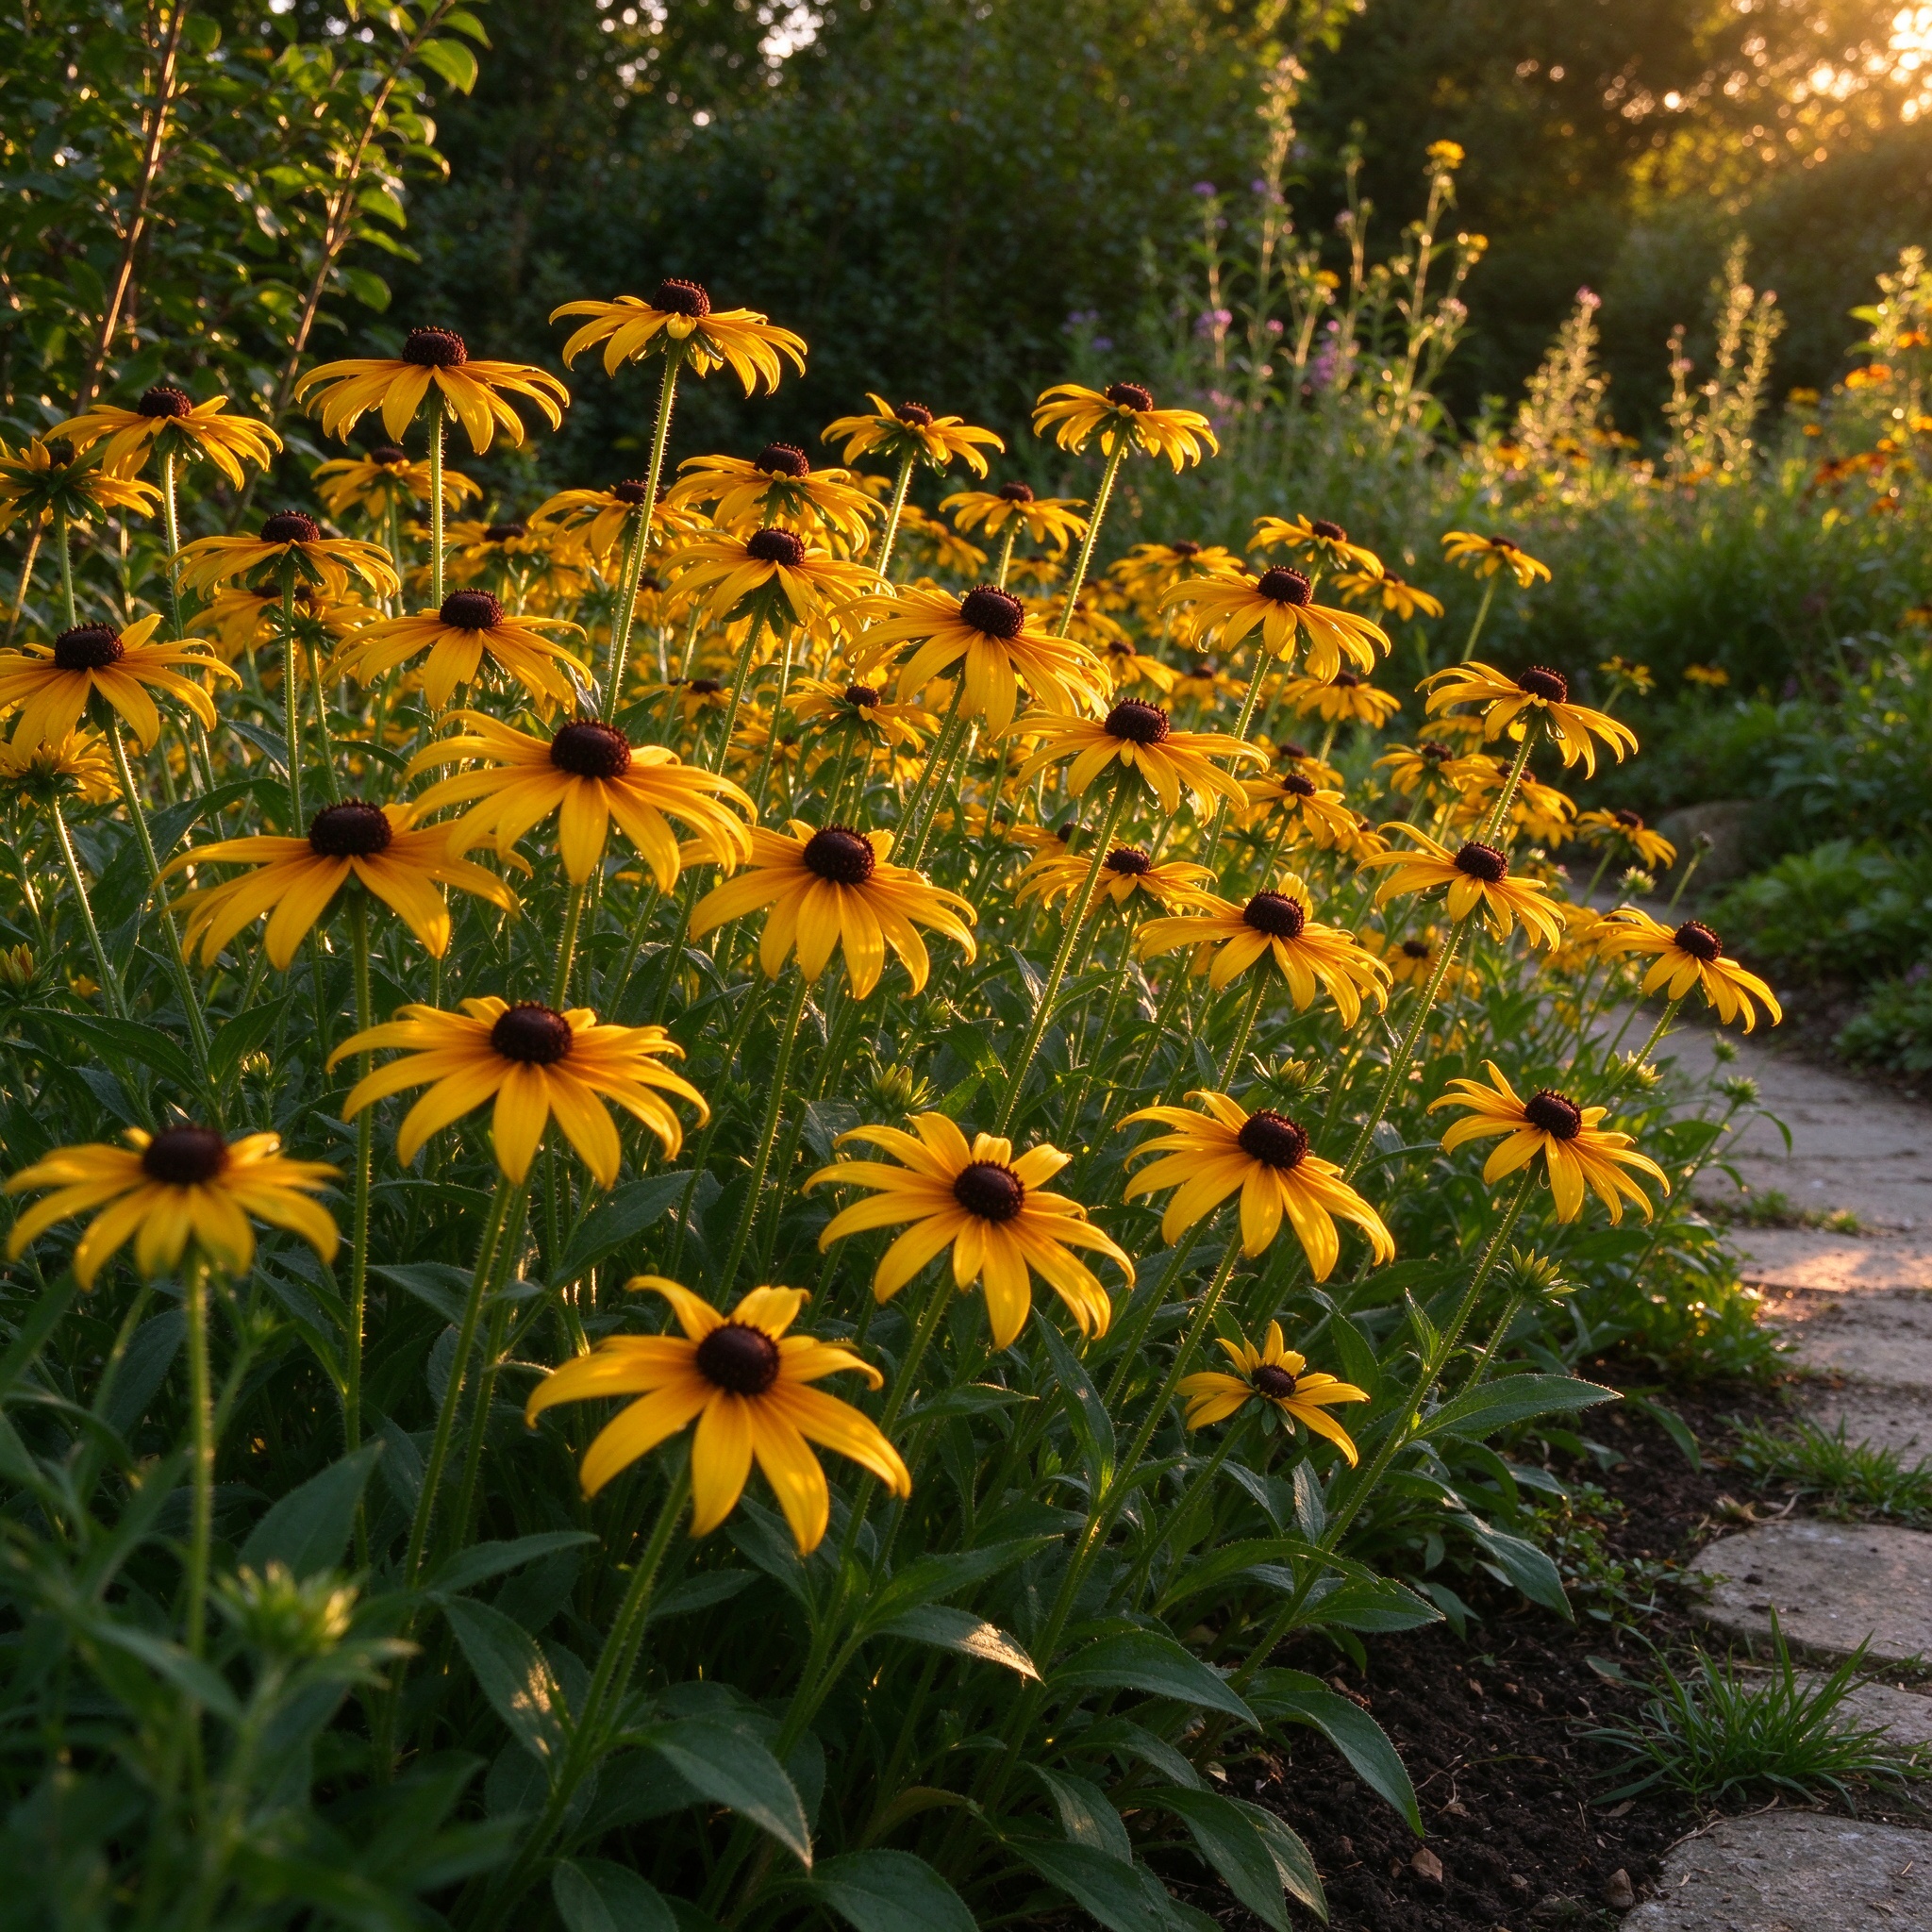
- •Black-eyed Susan is a fast-growing, upright, branching native wildflower in the aster family, native to the eastern United States and naturalized across much of North America.
- •Botanically it behaves as a biennial or short-lived perennial, but because spring-sown plants bloom in their first year it is most often grown and sold as an annual in home gardens.
- •Stems and leaves carry short, stiff hairs (the species name hirta means hairy), which give the plant its coarse texture and can irritate sensitive skin.
- •Plants reach 2 to 4 feet tall and 1 to 2 feet wide, producing daisy-like composite heads from midsummer through fall: a ring of bright golden-yellow to orange-yellow ray florets surrounding a domed, dark brown to purplish-black central cone, the dark 'eye' that gives the flower its name.
- •The blooms are highly valuable to pollinators, attracting bees, butterflies, and specialist native bees, while American goldfinches and other songbirds feed on the ripened seeds in fall and winter.
- •Black-eyed Susan is used in meadow and prairie plantings, pollinator and butterfly gardens, native borders, roadside restoration, and cut-flower arrangements, and it freely self-seeds so a single planting tends to renew itself year after year.
- •Related perennial Rudbeckia species such as R. fulgida (orange coneflower) are often grown alongside it in perennial borders.
📋 Quick Facts
Scientific Name: Rudbeckia hirta
Family: Asteraceae
Category: Flower
USDA Zones: Perennial in zones 3–8; grown as a reseeding annual elsewhere.
Light:
- •Black-eyed Susan flowers best in full sun, six or more hours of direct sunlight each day.
- •It tolerates partial shade, but stems in shade grow taller and floppier, need staking, and produce fewer, smaller flowers with open, sparse centers.
- •Full sun also dries morning dew from the hairy foliage and reduces the powdery mildew that appears on crowded, shaded plants.
- •In very hot southern gardens, light afternoon shade can extend flower life, but the plant still needs strong morning and midday sun to stand upright and bloom heavily.
Water:
- •Water new plants regularly until established, keeping the root zone evenly moist but not saturated.
- •Once rooted, black-eyed Susan is moderately drought tolerant and shrugs off short dry spells; give about 1 inch of water per week during prolonged heat or drought, soaking deeply at the base rather than sprinkling foliage.
- •Wet leaves in still air invite fungal disease, so water at soil level and maintain the 18-inch spacing for airflow.
- •Do not plant it in low spots that pool after rain; constant wetness around the crown encourages root rot.
- •A thin layer of organic mulch around the plants conserves moisture and suppresses weeds, kept away from the hairy stems.
Temperature:
- •Black-eyed Susan grows best between 65 and 85°F (18 to 29°C) and is a warm-season bloomer that thrives through summer heat.
- •Seed germinates at 70 to 75°F (21 to 24°C).
- •In the garden it is hardy as a dormant root in USDA zones 3 to 8; in colder zones and in warm-winter areas it is grown as an annual that reseeds itself.
- •Foliage is cut back by frost in fall, but the root crown survives winters where it is hardy, and seedlings emerge the following spring.
- •Cold, damp stratification for about 30 days can improve germination of stored seed, while summer temperatures above 90°F slow flowering until cooler weather returns.
Soil:
- •Grow black-eyed Susan in moist, well-drained clay, loam, or sandy soil with a neutral pH around 6.0 to 7.5.
- •It tolerates poor, average, and somewhat compacted soils better than most garden flowers, including roadside fill and disturbed ground, but it performs best in moderately fertile soil.
- •Excess fertility and high nitrogen are counterproductive: they push lush soft foliage, weak floppy stems, and dense growth that traps humidity and mildews, while reducing flower production.
- •Avoid planting it along a fertilized lawn edge where lawn nitrogen drifts into the bed.
- •Amend heavy wet soil with compost and grit to improve drainage, and avoid waterlogged sites.
Harvest:
- •For cut flowers, harvest stems early in the morning when the central cone is just opening and the ray petals are fully expanded; remove lower leaves that would sit below the water line and recut stems at an angle.
- •The blooms last about seven to ten days in a vase.
- •For seed saving, leave flower heads on the plant until the petals fade and the dark cone dries and turns brown in fall; cut the heads before the seed shatters and bring them indoors to finish drying.
- •If you want the planting to self-seed, leave mature heads standing through winter for the birds; if you want to limit spread, deadhead most spent blooms through summer and fall.
- •Cut back old foliage and stems in spring rather than fall, so the seed heads and basal rosette can shelter wildlife over winter.
Common Problems: Powdery mildew on shaded, crowded foliage; floppy stems and sparse bloom in partial shade; excess self-seeding; slugs and snails on young leaves; leafhopper-transmitted aster yellows; root rot in waterlogged soil.
📅 When to Plant
- •Set out nursery plants or sow seed in spring after all danger of frost has passed, when soil temperatures reach 70 to 75°F (21 to 24°C).
- •For bloom in the first year, start seeds indoors about six weeks before your average last frost: sprinkle seeds on the surface of seed-starting mix and do not cover them, because black-eyed Susan seeds need light to germinate.
- •Keep the mix moist and warm, then harden seedlings off for a week before transplanting after frost.
- •Direct sowing outdoors works equally well in spring once the soil has warmed; press seeds onto the surface and keep them damp until emergence, which typically takes 7 to 30 days.
- •A 30-day cold, moist stratification can improve germination of saved seed but is optional for purchased packet seed.
- •Space plants about 18 inches apart to allow the mature clumps room for air circulation.
- •In milder zones you can also plant in fall, letting the seed overwinter naturally for earlier spring bloom.
🌱 Growing Stages
 1
Germination
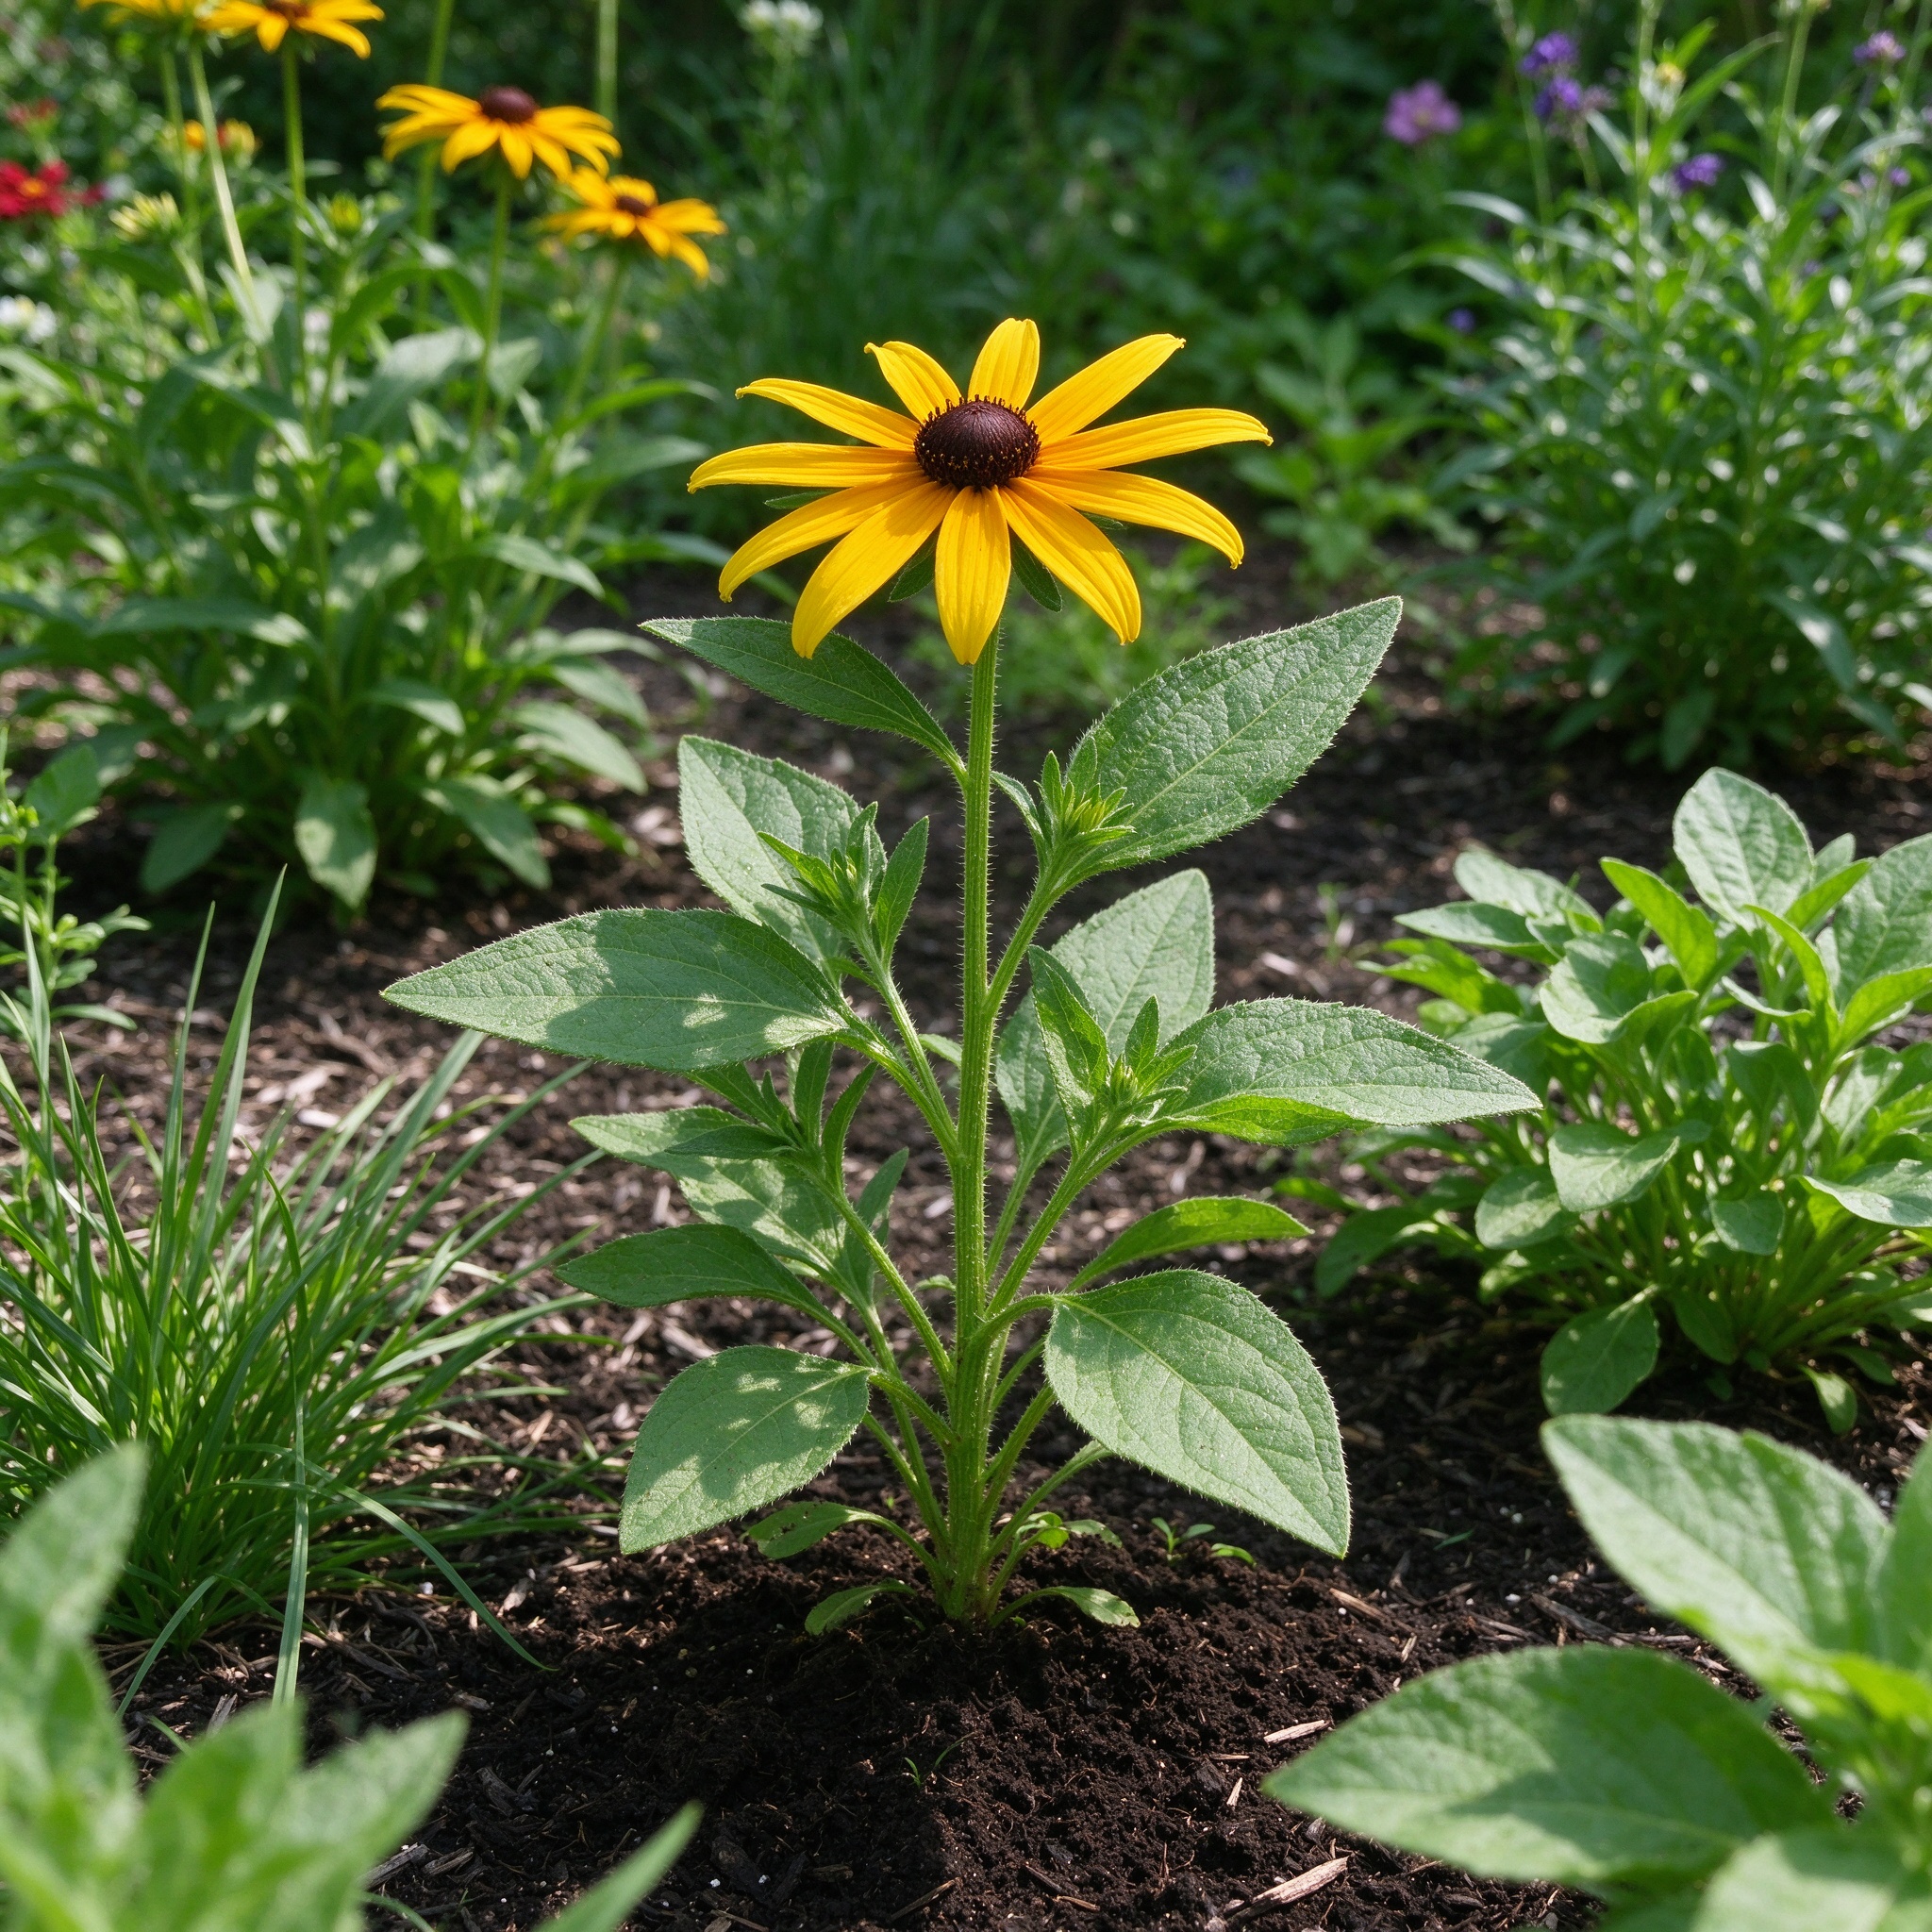
(7 to 30 days)- •Light and warmth drive germination: seeds resting on moist soil at 70 to 75°F send down a short root, then the first narrow seedling leaves appear.
- •Stored seed benefits from 30 days of cold, moist stratification; packet seed usually sprouts without it.
- •Keep the surface damp but not waterlogged, since buried seed rots rather than sprouts.
 2
Basal rosette establishment
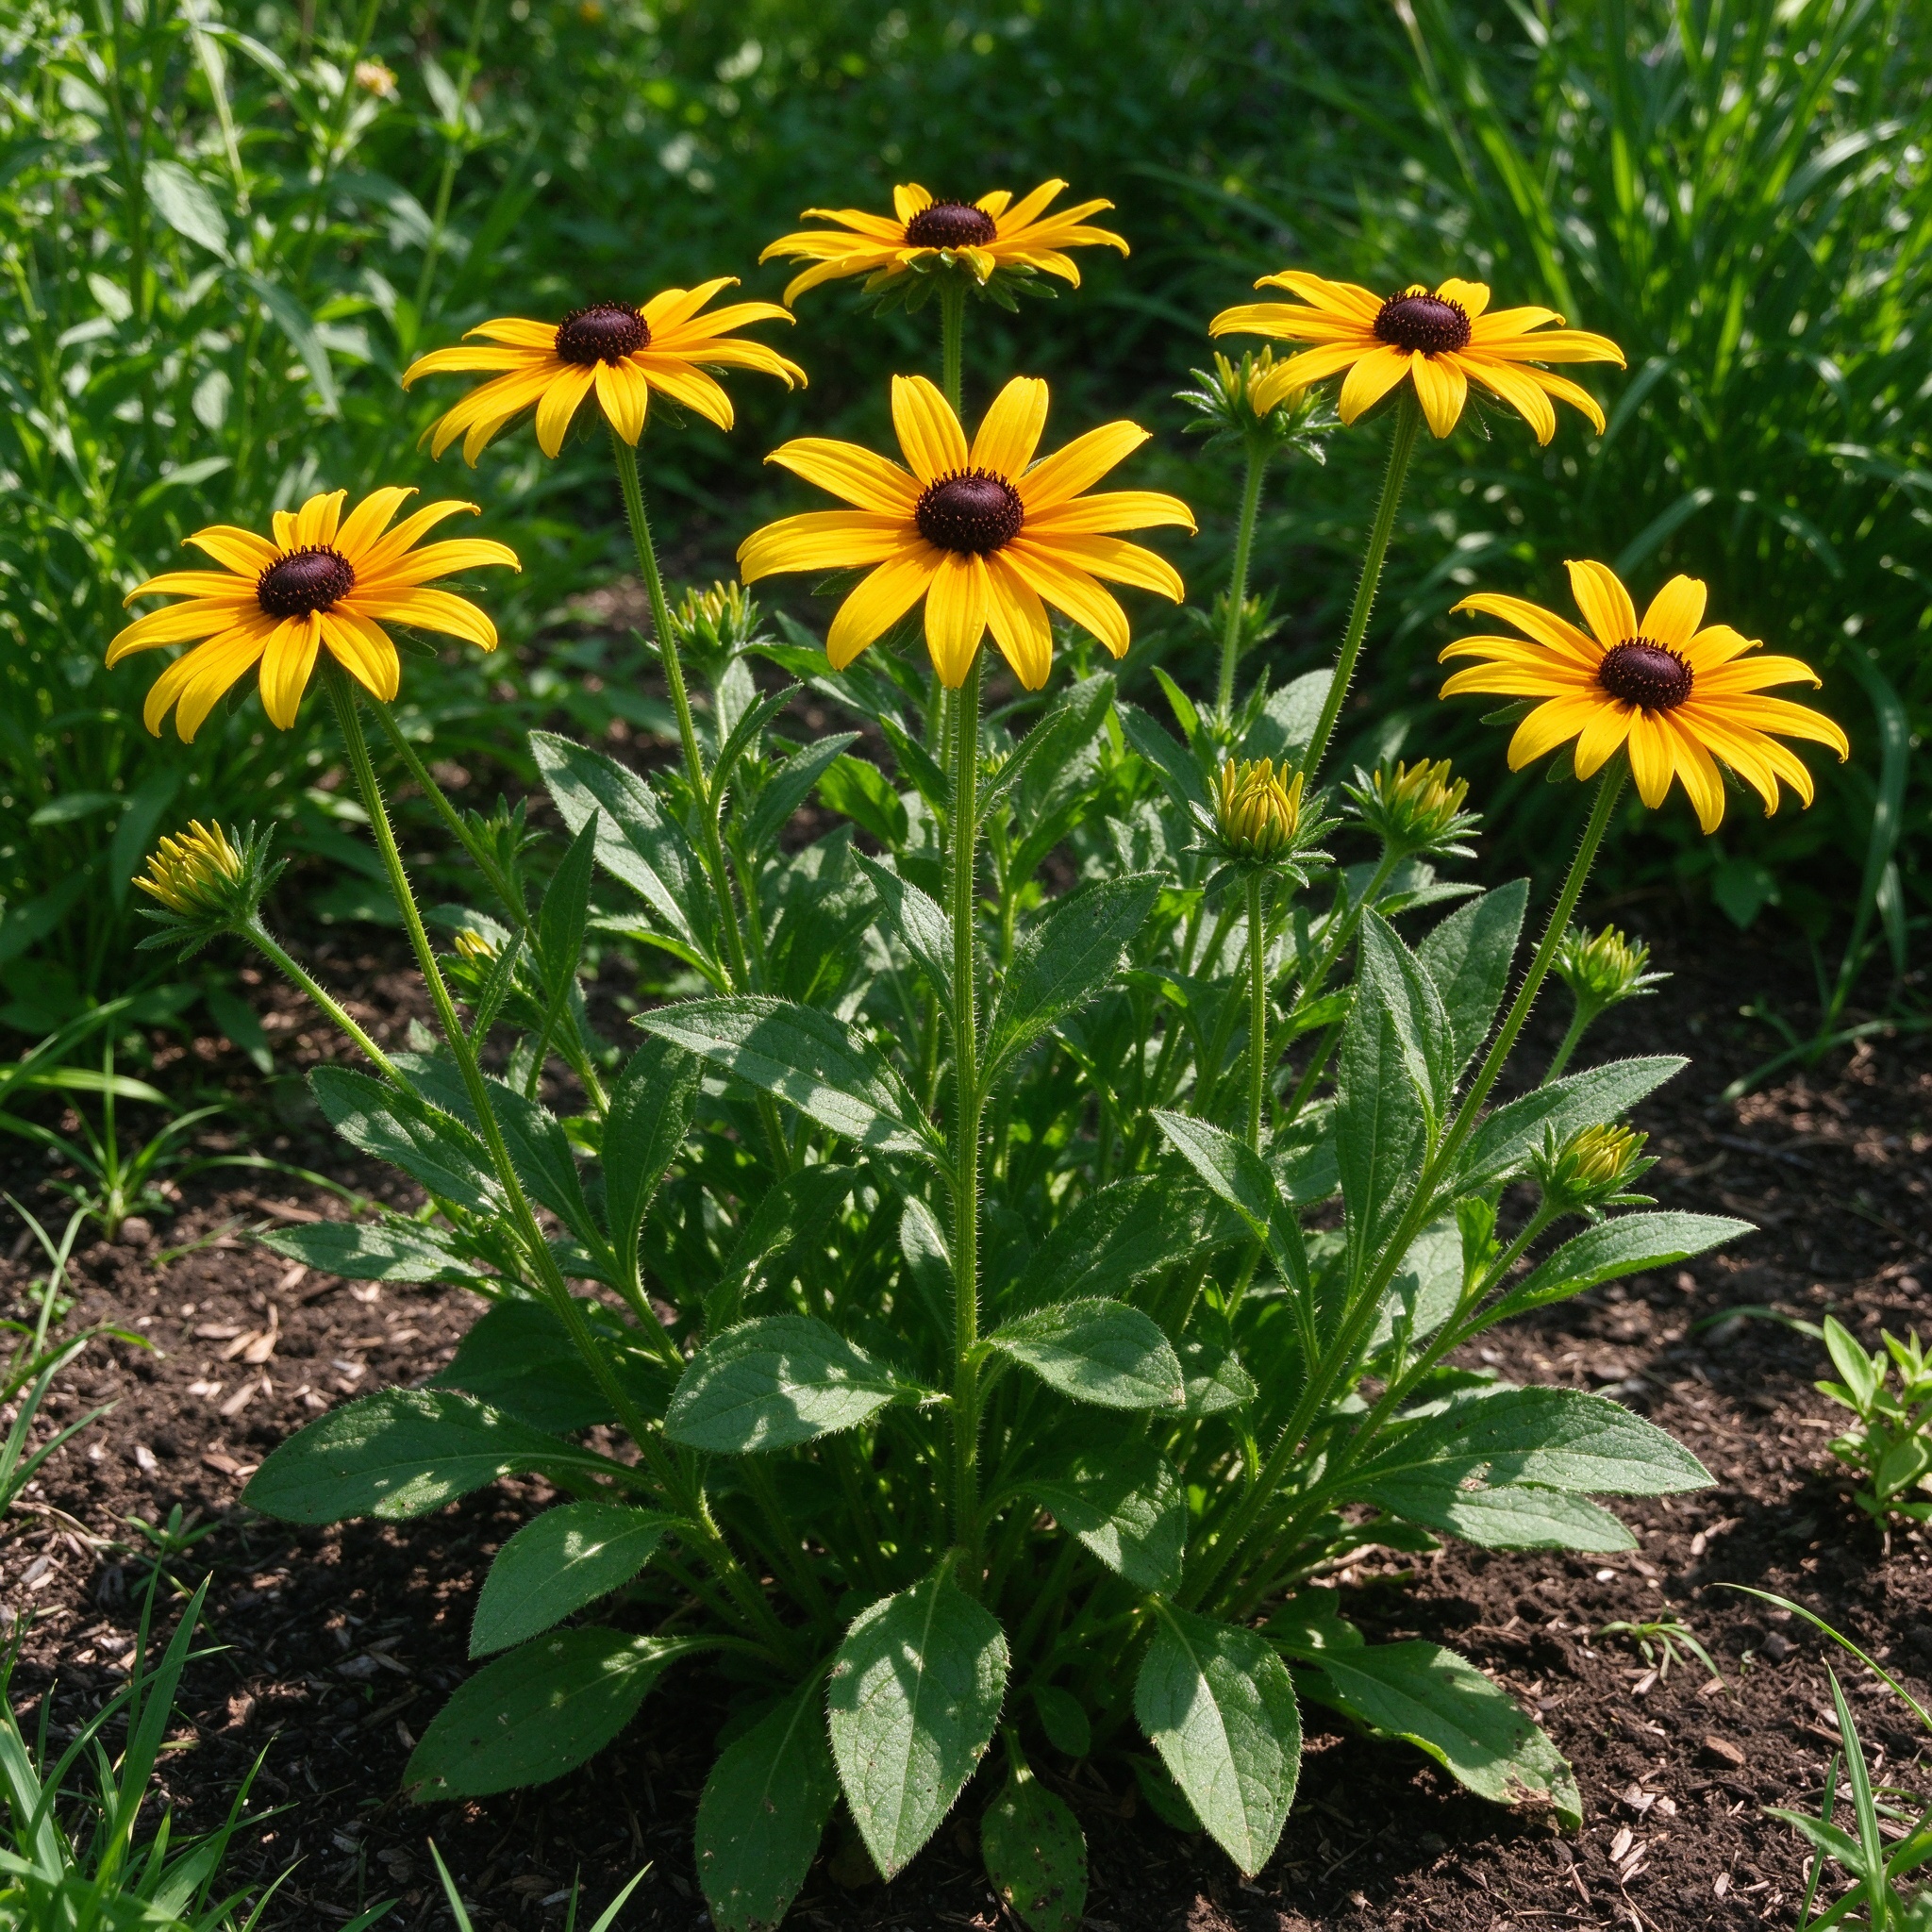
(4 to 6 weeks)- •Young plants form a low rosette of hairy, oval leaves close to the ground while the fibrous root system spreads through the upper soil.
- •This is the window for thinning, transplanting, and slug protection.
- •Avoid high-nitrogen feeds, which make the rosette soft and susceptible to mildew and pests.
 3
Stem elongation and bud formation
(6 to 10 weeks after emergence)- •Upright branching stems rise from the rosette, carrying alternately arranged, coarsely toothed leaves, and terminal flower buds swell at the stem tips.
- •In full sun the stems stay stout and branched; in shade they stretch and lean, requiring support.
- •First flowers open around 10 to 12 weeks after a spring sowing.
 4
Bloom, seed set, and dormancy
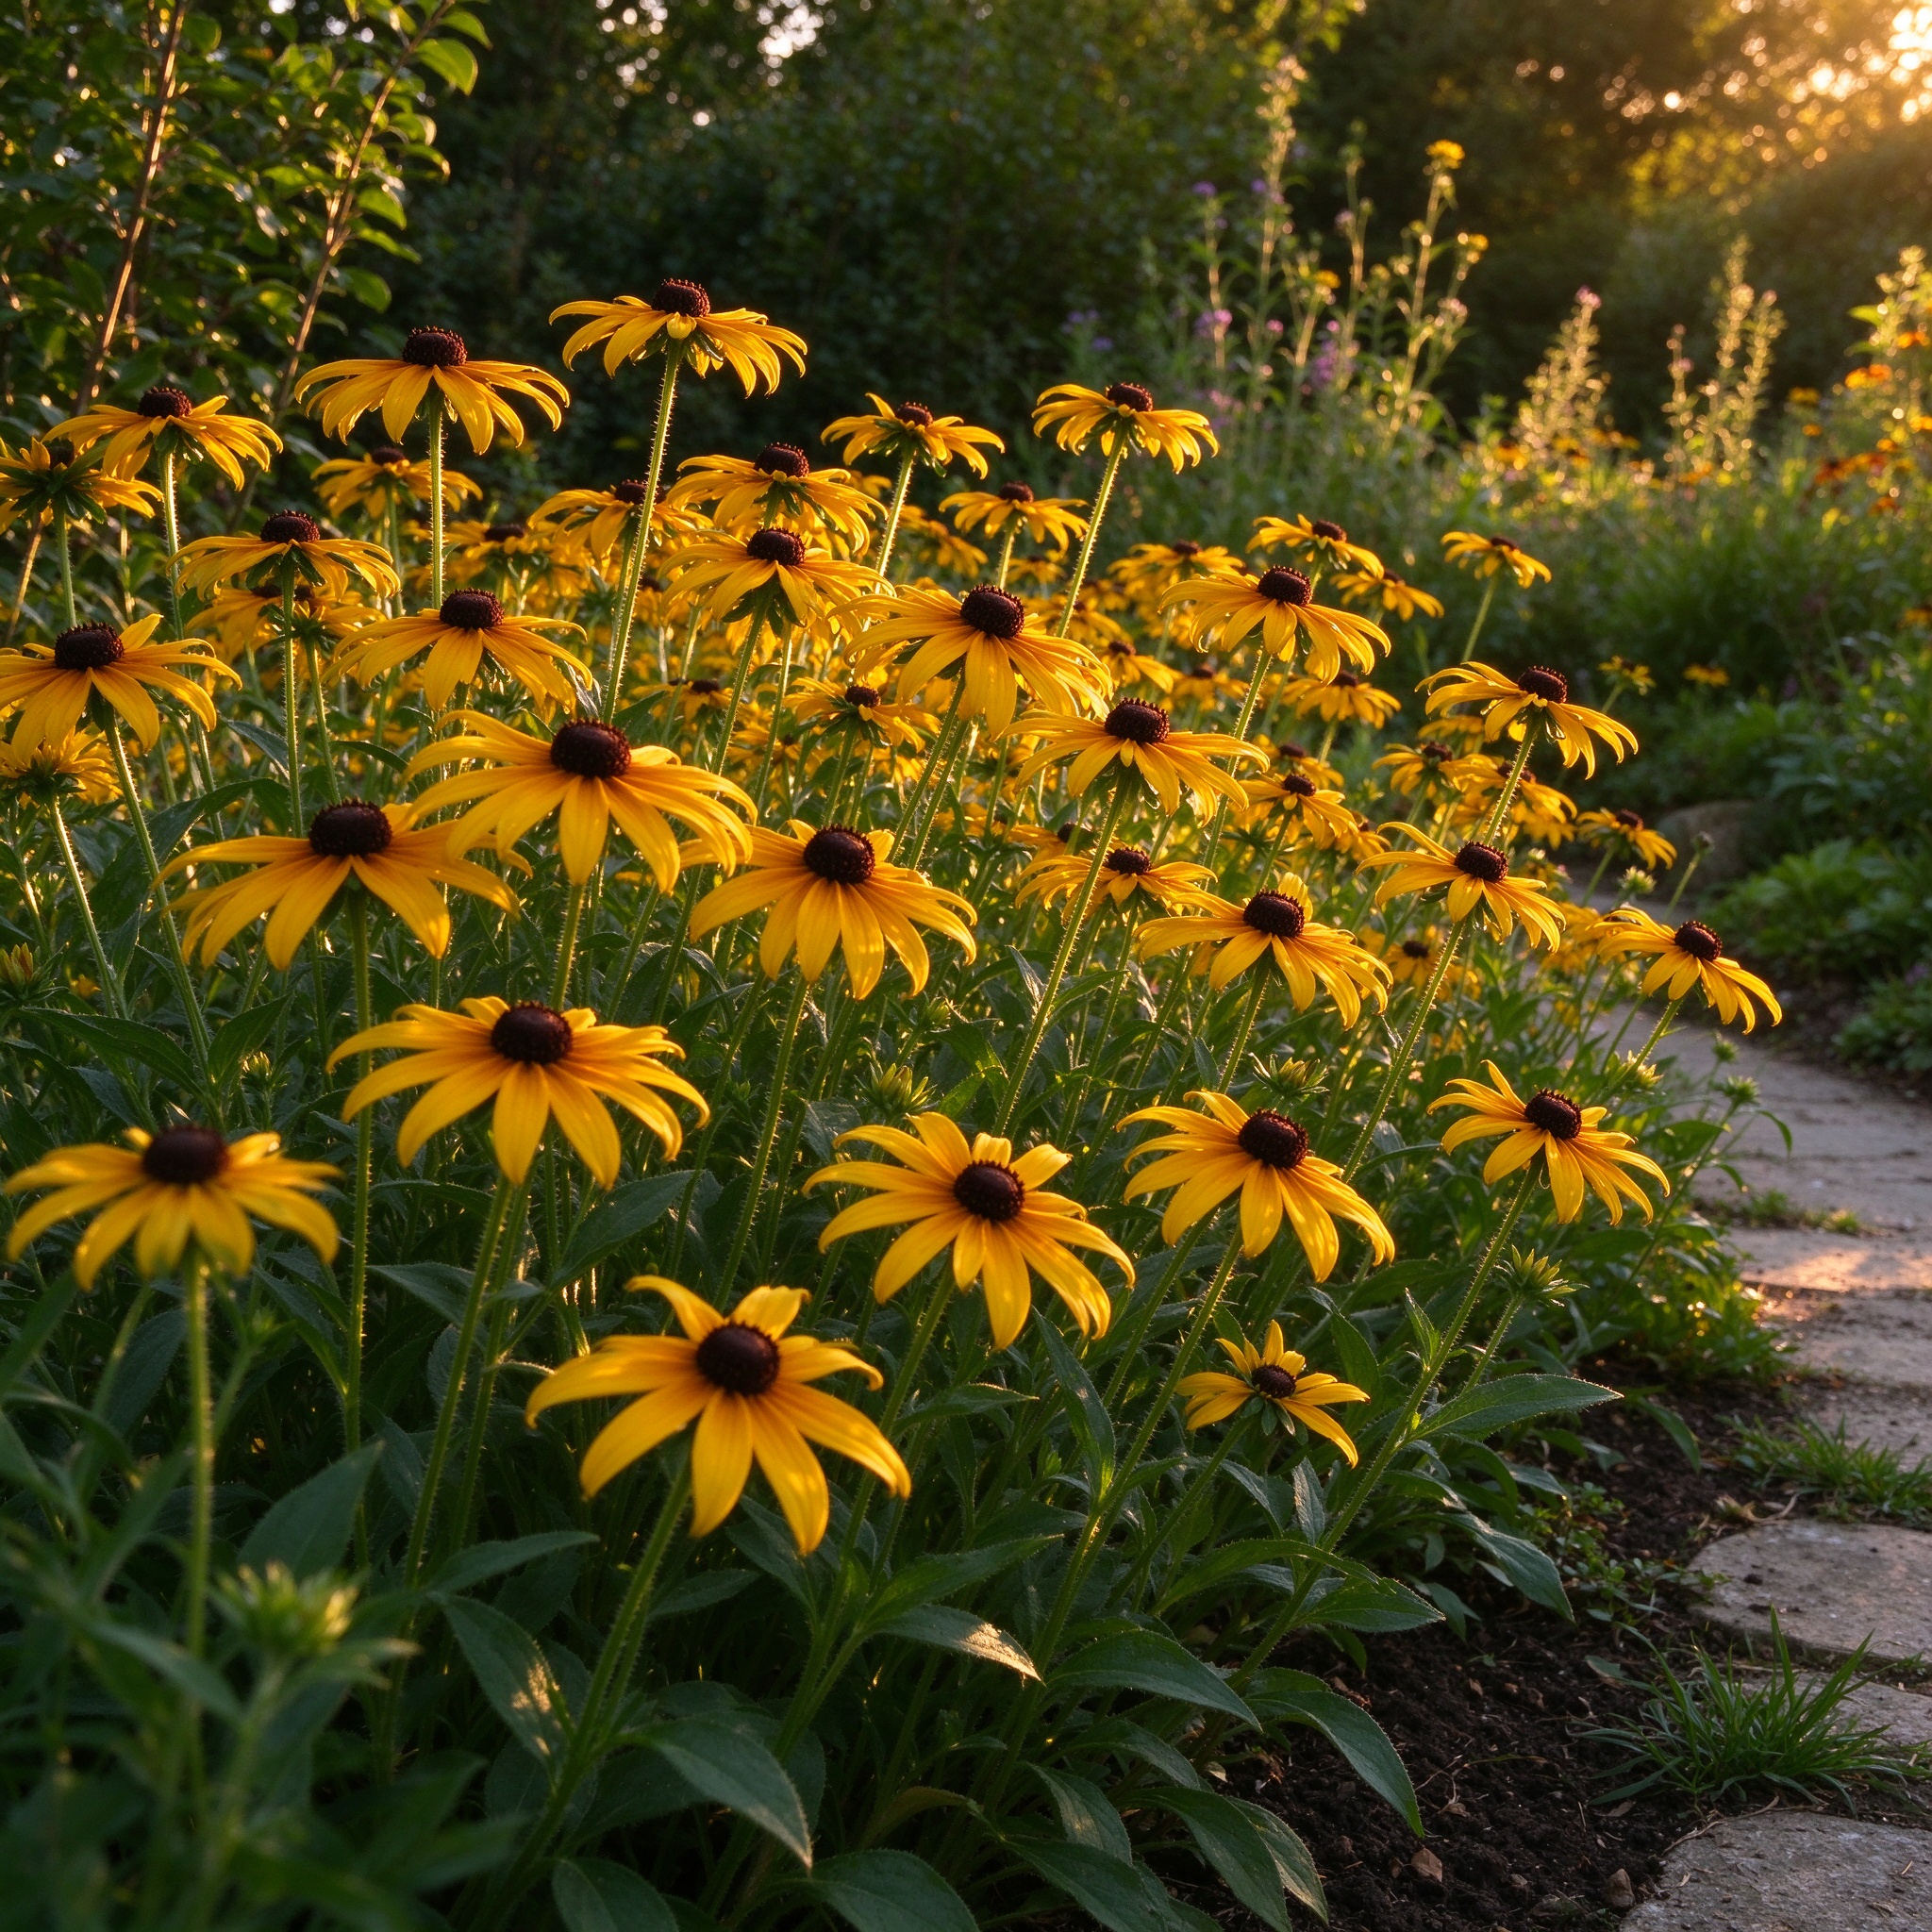
(Midsummer through winter)- •Successive heads open from midsummer to fall, feeding pollinators through the season and ripening seed cones that attract goldfinches.
- •Frost cuts down the foliage in autumn; where hardy, the root crown overwinters under a basal rosette of leaves, while in annual zones self-sown seedlings restart the cycle the following spring.
💧 Detailed Care Guide
☀️ Light Requirements
- •Black-eyed Susan flowers best in full sun, six or more hours of direct sunlight each day.
- •It tolerates partial shade, but stems in shade grow taller and floppier, need staking, and produce fewer, smaller flowers with open, sparse centers.
- •Full sun also dries morning dew from the hairy foliage and reduces the powdery mildew that appears on crowded, shaded plants.
- •In very hot southern gardens, light afternoon shade can extend flower life, but the plant still needs strong morning and midday sun to stand upright and bloom heavily.
💧 Watering
- •Water new plants regularly until established, keeping the root zone evenly moist but not saturated.
- •Once rooted, black-eyed Susan is moderately drought tolerant and shrugs off short dry spells; give about 1 inch of water per week during prolonged heat or drought, soaking deeply at the base rather than sprinkling foliage.
- •Wet leaves in still air invite fungal disease, so water at soil level and maintain the 18-inch spacing for airflow.
- •Do not plant it in low spots that pool after rain; constant wetness around the crown encourages root rot.
- •A thin layer of organic mulch around the plants conserves moisture and suppresses weeds, kept away from the hairy stems.
🌡️ Temperature
- •Black-eyed Susan grows best between 65 and 85°F (18 to 29°C) and is a warm-season bloomer that thrives through summer heat.
- •Seed germinates at 70 to 75°F (21 to 24°C).
- •In the garden it is hardy as a dormant root in USDA zones 3 to 8; in colder zones and in warm-winter areas it is grown as an annual that reseeds itself.
- •Foliage is cut back by frost in fall, but the root crown survives winters where it is hardy, and seedlings emerge the following spring.
- •Cold, damp stratification for about 30 days can improve germination of stored seed, while summer temperatures above 90°F slow flowering until cooler weather returns.
🌱 Soil & Fertilizer
Soil:
- •Grow black-eyed Susan in moist, well-drained clay, loam, or sandy soil with a neutral pH around 6.0 to 7.5.
- •It tolerates poor, average, and somewhat compacted soils better than most garden flowers, including roadside fill and disturbed ground, but it performs best in moderately fertile soil.
- •Excess fertility and high nitrogen are counterproductive: they push lush soft foliage, weak floppy stems, and dense growth that traps humidity and mildews, while reducing flower production.
- •Avoid planting it along a fertilized lawn edge where lawn nitrogen drifts into the bed.
- •Amend heavy wet soil with compost and grit to improve drainage, and avoid waterlogged sites.
Fertilizer:
- •Black-eyed Susan is a light feeder that usually needs no fertilizer in average garden soil.
- •A single spring top-dressing of finished compost around the crown is enough to support the season's growth; the plant's wildflower ancestry means it performs well on modest nutrition.
- •High-nitrogen lawn or garden fertilizer should be avoided because it produces leafy growth at the expense of flowers and weakens stems that then fall over.
- •In poor sandy soil, a light balanced organic feed such as 4-4-4 applied once in spring can steady growth, but repeat feeding through summer is unnecessary and can encourage powdery mildew.
- •Container plants may receive a dilute balanced liquid feed once a month during bloom, since nutrients leach from pots.
📝 Step-by-Step Planting Guide
- 1
Choose a sunny, well-drained site
- •Pick a spot with six or more hours of direct sun and soil that drains after rain rather than pooling.
- •Black-eyed Susan tolerates clay, fill, and disturbed ground, but avoid low, wet corners where the crown would sit in saturated soil.
- •Clear perennial weeds and loosen the top 6 to 8 inches; work in compost only if the soil is very poor or heavy.
- •Keep the planting away from fertilized lawn edges so excess nitrogen does not reach the roots.
- 2
Sow seed on the soil surface
- •In spring after frost, sprinkle seeds over prepared ground or sow indoors six weeks before the last frost.
- •Do not cover the seed: black-eyed Susan needs light to germinate, so press the seeds onto the surface and firm them into contact with moist soil.
- •Keep the surface evenly moist until emergence in 7 to 30 days at 70 to 75°F.
- •Indoor seedlings need bright light from day one to stay compact; thin or transplant when they show two sets of true leaves, hardening off for a week before going outside.
- 3
Space plants for air circulation
- •Set nursery plants and thinned seedlings about 18 inches apart in all directions to give the mature 2-foot-wide clumps room to breathe.
- •Close spacing traps humidity against the hairy foliage and is the leading cause of powdery mildew.
- •Plant at the same depth the plants grew in their pots, firm the soil around the roots, and water thoroughly to settle the root zone.
- •Taller strains in windy or shaded sites may need a short stake or a support ring once buds swell.
- 4
Water and mulch through establishment
- •Keep the root zone evenly moist for the first four to six weeks while roots spread, then let the top inch dry between deep soakings.
- •Apply a 1- to 2-inch layer of shredded bark or leaf mold around the plants, leaving a gap around the stems to avoid crown rot.
- •Check young leaves overnight for slug damage, and rinse aphid colonies off shoot tips with a strong water spray.
- •Once established, the plant needs only supplemental water during extended drought.
- 5
Deadhead and manage self-seeding
- •Remove spent flower heads through summer and fall to prolong bloom and stop the plant from pouring energy into seed.
- •Deadheading back to the first leafy branch triggers new side shoots and a second flush of flowers.
- •If you want a controlled naturalized patch, leave a few heads to ripen; if you want to prevent spread around the garden, cut all faded blooms before the cone sets seed.
- •Leave the last fall heads standing for goldfinches, and tidy the old stems and basal rosette in spring rather than cutting back in autumn.
- 6
Collect ripe seed heads in fall
- •In fall, after petals fade and the central cone turns dry and dark brown, cut the seed heads before they shatter.
- •Place them in a paper bag or on a paper sheet in a cool, dry, ventilated room for two weeks to finish drying, then rub the heads between your palms to release the small brown achenes.
- •Winnow away the chaff by gentle blowing, label the packet, and store in a cool, dry, dark place.
- •Open-pollinated Rudbeckia strains come true from saved seed; named hybrids may not, and seedlings may revert to mixed colors.
🌱 Recommended Varieties
'Indian Summer' — giant golden daisies
- •An All-America Selections winner bred for extra-large, 6- to 9-inch golden-yellow single flowers on stout, 3- to 4-foot stems.
- •The broad overlapping rays surround a dark brown cone, and the sturdy stems stand without staking in full sun.
- •'Indian Summer' is a favorite for the back of the border and for cutting, blooming from early summer into fall, and it reliably comes true from open-pollinated seed.
'Prairie Sun' — gold-to-lemon blooms with a green cone
- •Another AAS winner (2003), 'Prairie Sun' carries 4- to 6-inch flowers that grade from golden orange at the base of the ray florets to lemon yellow at the tips, surrounding an unusual light green central cone rather than a black eye.
- •Plants reach 28 to 33 inches with strong branching and a long bloom season, making it a distinctive choice for meadow mixes and cut-flower arrangements.
Rudbeckia fulgida and 'Denver Daisy'
- •For a reliable perennial that returns from the same crown year after year, grow orange coneflower (R.
- •fulgida), a rhizomatous species hardy in zones 3 to 9 with orange-yellow flowers on 2- to 3-foot clumps; the widely sold cultivar 'Goldsturm' carries a long season of deep gold blooms.
- •Among R.
- •hirta selections, 'Denver Daisy' won honors in the NC State Annual Color Trials, bearing yellow petals around a large mahogany-red eye, while 'Cherry Brandy' offers rare cherry-red rays for contrast in mixed borders.
🪴 Growing in Containers
- Choose dwarf strains and a large pot:
- •Standard 3- to 4-foot black-eyed Susan is too tall and root-hungry for small pots; choose compact or dwarf strains that stay under 18 inches, or grow one dwarf plant in a 12- to 14-inch pot.
- •Use a container with several drainage holes and place it on pot feet so excess water drains freely.
- •Taller cut-flower strains need a 16-inch pot and a small stake for support once buds appear.
- Plant in a free-draining potting mix:
- •Fill the pot with a premium potting mix blended with perlite for drainage; garden soil compacts and waterlogs in containers.
- •Set the plant at its original depth, firm the mix, and water thoroughly until water runs from the holes.
- •Position the pot in full sun on a patio, deck, or balcony railing; shade makes potted Rudbeckia leggy and prone to mildew, the same as in beds.
- Water and feed potted plants lightly:
- •Check the pot daily in warm weather and water when the top inch of mix feels dry, soaking until water drains through; never let the pot stand in a saucer of water.
- •Container nutrients wash out faster, so feed once a month during bloom with a dilute balanced liquid fertilizer, avoiding high-nitrogen formulas that push foliage over flowers.
- •Deadhead the pot repeatedly to keep blooms coming and remove yellowed lower leaves for airflow.
✂️ Pruning & Maintenance
- ✓
Deadhead spent blooms through summer
- •Cut faded flower heads back to the first healthy leafy branch below the bloom.
- •Regular deadheading stops seed formation, keeps the plant tidy, and triggers a second wave of side shoots and flowers that extends the display into fall.
- •It also prevents the abundant self-seeding that can turn a managed border into a wildflower thicket.
- ✓
Leave stems standing over winter
- •In fall, stop deadheading and leave mature seed heads standing: goldfinches and other birds feed on the seeds through winter, and the dry stems and basal foliage shelter overwintering insects and protect the root crown.
- •Do not cut back until early spring, when new green growth appears at the base; then cut old stems to the rosette and remove debris that could harbor disease.
- ✓
Support or shear floppy growth
- •If stems lean in a windy or partially shaded site, stake tall plants with a ring support or thin bamboo.
- •A midseason shear of the tallest stems by one-third after the first flush encourages a lower, bushier second bloom.
- •Remove any yellowed or mildewed lower foliage to open the center of the clump to air movement.
🐛 Pest & Disease Control
Common Pests
Aphids
Symptoms: Soft green or black colonies cluster on shoot tips and under young leaves, curling growth and coating foliage with sticky honeydew that later grows black sooty mold.Control:- •Knock colonies off with a strong jet of water for two or three days running, and encourage lady beetles and lacewings that prey on aphids.
- •Heavy infestations respond to insecticidal soap or horticultural oil applied in cool weather; avoid high-nitrogen fertilizer that produces the tender growth aphids prefer.
Slugs and snails
Symptoms: Irregular holes in young basal leaves and low stems, with a shiny silvery trail across the soil and foliage; damage appears overnight in damp spring weather, especially on rosette-stage plants.Control:- •Hand-pick at dusk or dawn, trap under boards or inverted pots with beer bait, and ring vulnerable plants with diatomaceous earth or iron-phosphate slug bait.
- •Improve drainage and air circulation, remove damp leaf litter that shelters slugs by day, and keep mulch from resting directly against the crown.
Leafhoppers
Symptoms: Small wedge-shaped insects hop off plants when disturbed; they suck sap from leaves, causing pale speckling and curling, and are the principal vector of aster yellows phytoplasma, which produces distorted greenish flowers and stunted yellow growth.Control:- •Control leafhoppers by keeping weeds down around the planting, where they breed, and by applying insecticidal soap or neem oil to nymphs early in the season.
- •Remove and discard any plant showing aster yellows symptoms, since no cure exists and the pathogen spreads to neighboring flowers.
Japanese beetles and flower beetles
Symptoms: Metallic green beetles skeletonize leaves between veins and chew petals at the edge of flower heads; clustering on the sunniest blooms in early summer, they leave ragged, browned foliage and tattered petals.Control:- •Hand-pick beetles into soapy water each morning while numbers are low, and use pheromone traps placed far from the planting rather than beside it.
- •Insecticidal soap kills on contact; neem or labeled pyrethrin sprays reduce feeding.
- •Remove fallen foliage and keep nearby wild rose and knotweed hosts in check.
Common Diseases
Powdery mildew
Symptoms: A white to grayish powdery coating spreads over leaves and stems, most often on crowded or shaded plants during humid nights and dry days; leaves curl, yellow, and drop early while bloom continues.Control:- •Grow in full sun at the recommended 18-inch spacing, water at soil level rather than overhead, and prune out dense growth to open the center.
- •Remove heavily infected leaves; sulfur or potassium-bicarbonate fungicides at the first sign slow spread. Resistant R.
- •fulgida cultivars suffer less than tall R. hirta strains.
Septoria and fungal leaf spot
Symptoms: Brown to gray circular or angular spots develop on lower leaves, often with dark purplish borders, and coalesce into blotches that cause the leaf to yellow and drop; spread by splashing water in wet seasons.Control:- •Water at the base of the plant, keep leaves dry, and rake and remove infected foliage at season's end rather than leaving it on the soil as inoculum.
- •Copper or sulfur fungicides protect healthy leaves after prolonged rain; avoid working among wet plants, which spreads spores by contact.
Botrytis blight
Symptoms: Gray-brown fuzzy mold covers flower petals, buds, and wounded leaves during cool, damp, still weather; browned blooms decay and the rot spreads along touching stems and foliage.Control:- •Remove dead petals and fallen leaves from around the crown, water at the base, and maintain wide spacing and airflow.
- •Cut out affected stems with clean tools and discard them in household trash rather than compost; fungicides labeled for botrytis protect healthy growth during prolonged damp spells.
Root rot and aster yellows
Symptoms: Root rot appears as stunting, yellowing, and wilting that does not recover with watering, caused by waterlogging in heavy soil; aster yellows causes chlorotic, bushy growth, stunted stems, and greenish, malformed flowers with no clear central cone.Control:- •Prevent root rot by planting in drained soil or raised beds and never overwatering the crown; affected plants cannot be cured and should be removed.
- •For aster yellows, uproot and discard the symptomatic plant, control the leafhopper vector, and clear weeds that host the phytoplasma in the surrounding area.
🍅 When to Harvest
- •For cut flowers, harvest stems early in the morning when the central cone is just opening and the ray petals are fully expanded; remove lower leaves that would sit below the water line and recut stems at an angle.
- •The blooms last about seven to ten days in a vase.
- •For seed saving, leave flower heads on the plant until the petals fade and the dark cone dries and turns brown in fall; cut the heads before the seed shatters and bring them indoors to finish drying.
- •If you want the planting to self-seed, leave mature heads standing through winter for the birds; if you want to limit spread, deadhead most spent blooms through summer and fall.
- •Cut back old foliage and stems in spring rather than fall, so the seed heads and basal rosette can shelter wildlife over winter.
❓ Frequently Asked Questions
- 1
How to grow black-eyed Susans from seeds?
- •Sow black-eyed Susan seeds in spring after the last frost, once soil reaches 70 to 75°F (21 to 24°C).
- •Sprinkle seeds on the surface of prepared, well-drained soil and do not cover them, because the seeds need light to germinate; press them into moist soil and keep the surface evenly moist until emergence, which takes 7 to 30 days.
- •For earlier bloom, start seeds indoors six weeks before the last frost on the surface of seed-starting mix, keep warm and bright, harden seedlings off for a week, then transplant after frost at 18-inch spacing.
- •Plants bloom in their first year from seed, and open-pollinated strains self-sow freely so a single planting renews itself annually.
- •A 30-day cold moist stratification improves germination of stored seed but is optional for packet seed.
- •Keep the plants in full sun; shaded seedlings stretch and bloom poorly.
- 2
How to save black-eyed Susan seeds?
- •Allow flower heads to mature on the stalk after the petals fade: the golden rays drop away and the central cone dries, darkens to brown, and hardens in fall.
- •Cut the heads before the seed shatters and lay them in a paper bag or on a paper sheet in a cool, dry, ventilated room for about two weeks to finish drying.
- •Rub the dried cones between your palms over white paper to release the small brown achenes, blow or winnow away the petal chaff, and spread the seed another week on a paper plate.
- •Store in a labeled paper envelope in a cool, dry, dark place; seed remains viable for two to three years.
- •Save seed only from open-pollinated species and heirloom strains: named hybrids do not come true, and their seedlings revert to mixed colors and heights.
- •Note that goldfinches also prize these seeds, so cover late heads with mesh if you want to save them before the birds do.
- 3
Are black-eyed Susans perennials or annuals?
- •Rudbeckia hirta is botanically a biennial or short-lived perennial, but in gardens it behaves like an annual in most climates because each individual plant fades after one or two seasons while the patch renews itself by self-seeding.
- •It is reliably hardy as a dormant root in USDA zones 3 to 8; in colder areas and warm-winter regions it is grown as an annual and reseeds the following spring.
- •If you want a true perennial that returns from the same crown each year, plant the orange coneflower relative R.
- •fulgida, especially the cultivar 'Goldsturm', which spreads by rhizomes and is hardy in zones 3 to 9.
- •Either way, expect volunteer seedlings around the parent plant; deadhead most blooms if you want to limit this spread.
- 4
Why are my black-eyed Susans floppy and not blooming?
- •The main causes are too little sun, too much fertilizer, and crowding.
- •Black-eyed Susan needs six hours or more of full sun; stems in partial shade stretch tall, lean, fall over without staking, and open sparse centers with few flowers.
- •High-nitrogen fertilizer or lawn fertilizer drift produces lush soft leaves and weak stems at the expense of buds, while sowing too thickly without thinning creates a humid, mildew-prone canopy.
- •Move or thin the planting to 18-inch spacing, stop feeding nitrogen-rich fertilizer, water at the base, and stake or shear the longest stems after the first flush.
- •If the location stays shaded all day, the plants will keep performing poorly and should be moved to a sunnier spot.
Source:
NC State Extension Gardener Plant Toolbox — Rudbeckia hirta — https://plants.ces.ncsu.edu/images/plants/rudbeckia-hirta/
NC State Extension Gardener Plant Toolbox — Pests and Problems — https://plants.ces.ncsu.edu/images/plants/rudbeckia-hirta/
The Old Farmer's Almanac — Black-eyed Susan Flowers — https://www.almanac.com/plant/black-eyed-susans
ASPCA Animal Poison Control — Toxic and Non-Toxic Plants List — https://www.aspca.org/pet-care/animal-poison-control/toxic-and-non-toxic-plants
Photo credit: NC State Extension
Images courtesy of NC State Extension under CC BY license. Thank you to the photographers who make these educational images available.
License: CC BY-NC 2.0 / CC BY 4.0