
How to Grow Spider Plant: Complete Guide
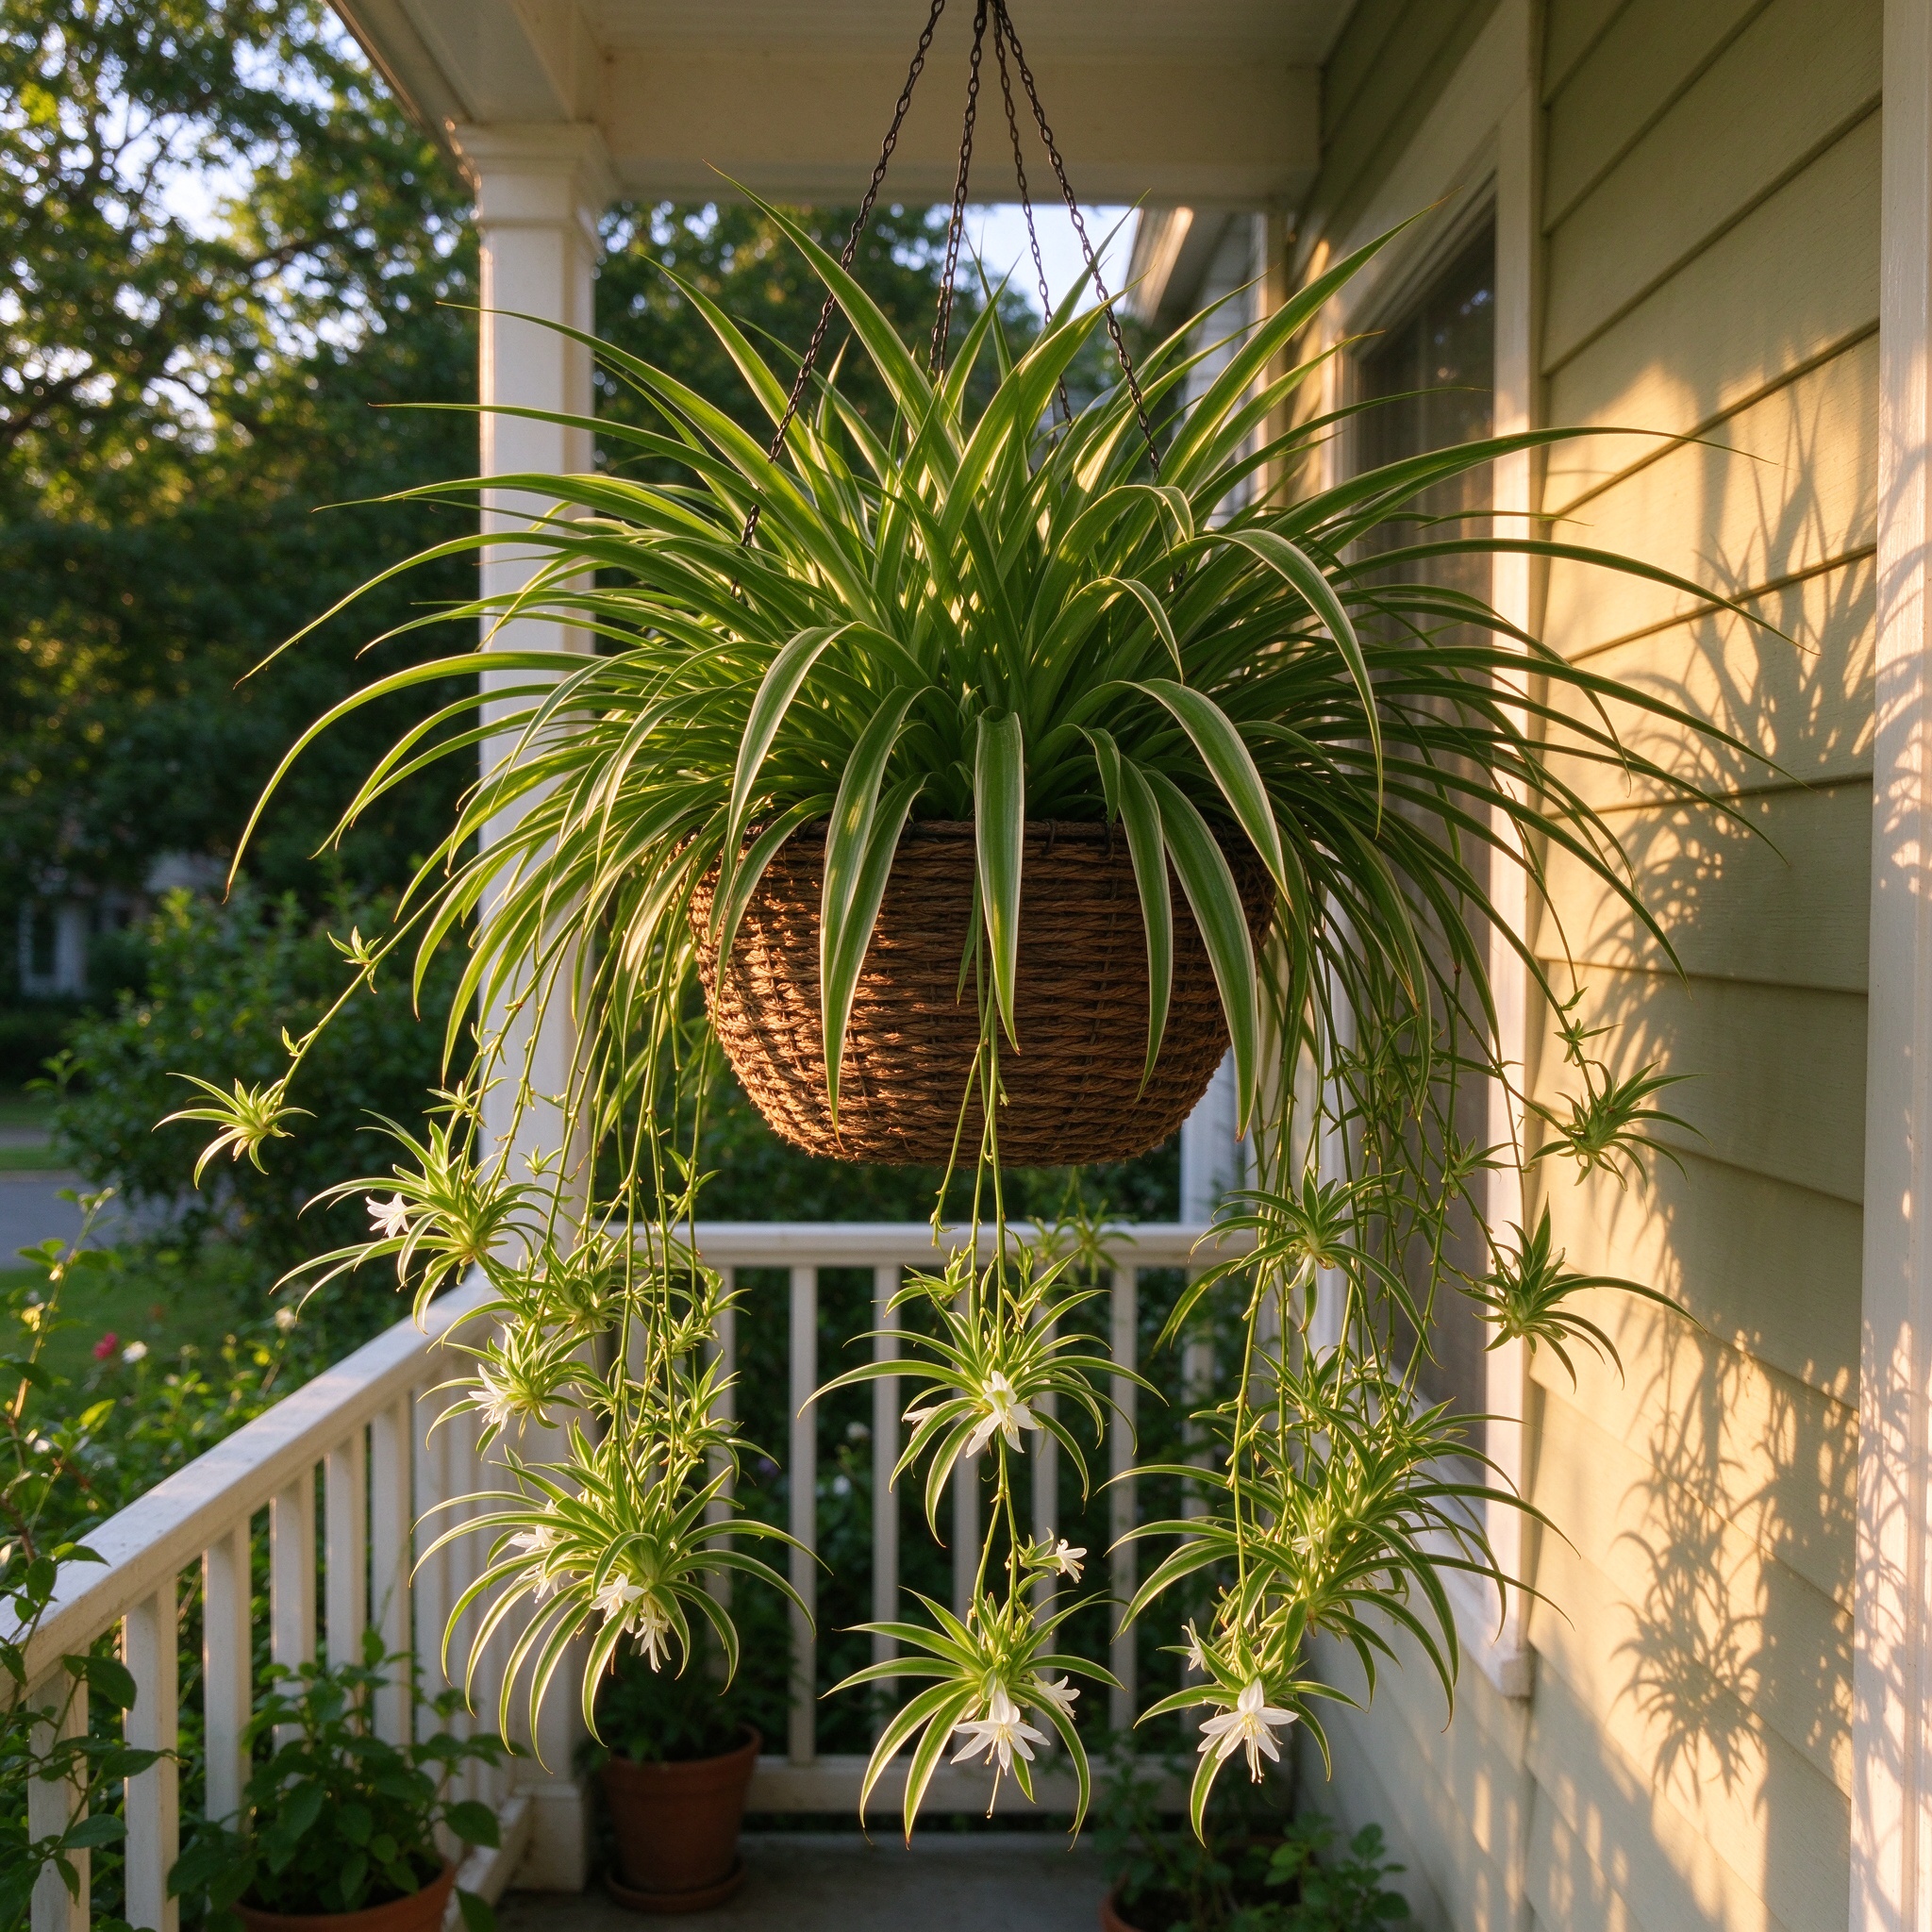
- •Spider plant (Chlorophytum comosum) is an herbaceous perennial houseplant in the Asparagaceae family, native from tropical West Africa to Cameroon and from Ethiopia down to South Africa.
- •It forms a mound of narrow, strappy leaves often striped white, and sends out long arching stolons that carry small white star-shaped flowers and, at their tips, baby plantlets that look like spiders dangling on threads.
- •It is commonly grown as a houseplant because it adapts to many indoor conditions, tolerating medium light and even deep shade, and it does particularly well in hanging baskets or any container where its leaves and runners can cascade down the side.
- •It is non-toxic to cats, dogs, and horses.
📋 Quick Facts
Scientific Name: Chlorophytum comosum
Family: Asparagaceae
Category: Houseplant
USDA Zones: 9-11 (houseplant)
Light:
- •Spider plant prefers medium light levels yet can tolerate deep shade, and it is intolerant of direct sunlight.
- •Give it bright indirect light near an east window or a few feet back from a south or west window.
- •Too much direct sun scorches the leaves and washes out the stripes; very dark corners slow growth and reduce the number of runners the plant produces.
Water:
- •Grow it in moist soil with medium air humidity, though it is tolerant of drought and dry soil.
- •Let the top inch of soil dry out briefly between waterings, then water thoroughly. Reduce watering during winter, when growth slows.
- •Importantly, avoid watering with straight tap water, because chlorine and fluorides can cause leaf tip burn; rainwater or distilled water is better.
Temperature:
- •Keep temperatures above 45 degrees F at all times, and aim for a normal indoor range of about 60 to 75 degrees F.
- •UF/IFAS notes that temperatures below 55 F are too cool and those above 80 F are too warm, which makes a typical living room ideal.
- •Keep the plant away from cold drafts, air-conditioning vents, and heating radiators that swing the temperature up and down.
Soil:
- •Use a regular, well-draining, loamy potting mix with a roughly neutral pH (6.0 to 8.0).
- •Standard houseplant potting soil works fine; adding a little perlite or orchid bark improves drainage for plants that tend to stay wet.
- •The plant is forgiving of a wide range of soil conditions as long as the pot drains freely and does not sit in a saucer of standing water.
Harvest:
- •There is no edible harvest with a spider plant.
- •Instead, the plant is ready to propagate once the mother plant sends out long stolons tipped with baby plantlets, and those plantlets have developed their own little roots or are large enough to snap off and pot.
- •A mature, full plant that is cascading with runners is the visual 'payoff' moment most growers aim for.
Common Problems:
- •The most common complaints are brown leaf tips (usually fluoride, chlorine, or dry air), root rot from overwatering, and sparse, floppy growth in too little light.
- •Pests are rarely serious, but spider mites, mealybugs, and fungus gnats can appear on stressed plants.
- •Avoid watering with fluoridated tap water and keep the plant out of direct sun to prevent most leaf damage.
📅 When to Plant
- •Spider plants are sold in garden centers and houseplant shops year-round, so you can buy or repot one indoors at any time of year.
- •The best window to repot or propagate is spring through early summer, when the mother plant is starting active growth and will recover fastest from root disturbance.
- •Winter is the slow season; only repot then if a badly root-bound plant is actively suffering.
🌱 Growing Stages
 1
Acclimation stage (first 2-4 weeks)
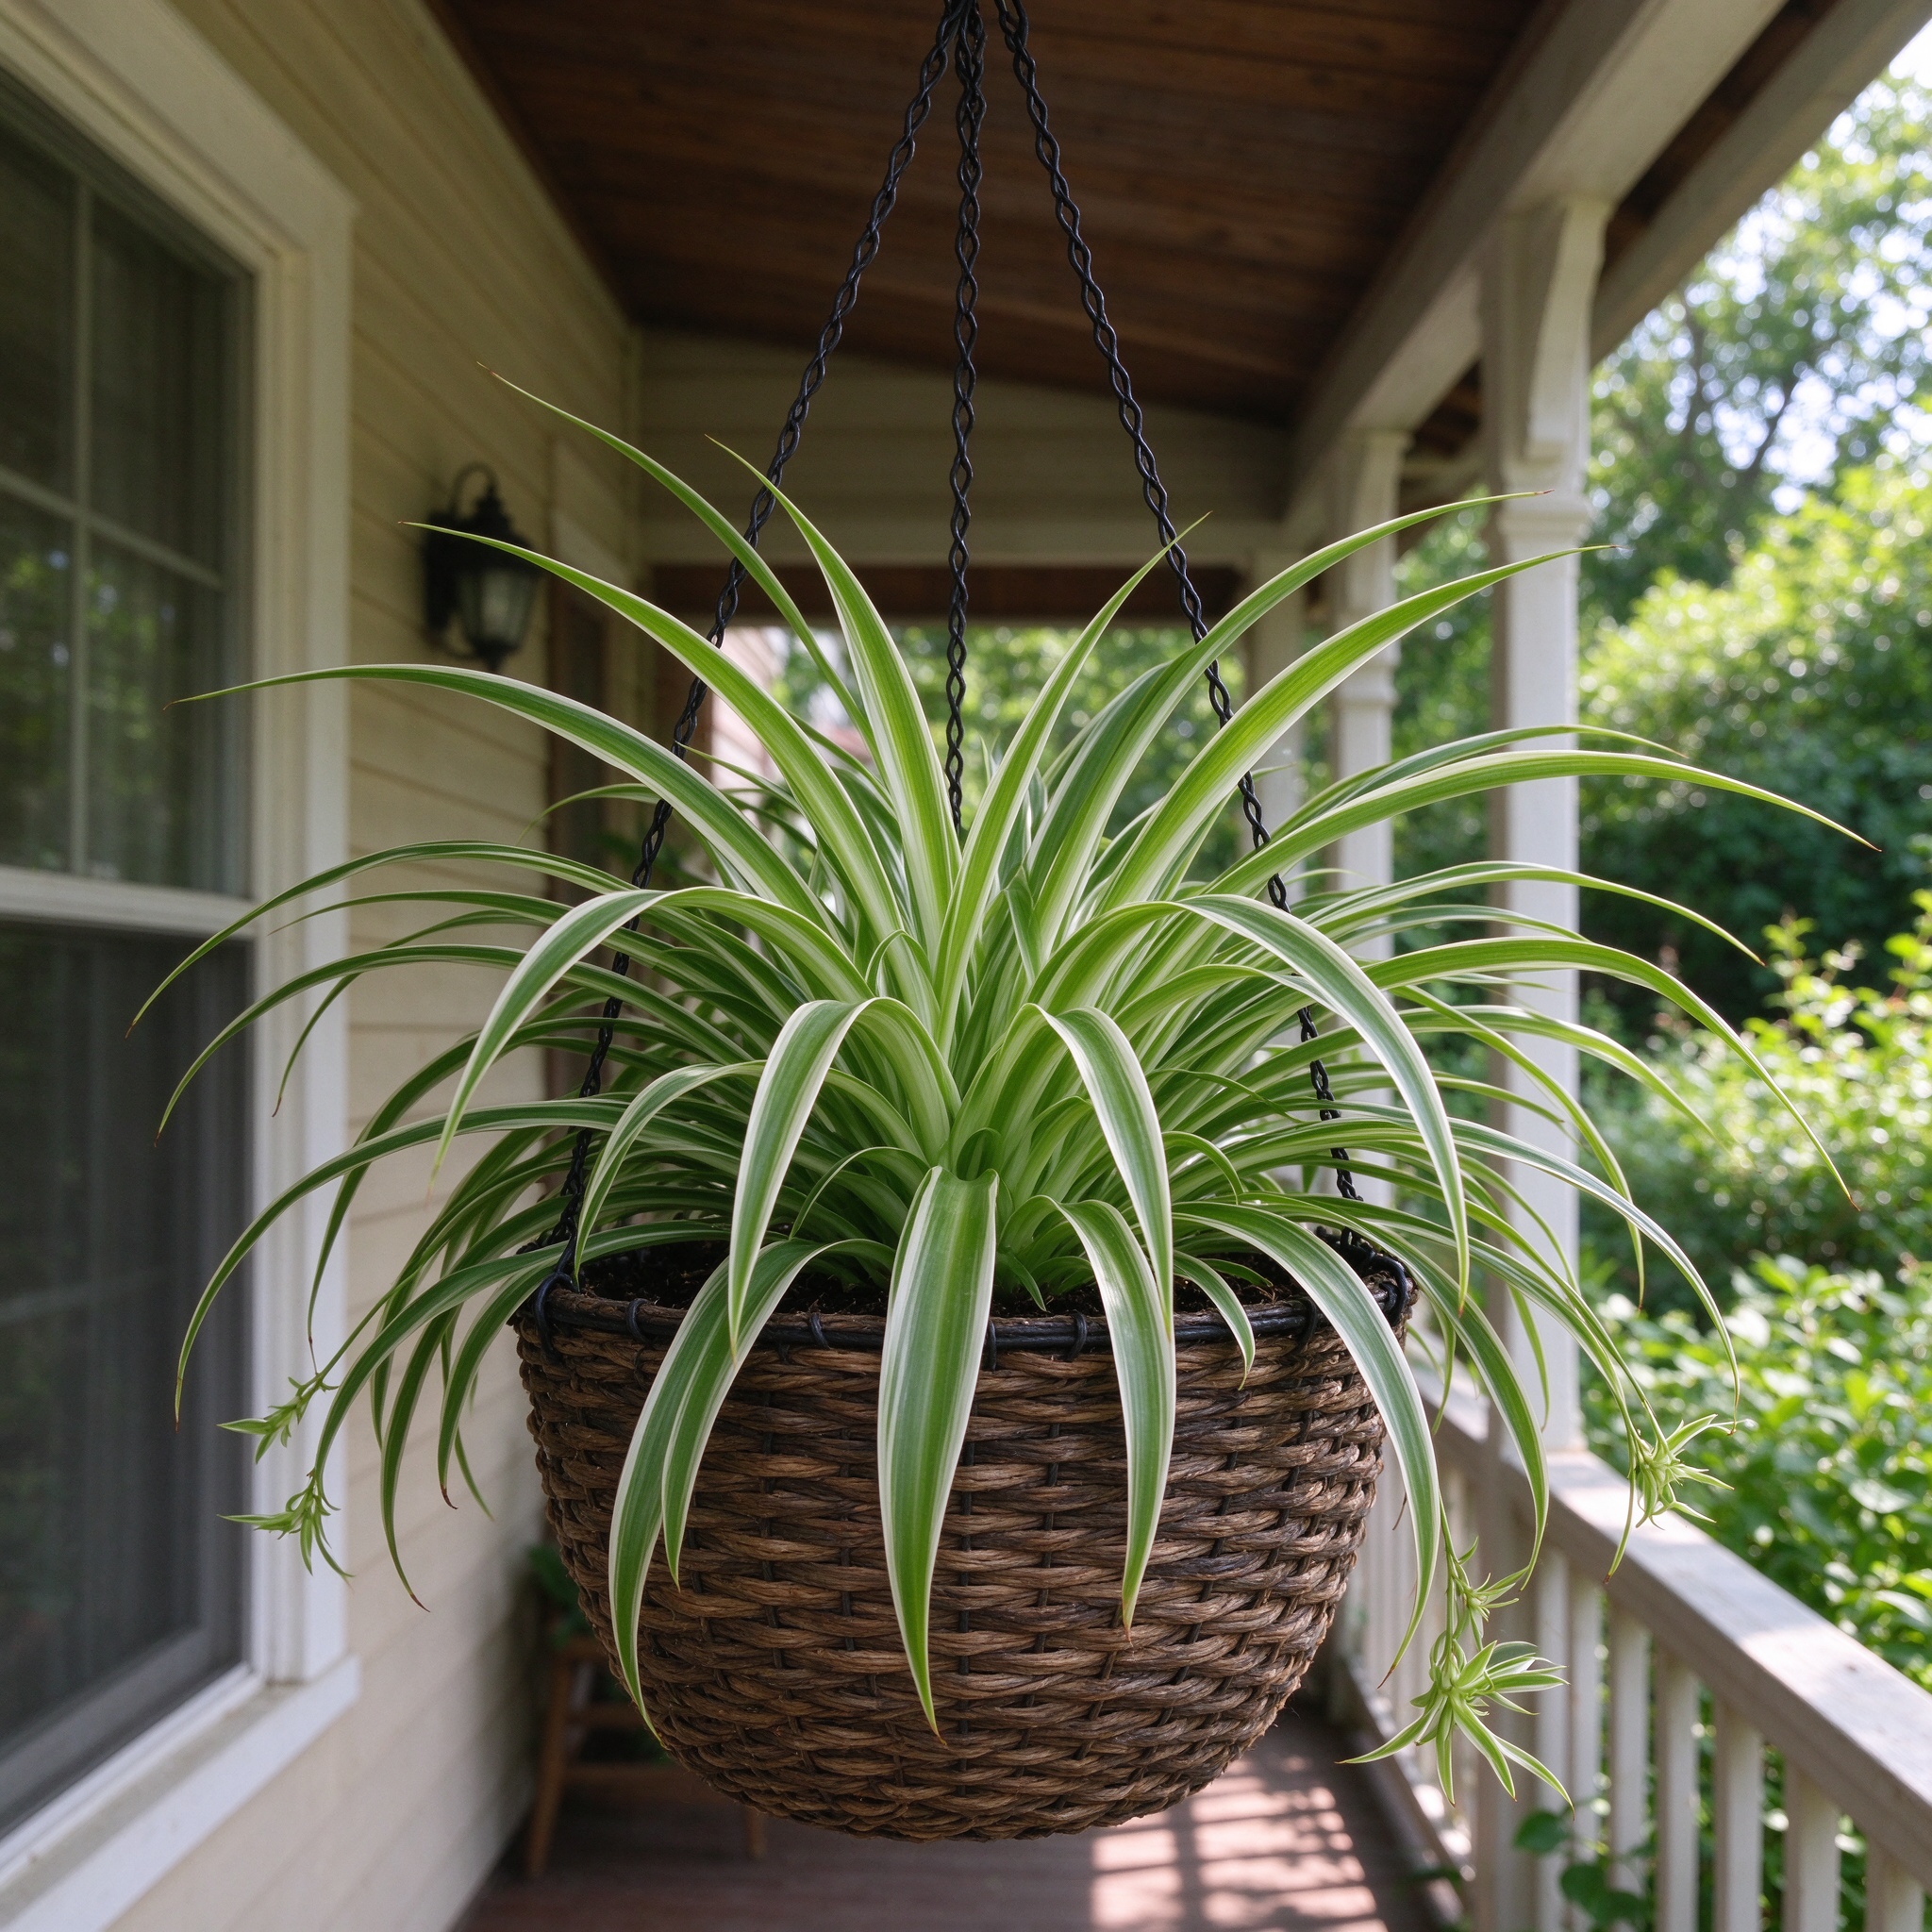
(2 to 4 weeks after purchase)- •A newly bought spider plant is adjusting to your home's light, temperature, and humidity after leaving the nursery.
- •Keep it in bright indirect light, water when the top inch dries, and do not fertilize or repot immediately.
- •Some lower leaves yellow or a tip or two browns during this settling-in period; that is normal.
- •Wait until the plant pushes out a new leaf before moving it or changing its care routine.
 2
Root and rosette establishment
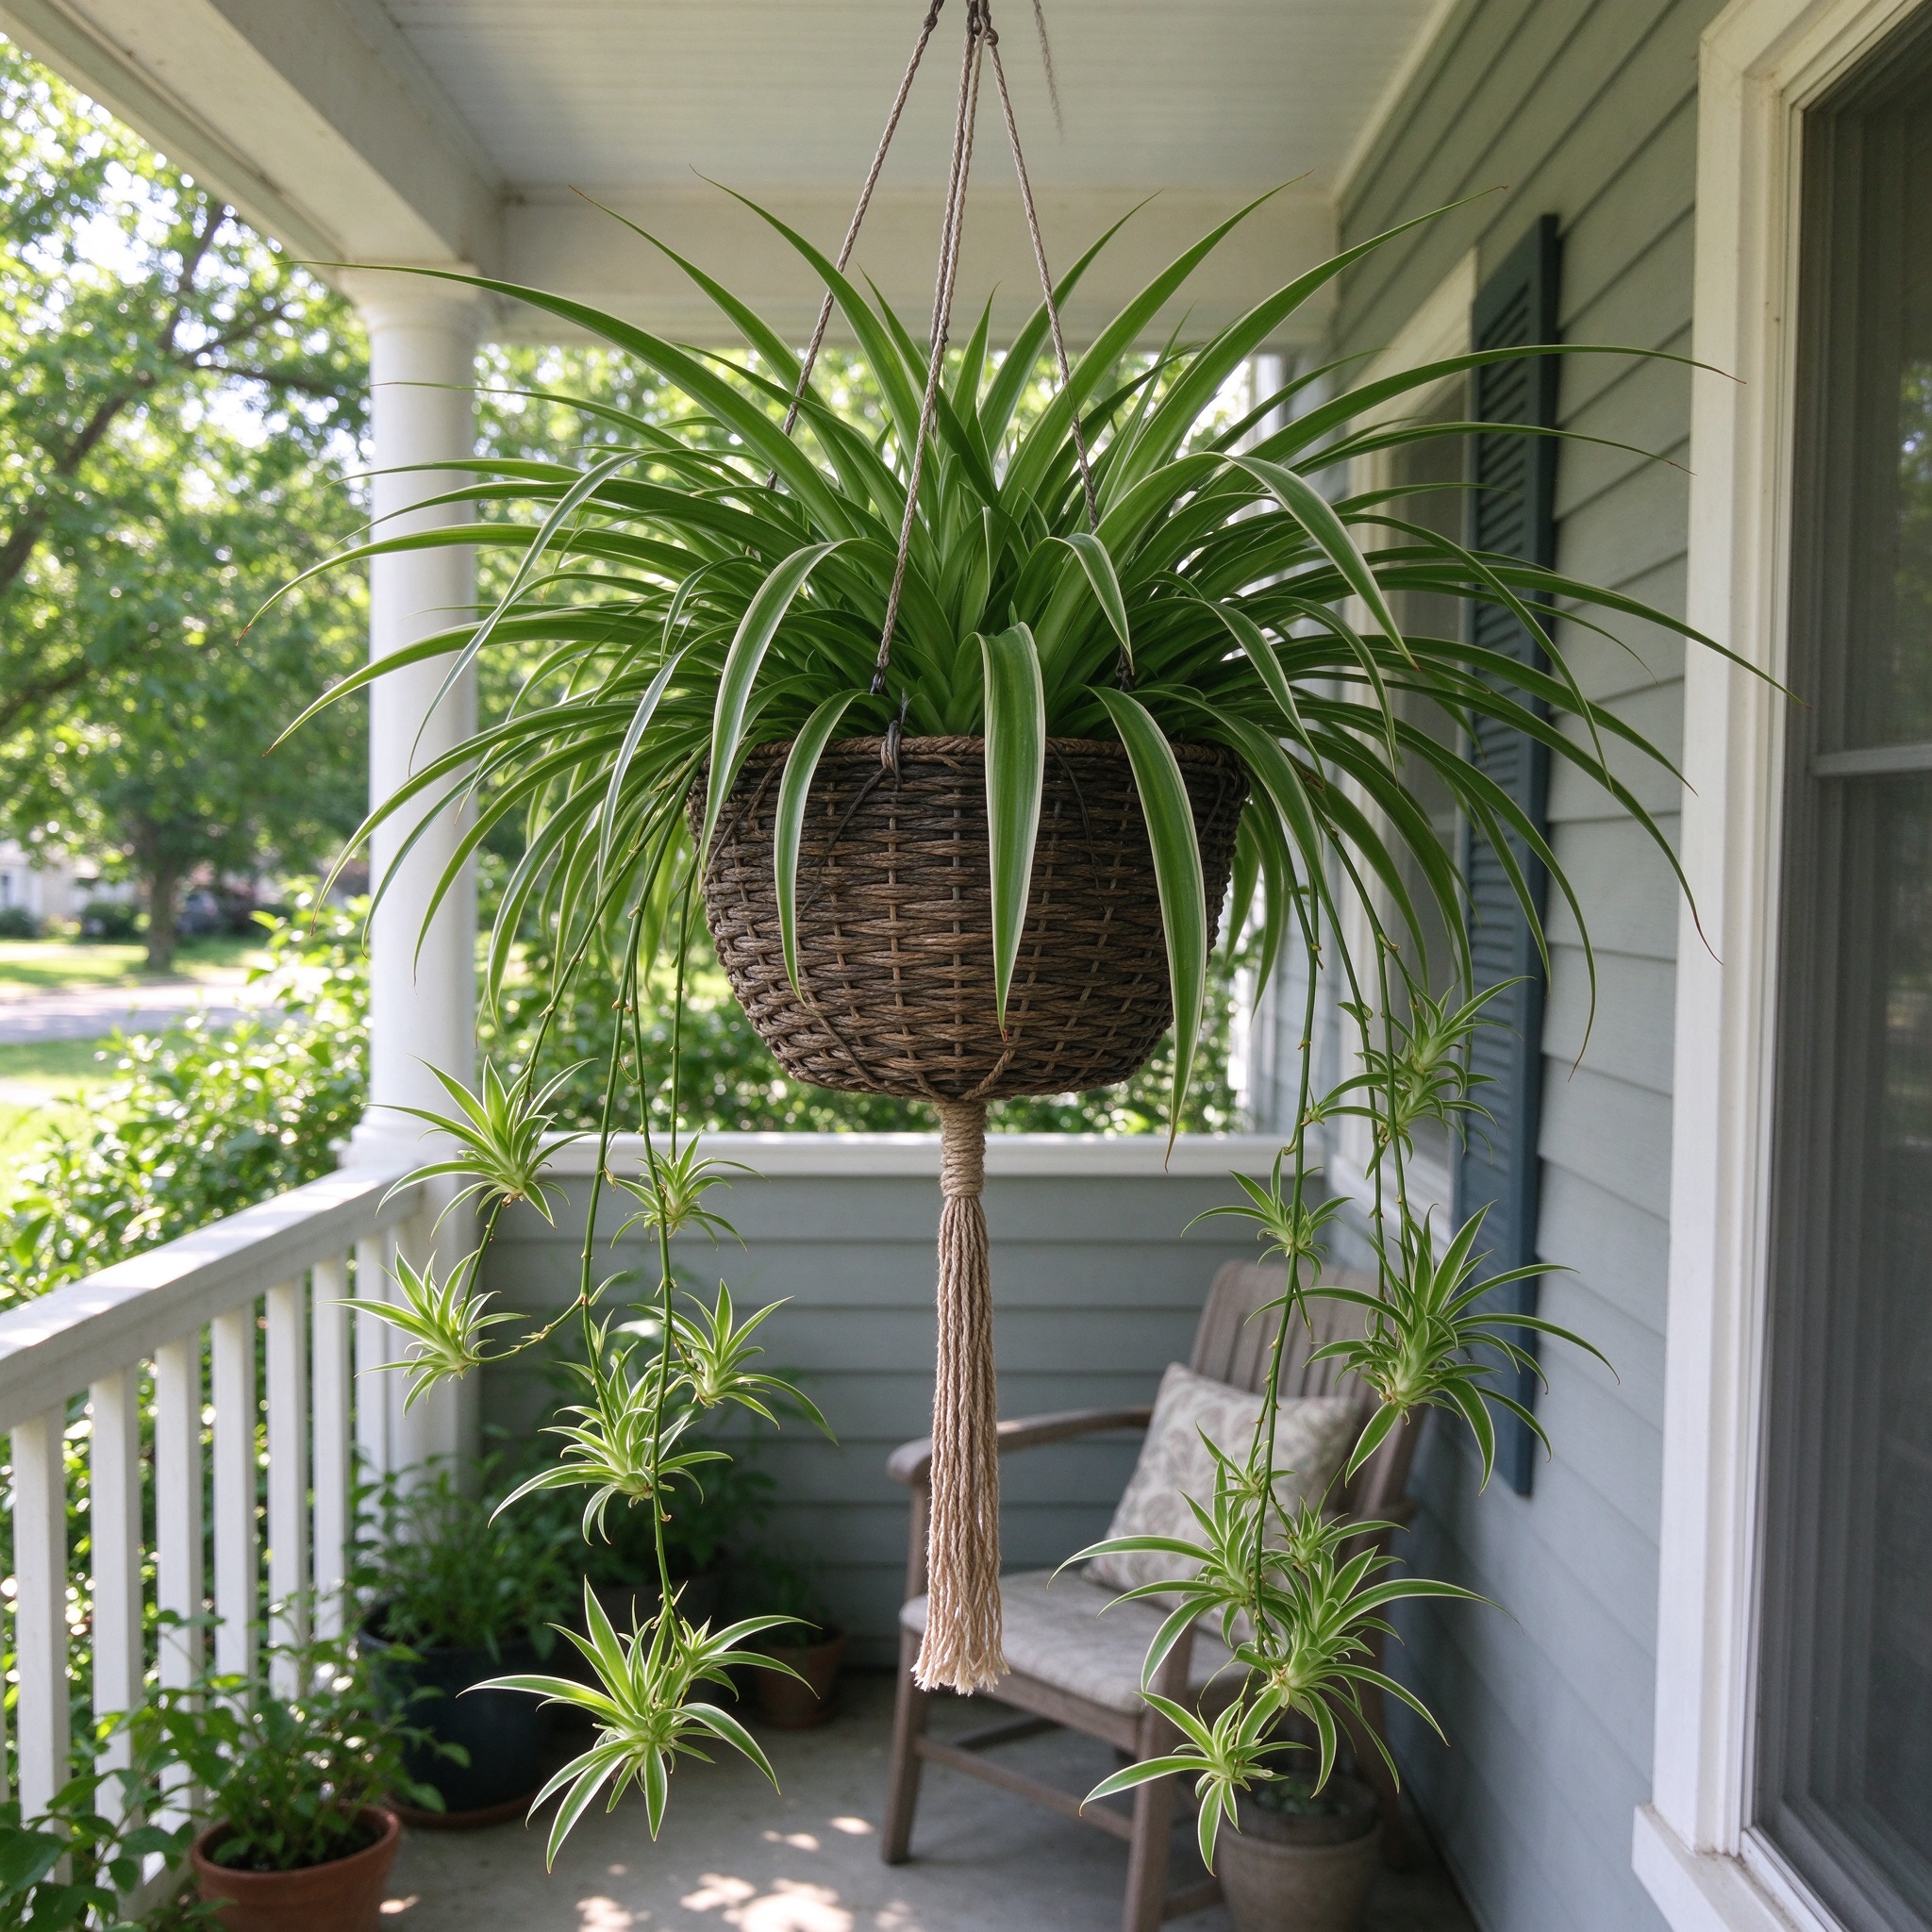
(Weeks 1 to 6 months)- •During this stage the plant builds its fleshy root system and fills out the central rosette of arching leaves.
- •Growth is medium-speed; a healthy plant produces several new strappy leaves a month in good light.
- •Keep the soil lightly moist, feed at half strength monthly in spring and summer, and rotate the pot weekly.
- •The rosette should get wider and fuller; if it stalls, check for too-dry soil or too-dark light.
 3
Mature foliage and runner production
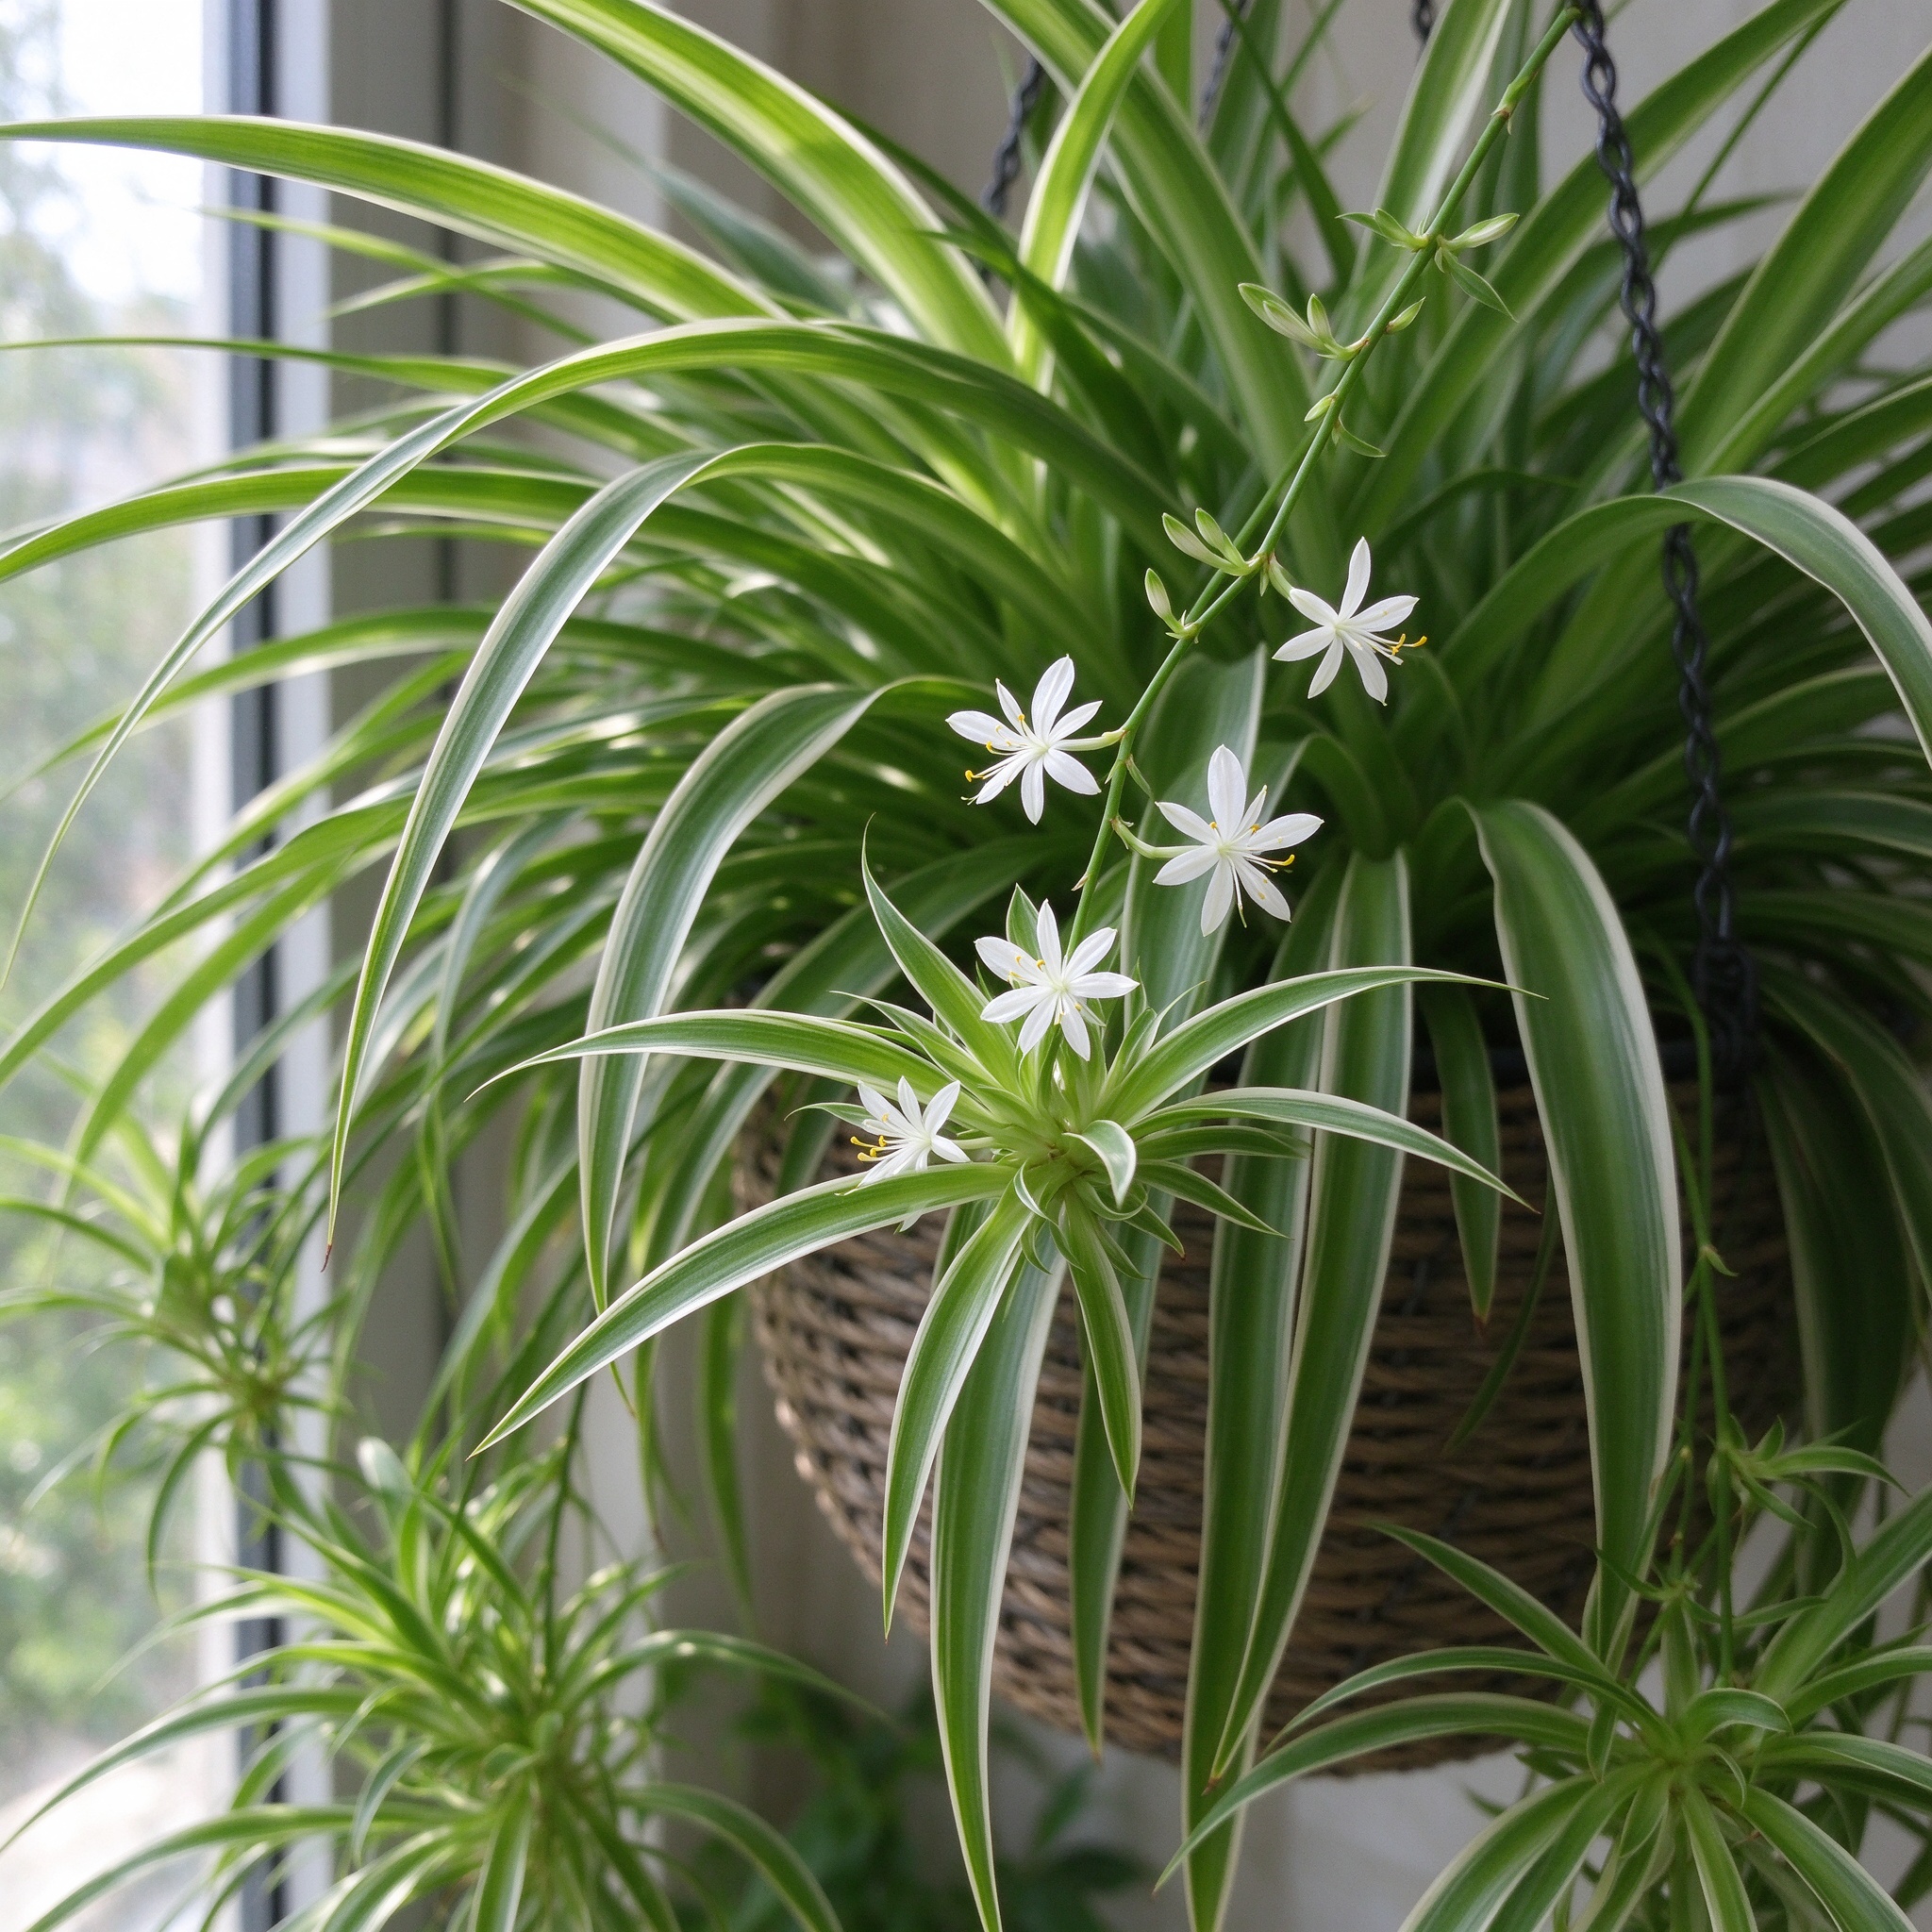
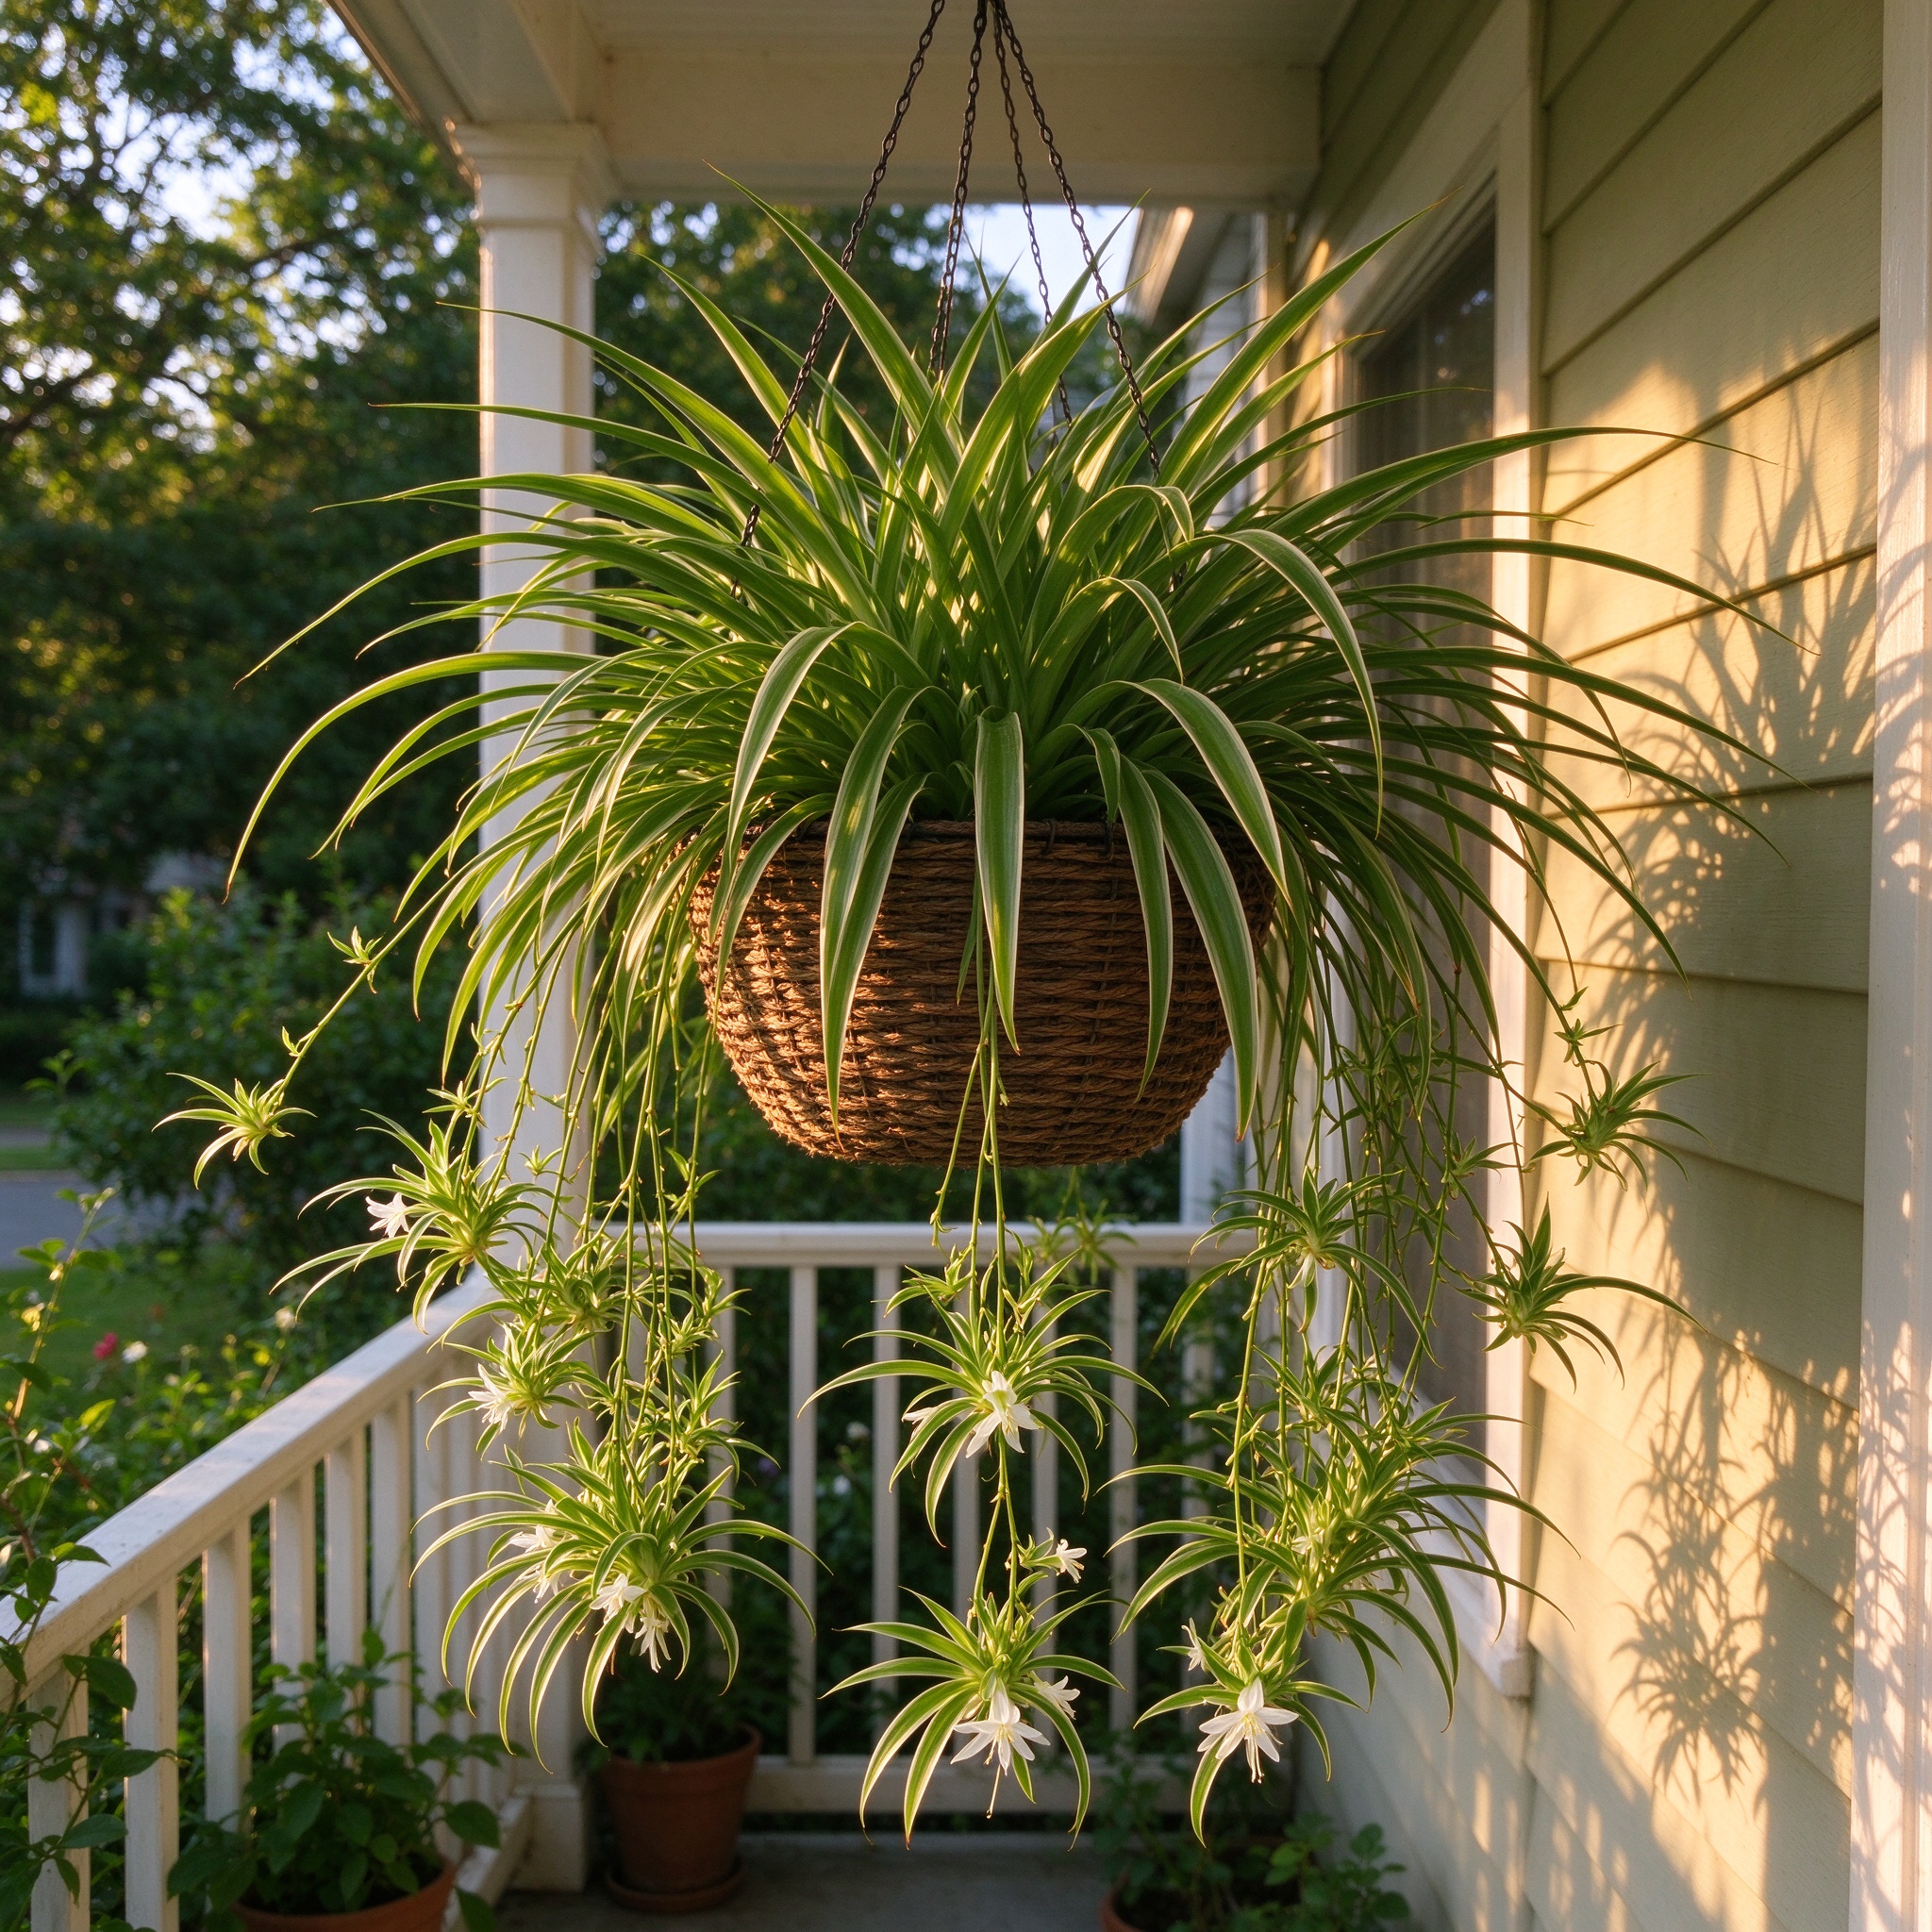
(6 months to 2+ years)- •Once the plant is mature and slightly pot-bound, it sends up long arching stolons that carry tiny white star-shaped flowers and then baby plantlets at their tips.
- •This is the signature cascading, spidery look the plant is named for.
- •Short days and long, uninterrupted nights trigger the runners, and moderate feeding supports them.
- •This is when the plant earns its spot in a hanging basket.
 4
Propagation / division stage
(Spring or early summer)- •Mature spider plants cycle into propagation mode: the plantlets on the runners develop their own roots, and crowded clumps can be split at repotting time.
- •Peg a plantlet into a small pot while attached, snip it once rooted, or divide the crown by hand.
- •Each new plantlet grows into a full rosette in a few months, letting one healthy mother plant produce a whole collection over a year or two.
💧 Detailed Care Guide
☀️ Light Requirements
- •Spider plant prefers medium light levels yet can tolerate deep shade, and it is intolerant of direct sunlight.
- •Give it bright indirect light near an east window or a few feet back from a south or west window.
- •Too much direct sun scorches the leaves and washes out the stripes; very dark corners slow growth and reduce the number of runners the plant produces.
💧 Watering
- •Grow it in moist soil with medium air humidity, though it is tolerant of drought and dry soil.
- •Let the top inch of soil dry out briefly between waterings, then water thoroughly. Reduce watering during winter, when growth slows.
- •Importantly, avoid watering with straight tap water, because chlorine and fluorides can cause leaf tip burn; rainwater or distilled water is better.
🌡️ Temperature
- •Keep temperatures above 45 degrees F at all times, and aim for a normal indoor range of about 60 to 75 degrees F.
- •UF/IFAS notes that temperatures below 55 F are too cool and those above 80 F are too warm, which makes a typical living room ideal.
- •Keep the plant away from cold drafts, air-conditioning vents, and heating radiators that swing the temperature up and down.
🌱 Soil & Fertilizer
Soil:
- •Use a regular, well-draining, loamy potting mix with a roughly neutral pH (6.0 to 8.0).
- •Standard houseplant potting soil works fine; adding a little perlite or orchid bark improves drainage for plants that tend to stay wet.
- •The plant is forgiving of a wide range of soil conditions as long as the pot drains freely and does not sit in a saucer of standing water.
Fertilizer:
- •Feed with a balanced liquid houseplant fertilizer at half strength about once a month in spring and summer.
- •Do not over-fertilize, because excess fertilizer decreases plantlet formation and can contribute to brown leaf tips.
- •Skip fertilizer entirely in fall and winter, when the plant is resting, and flush the pot with plain water periodically to prevent salt buildup.
📝 Step-by-Step Planting Guide
- 1
Choose the right spot and pot
- •Pick a location with bright indirect light, such as near an east-facing window or a few feet back from a south or west window, and keep the plant out of direct sun, which scorches the leaves.
- •A hanging basket or a pot on a high shelf is ideal because the arching leaves and runners can cascade over the edge.
- •Choose a container with at least one drainage hole and size it only one to two inches wider than the root ball; spider plants like being slightly crowded and produce more runners when they are not swimming in an oversized pot.
- •Weight the basket or use a pot with a saucer so it does not tip as the plant gets heavier.
- 2
Pot up with well-draining mix
- •Use a standard houseplant potting mix that is loamy and drains freely, with a pH near neutral.
- •Add a handful of perlite or orchid bark if your mix tends to stay soggy.
- •Place a small layer of soil in the bottom of the new pot, set the plant so the root crown sits at the same depth it was in the nursery pot, and fill in around the sides, tamping gently to remove air pockets.
- •Do not bury the base of the leaf rosette; crowns planted too deep rot easily.
- •After potting, water thoroughly until water runs out the drainage holes, then let the pot drain completely before hanging or setting it back on its saucer.
- 3
Water on a steady indoor rhythm
- •Spider plants want evenly moist soil in the growing season, but they forgive the occasional missed watering.
- •Let the top inch of the potting mix dry out briefly between drinks, then water until it drains freely.
- •In winter, when growth slows, cut back to letting the soil dry out more deeply between waterings.
- •Because the plant is sensitive to chlorine and fluorides that cause leaf tip burn, water with rainwater, distilled water, or tap water that has sat out overnight rather than straight from the faucet.
- •Never let the pot sit in a saucer of pooled water; dump the saucer after each watering.
- 4
Maintain humidity and feed lightly
- •Average indoor humidity is fine, but the plant looks its best with medium air moisture.
- •If your home is dry in winter, run a small humidifier nearby or set the pot on a tray of pebbles filled with water, making sure the pot itself sits above the waterline.
- •Dust the long leaves occasionally by wiping them with a damp cloth so the plant can photosynthesize efficiently.
- •Feed with a balanced liquid houseplant fertilizer diluted to half strength once a month from spring through summer, and stop in fall and winter.
- •Resist the urge to over-fertilize, because excess feed suppresses runner and plantlet production.
- 5
Propagate the baby plantlets
- •Once the mother plant sends out long stolons tipped with baby plantlets, you have free new plants.
- •Either peg a plantlet down into a small pot of moist potting mix while it is still attached to the mother, keep the mix moist, and snip the stolon once the baby has rooted on its own; or wait until the plantlet is large and has formed tiny roots of its own, snip it off, and pot it directly.
- •New runners form when the mother plant gets short days and long, uninterrupted nights of less than 12 hours of light for at least three weeks, so a room that is not lit late into the evening is the best trigger.
- •Dividing a crowded root clump at repotting time works the same way.
🌱 Recommended Varieties
Reliable, widely grown cultivars
- •For a first spider plant, start with the classic clones sold in every nursery.
- •'Vittatum' is the most common selection, with medium green leaves and a wide, creamy-white central stripe running down each arching blade.
- •The solid all-green species (often just sold as Chlorophytum comosum) is the toughest and most vigorous.
- •'Variegatum' has green leaves edged in white or cream margins instead of a central stripe.
- •All three tolerate low light, bounce back from missed waterings, and produce runners freely.
Curly and narrow-leaved compact forms
- •If your shelf or hanging spot is small, choose a compact or curling cultivar.
- •'Bonnie' has green leaves that curl and twist into a relaxed fountain rather than standing stiffly upright, and it looks great in a small hanging basket.
- •'Bonnie Variegated' combines that curled habit with creamy white stripes on the leaves.
- •'White Stripe' keeps a tidy rosette, with only a narrow white or cream line down the central leaf vein and cream-to-yellowish flower stalks.
- •These stay noticeably smaller and neater than standard Vittatum.
Striped and colored collector cultivars
- •Collectors chase the more unusual variegations.
- •'Milky Way' has a broad white or cream center band with green margins, giving a very light overall look.
- •'Picturatum' carries a central yellow stripe down the leaf.
- •'Hawaiian' opens with bold variegation on the new leaves that gradually fades to green as the leaves age, so the plant shows a mix of bright young growth and mature foliage.
- •These are slightly fussier about light and water but reward a patient grower with striking foliage.
🪴 Growing in Containers
- Hanging baskets are the classic choice:
- •Spider plant does particularly well in hanging baskets or any container where the leaves and runners can cascade down the side.
- •Choose a wire or plastic basket lined with sphagnum, or a simple ceramic hanging pot, and make sure it has a drainage hole and a saucer.
- •Weight the hook for the eventual mass of wet soil and dangling plantlets.
- Pick a pot only slightly larger than the root ball:
- •Do not over-size the pot.
- •A container one to two inches wider than the current root ball keeps the plant a little tight at the roots, which encourages runners and prevents the extra wet soil around the roots that causes rot.
- •A cramped pot that has rhizomes pushing against the sides is the trigger to step up one size, not two.
- Drainage holes are non-negotiable:
- •Every pot must have at least one drainage hole, and you should empty the saucer after each watering.
- •Plastic pots are forgiving and keep moisture longer; terra-cotta dries faster and suits anyone who tends to overwater.
- •Add a layer of pebbles in the bottom of a cache pot if you want to hide the nursery pot inside a decorative planter.
- Mix the soil for drainage and aeration:
- •Use a standard loamy houseplant mix, and blend in up to 20 percent perlite or orchid bark if your waterings tend to run long.
- •The mix should feel light and airy, not dense and peaty.
- •Refreshing the top inch of soil each year is enough for mature plants; full repotting happens every year when young and every other year once mature.
- Elevate pots for humidity and air flow:
- •Set a potted spider plant on a tray of pebbles filled with water so the pot sits above the waterline; this raises local humidity around the long leaves.
- •Leave an inch or two of space between neighboring houseplants so air circulates around the rosette and the leaves dry quickly after watering.
- •Avoid setting the pot directly on a hot radiator or a cold windowsill.
✂️ Pruning & Maintenance
- ✓
Trim brown leaf tips
- •Snip off brown, crispy leaf tips with small scissors, following the natural taper of the leaf.
- •The dead tissue will not re-green, but a clean cut keeps the plant looking tidy.
- •Do not cut healthy green leaf length just to shorten the plant; spider plants look best with their full arching silhouette.
- ✓
Remove yellow or dying outer leaves
- •Pull or snip off the oldest outer leaves as they yellow and fade, cutting them off cleanly at the base of the rosette.
- •This lets the plant put energy into new upright growth and keeps the center open and airy, which discourages mealybugs and crown rot.
- •Remove no more than one or two outer leaves at a time.
- ✓
Harvest runners for propagation
- •Once a baby plantlet has its own little roots, snip the stolon that connects it to the mother, or peg it into a small pot while still attached and snip once rooted.
- •You can also trim back extra runners that you do not want to root, since each runner costs the mother plant energy.
- •A mother plant carrying eight or more plantlets is a good time to thin.
- ✓
Shape the rosette at repotting
- •When you divide a crowded clump, trim any ragged leaf ends and dead tips with sterile scissors so each division looks fresh.
- •Do not prune into the tight central growing point; spider plants grow from the center of the rosette outward, and cutting the crown will deform the plant.
- •A light trim of the outer skirt leaves is all the shaping a spider plant needs all year.
🐛 Pest & Disease Control
Common Pests
Spider mites
Symptoms:- •Fine pale speckling on the arching leaves, faint webbing on the undersides and where leaves meet runners, and a generally dull, washed-out look.
- •Infestations usually flare in hot, dry rooms with forced-air heat.
Control:- •Rinse the plant thoroughly under a lukewarm shower or wipe every leaf top and bottom with a damp cloth to knock the mites off.
- •Boost nearby humidity with a pebble tray, since mites thrive in dry air.
- •Repeat weekly, and treat stubborn cases with insecticidal soap or neem oil spray applied to leaf undersides.
Mealybugs
Symptoms: Cottony white blobs tucked into the tight center of the rosette, where leaves emerge, and along runners; sticky honeydew on the leaf surfaces is a secondary sign.Control:- •Dab individual bugs with a cotton swab dipped in rubbing alcohol, then spray the whole plant with insecticidal soap.
- •Isolate the plant from other houseplants while you treat it, and inspect new plantlets before potting them up, because mealybugs easily ride along on cuttings.
Fungus gnats
Symptoms: Tiny black flies drifting up from the soil when you water; the larvae feed on fine roots and are a sign the pot stays too wet between waterings.Control:- •Let the top inch of soil dry out more consistently between waterings and let the pot drain freely.
- •Sticky yellow cards across the soil surface trap the adults.
- •For persistent larvae, water once with a Bt (Bacillus thuringiensis israelensis) drench or let the root ball dry out a touch more before each drink.
Aphids
Symptoms: Soft green or pink insects clustered on the tender new growth at the base of the plant and on the tips of young runners, causing slight curling and honeydew on the newest leaves.Control:- •Spray the affected growth with a strong jet of room-temperature water to knock aphids off, then follow up with insecticidal soap if they return.
- •Wipe down the leaves and keep the plant healthy with correct light and light feeding; strong spider plants rarely sustain a heavy aphid outbreak.
Common Diseases
Root rot (overwatering)
Symptoms: Yellowing and wilting leaves that stay soft even though the soil is wet; eventually the base of the crown turns mushy and brown and pulls away from the pot easily.Control:- •Stop watering immediately and tip the plant out of the pot.
- •Trim away any mushy, brown roots with clean scissors, repot into fresh, dry, well-draining mix in a pot with drainage, and water sparingly until new growth appears.
- •Going forward, let the top inch dry between waterings and never let the pot sit in standing water.
Leaf tip burn
Symptoms: The ends of the long leaves turn crispy, brown, and dry, sometimes with a yellow halo just below the dead tissue; this is most often a reaction to fluoride, chlorine, or salts in tap water.Control:- •Switch to rainwater, distilled water, or tap water left out overnight before watering, and flush the pot monthly with plain water to leach built-up fertilizer salts.
- •Trim the brown tips with scissors following the natural shape of the leaf; the damage will not heal, but new leaves will come in clean if the water issue is fixed.
Leaf spot (fungal/bacterial)
Symptoms: Small tan or brown spots, sometimes with a yellow halo, on the leaves; spots enlarge when water sits on the foliage or air does not circulate around a crowded rosette.Control:- •Water the soil rather than the leaves, and space plants so air moves freely around the rosette. Remove and destroy heavily spotted leaves.
- •In stubborn cases, stop wetting the foliage entirely and improve airflow; a mild copper-based houseplant spray can break the cycle.
Crown rot
Symptoms:- •The center of the rosette turns soft, brown, and slimy, and the whole plant slips out of the pot because the base has rotted.
- •It usually follows overwatering combined with burying the crown too deep in soil.
Control:- •If caught early, repot the plant at the correct depth, with the crown of the rosette sitting right at the soil surface, in fresh, dry mix.
- •Severely rotted crowns cannot be saved, but healthy plantlets on runners can be removed and potted to restart the collection.
Powdery mildew / dry tip dieback
Symptoms: A faint gray-white powder on leaves, or gradual drying back of older outer leaves in very warm, dry, stale air; not usually fatal but disfiguring.Control:- •Improve air circulation around the plant and avoid cold, still corners.
- •Wipe leaves regularly, keep humidity moderate rather than desert-dry, and remove the worst-affected outer leaves.
- •Spider plants in a breezy room with medium humidity almost never develop this.
🍅 When to Harvest
- •There is no edible harvest with a spider plant.
- •Instead, the plant is ready to propagate once the mother plant sends out long stolons tipped with baby plantlets, and those plantlets have developed their own little roots or are large enough to snap off and pot.
- •A mature, full plant that is cascading with runners is the visual 'payoff' moment most growers aim for.
❓ Frequently Asked Questions
- 1
Why are the tips of my spider plant turning brown?
- •Brown leaf tips are the classic complaint with spider plants, and they almost always come from the water rather than from a pest or disease.
- •Chlorine and fluoride in tap water, plus built-up fertilizer salts, draw moisture out of the leaf ends and leave them crispy and brown.
- •Switch to rainwater, distilled water, or tap water that has sat out overnight, and flush the pot with plain water once a month.
- •Very dry forced-air heat or letting the soil stay bone dry for weeks also contributes; aim for medium humidity and let only the top inch dry between waterings.
- 2
How do I get my spider plant to produce babies (runners and plantlets)?
- •Spider plants make runners tipped with baby plantlets once they are mature and slightly root-bound.
- •Two triggers matter: give the plant bright indirect light for most of the day, and give it long, uninterrupted nights of less than 12 hours of darkness for at least three weeks in fall, because flowering and stolon formation are short-day responses.
- •Do not over-pot the plant and do not over-fertilize, since both suppress runner production.
- •Once the babies form, you can root them while still attached or snip them off once they have tiny roots.
- 3
Are spider plants safe around cats and dogs?
- •Yes.
- •North Carolina State Extension lists spider plants as non-toxic for cats, dogs, and horses, so they are one of the safest trailing houseplants to hang in a living room where pets roam.
- •That said, cats are occasionally drawn to the long leaves and may chew them, which can cause mild stomach upset; hang the basket out of reach of playful kittens or trim the runners you do not want propagated.
- •Toxicity lists can differ by region, so if a pet eats a large amount and shows unusual symptoms, contact your vet.
- 4
How often should I water a spider plant?
- •In spring and summer, water thoroughly whenever the top inch of potting mix feels dry, usually once a week or so depending on light and pot size.
- •In winter, let the soil dry out more deeply between waterings and cut back to roughly every two weeks.
- •Always use a pot with drainage and never let it sit in a saucer of standing water.
- •Spider plants store some water in their fleshy roots and tolerate missed waterings much better than soggy soil, so when in doubt, wait a day or two.
- 5
Can a spider plant live in a dark bathroom or office?
- •Spider plants are unusually shade-tolerant and will survive in deep shade, but they look best and produce the most runners in bright indirect light.
- •In a very dark corner, expect slower growth, fewer stripes on the leaves, and no baby plantlets for a season or two.
- •A bathroom with a frosted window or an office a few feet from a fluorescent fixture works well; a hallway with no window at all is pushing it.
- •Rotate the plant a quarter turn each week so it grows evenly toward the light.
- 6
When and how do I repot a spider plant?
- •Repot young spider plants about once a year, then every other year once they mature, ideally in spring as growth resumes.
- •Choose a new pot only one to two inches wider than the old one, because spider plants like being a bit crowded and bloom and run better when slightly root-bound.
- •Gently tease the root ball apart, set the plant at the same depth in fresh houseplant mix, water it in, and let it drain.
- •If the clump is dense, this is also the moment to divide it into two or three separate plants and pot up any rooted plantlets.
- 7
Why are my spider plant leaves turning yellow?
- •Yellow leaves usually point to watering rather than a pest.
- •The most common cause is overwatering: when the soil stays soggy for days, the roots suffocate and the lower leaves turn yellow and soft, sometimes with a mushy base.
- •Check the mix with your finger; if it is wet and the plant sits in a pot without drainage, let it dry out and repot into fresh, airy mix.
- •Yellow leaves on a bone-dry root ball mean the opposite: the plant has been underwatered and should be soaked thoroughly.
- •An occasional old inner leaf yellowing on a mature clump is normal aging; a whole flush of yellow leaves at once signals a watering problem or a cold draft.
- 8
Why is my spider plant drooping or wilting?
- •The first suspect is underwatering: when the soil has gone bone dry, the long arching leaves flop over and lose their spring.
- •Water thoroughly until it drains, and the leaves usually perk back within a day or two.
- •A second common cause is a root-bound clump: the plant has filled the pot so tightly that the soil pulls away from the pot wall and water runs straight down the side without wetting the roots; repot in spring into a pot only one size larger, or divide the crowded clump.
- •Drooping with soft, yellow, mushy leaves instead means overwatering and root rot, which needs unpotting, root trimming, and fresh mix rather than more water.
- 9
Can I move my spider plant outside for the summer?
- •Yes, once nighttime temperatures stay above about 55°F (13°C), a spider plant can spend the summer on a shaded porch, patio, or balcony in bright indirect light; NC State notes it is intolerant of direct sunlight, so keep it out of midday sun, which scorches the leaves and washes out the stripes.
- •Rainwater suits it well, because NC State warns that tap water chlorine and fluorides can cause leaf tip burn.
- •Bring it back indoors before fall nights drop below 45°F (7°C), and inspect the foliage for any pests that may have climbed aboard outdoors before placing it near your other houseplants.
Source:
NC State Extension Gardener Plant Toolbox — https://plants.ces.ncsu.edu/images/plants/chlorophytum-comosum/
UF/IFAS Gardening Solutions — https://gardeningsolutions.ifas.ufl.edu/images/plants/houseplants/spider-plant/
Photo credit: NC State Extension
Images courtesy of NC State Extension under CC BY license. Thank you to the photographers who make these educational images available.
License: CC BY-NC 2.0 / CC BY 4.0