
How to Grow Thyme: Complete Guide
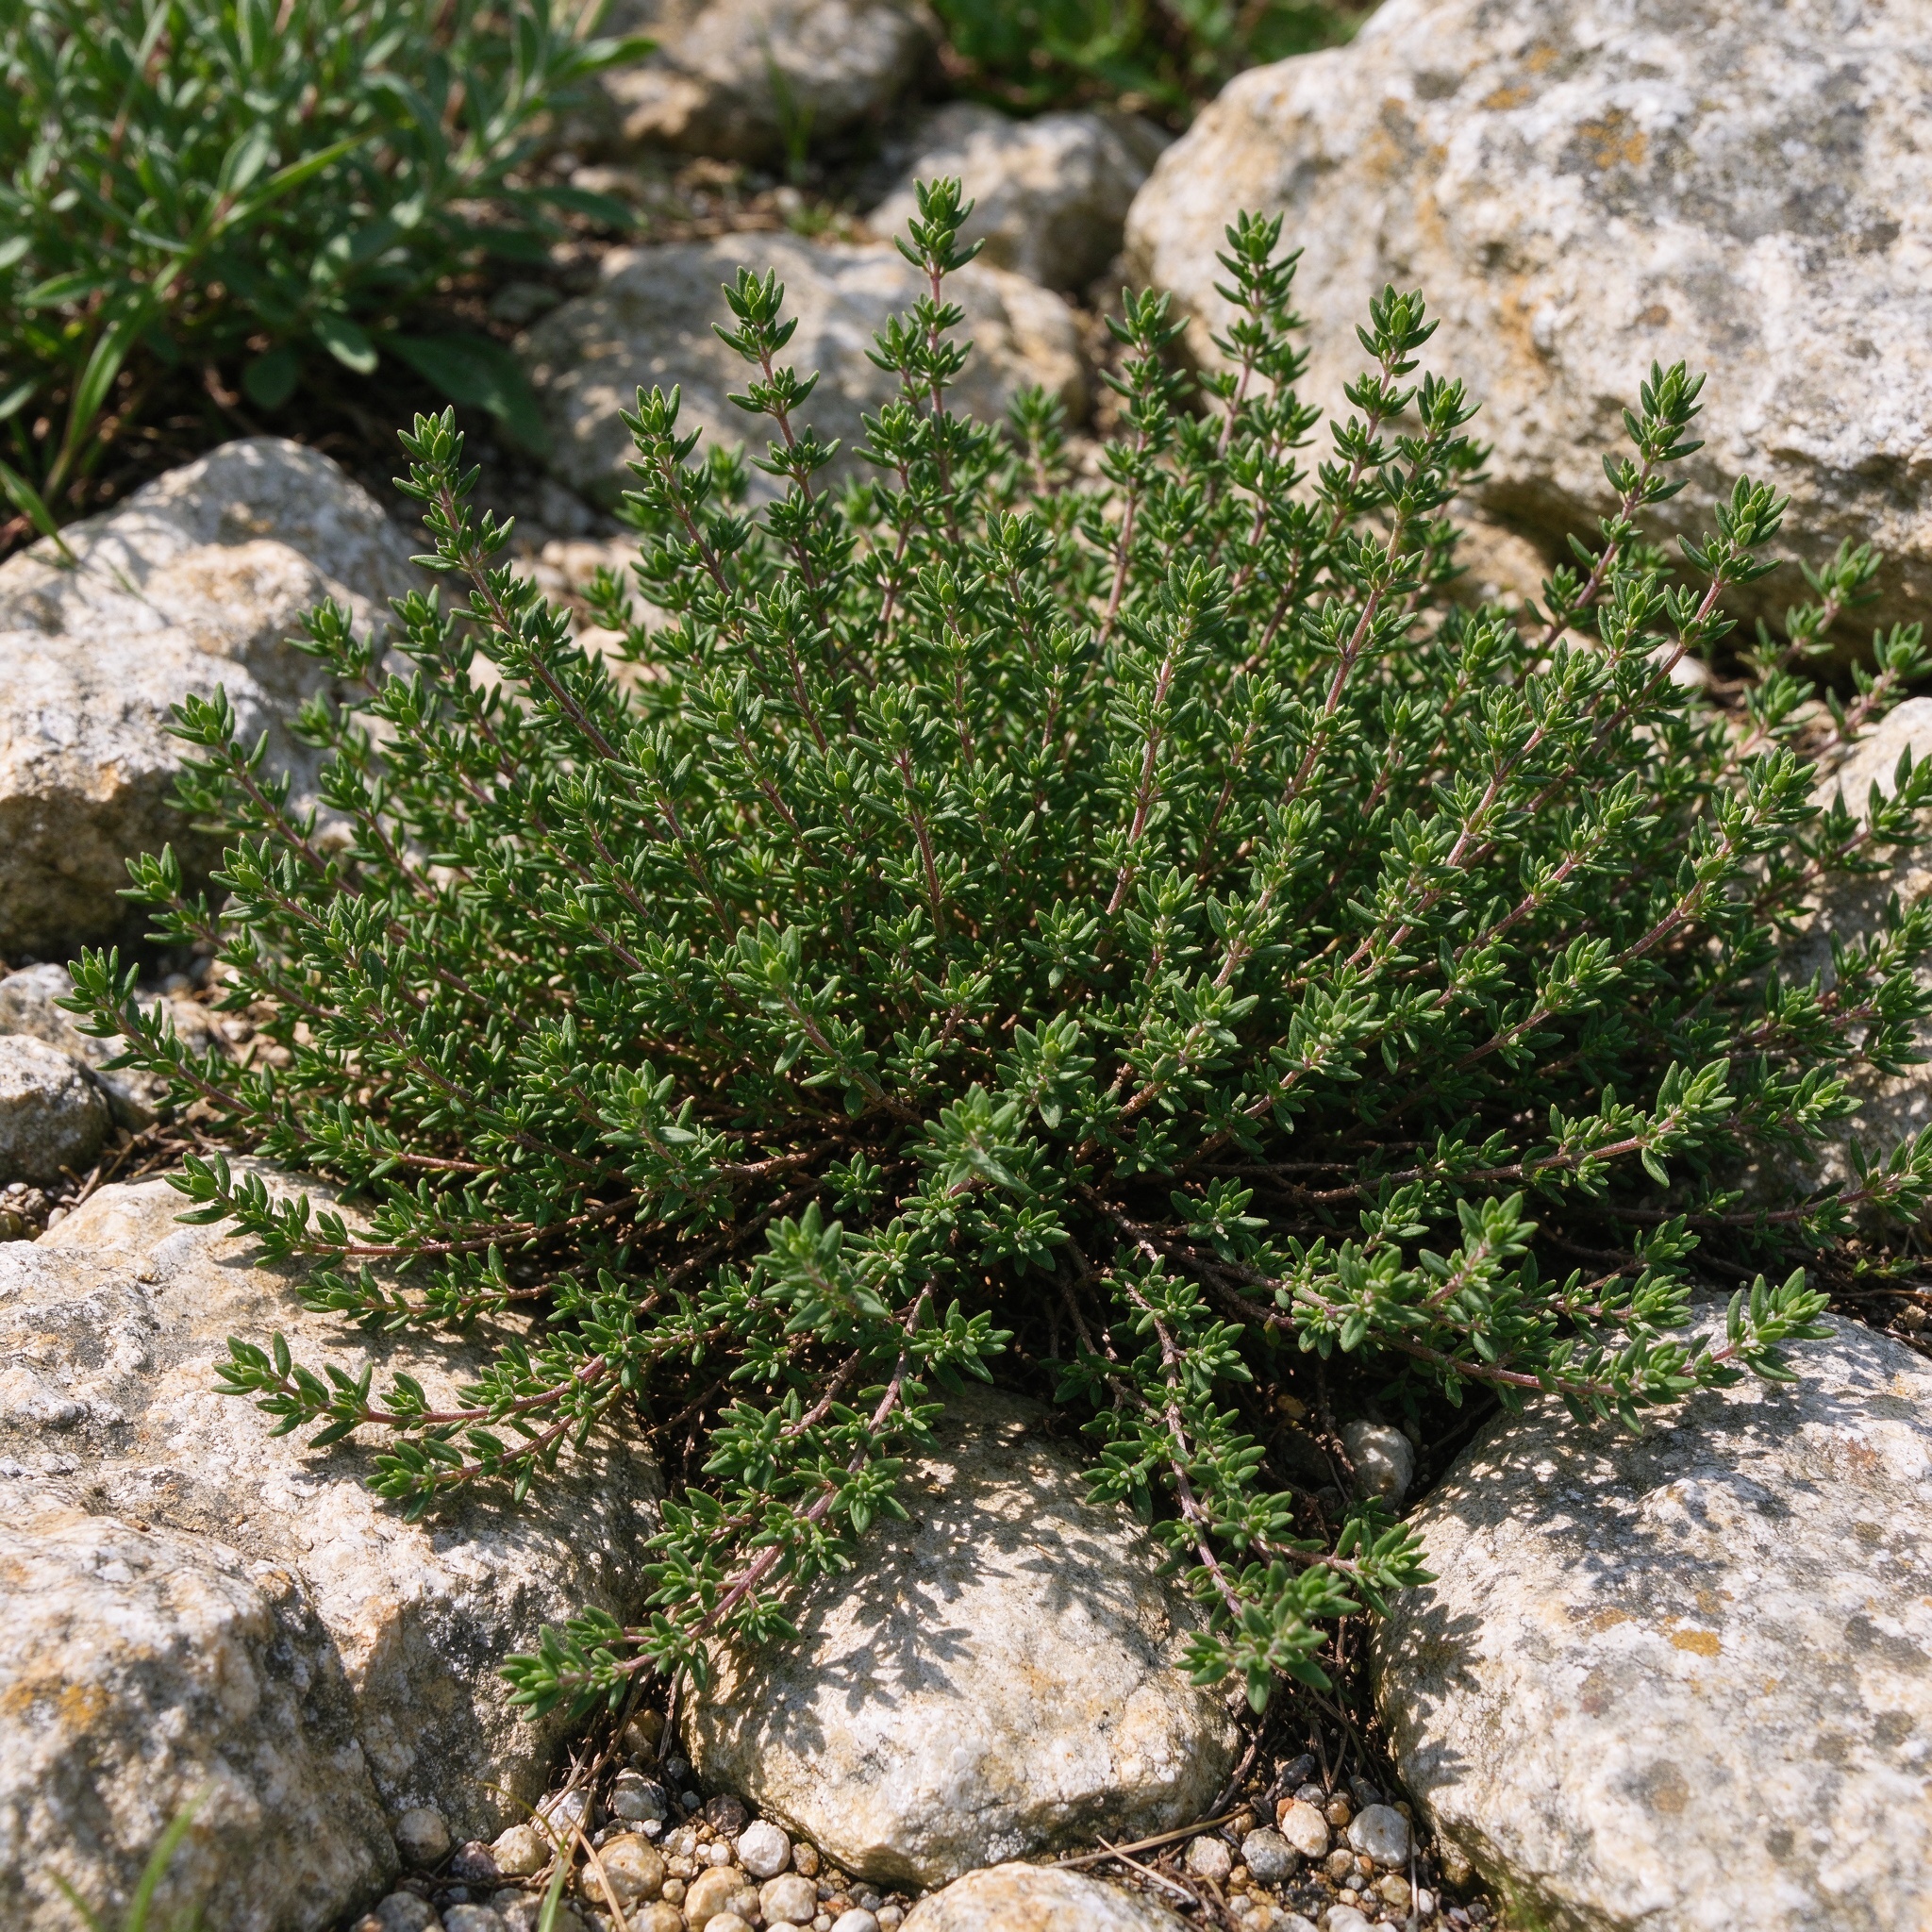
- •Thyme (Thymus vulgaris) is a low, woody-based perennial subshrub in the mint family, growing 6 to 12 inches tall in a spreading mound of tiny aromatic gray-green leaves.
- •Native to the Mediterranean, it thrives in dry, sandy or rocky soil, full sun, and neutral to alkaline pH, and is both drought- and frost-tolerant.
- •Its pale purple or white summer flowers feed bees. Start from plants or cuttings, since seed is slow and uneven.
📋 Quick Facts
Scientific Name: Thymus vulgaris
Family: Lamiaceae
Category: Herb
USDA Zones: 5-9
Light:
- •Thyme demands full sun, 6 to 8 hours a day, and truly suffers in shade.
- •Indoors, grow it on the sunniest windowsill or under lights; sparse, leggy growth usually means it is not getting enough light.
Water:
- •Water deeply only when the soil is completely dry. Once established, thyme is very drought-tolerant and hates wet feet.
- •Overwatering and poorly drained soil are the main reasons plants decline. A gravel mulch keeps crowns dry.
Temperature:
- •Thyme is hardy in zones 5 to 9 and tolerates frost, cold, and dry winters much better than soggy ones.
- •It prefers the Mediterranean rhythm of cool moist winters and hot dry summers. Mulch lightly after the ground freezes in cold regions.
Soil:
- •Plant in sharply drained, sandy or rocky, even poor soil, pH neutral to alkaline.
- •Thyme actually performs best in lean, fast-draining ground; rich, heavy soil makes it floppy and short-lived.
- •Add sand or grit to clay rather than compost.
Harvest:
- •Cut the top 5 to 6 inches of stems just before flowering, when oil content peaks. Leave at least 5 inches of growth and never cut into the hard wood.
- •Harvest in the morning after dew dries; two or more cuts per season are possible. Hang sprigs to dry or freeze them.
Common Problems: Root rot, Gray mold.
📅 When to Plant
- •Plant young thyme plants or cuttings after the ground warms to about 70°F (21°C), typically a few weeks before the last spring frost.
- •Start cuttings indoors 6 to 10 weeks before last frost. In zones 5 to 9, thyme is a hardy perennial that overwinters reliably.
🌱 Growing Stages
 1
Germination (if grown from seed)
(14–28 days)- •Tiny seeds sprout slowly and unevenly on the soil surface; they need light and warmth near 70°F.
- •Seedlings are minute and slow to develop, which is why most gardeners skip seed and start with plants or cuttings.
 2
Cutting establishment
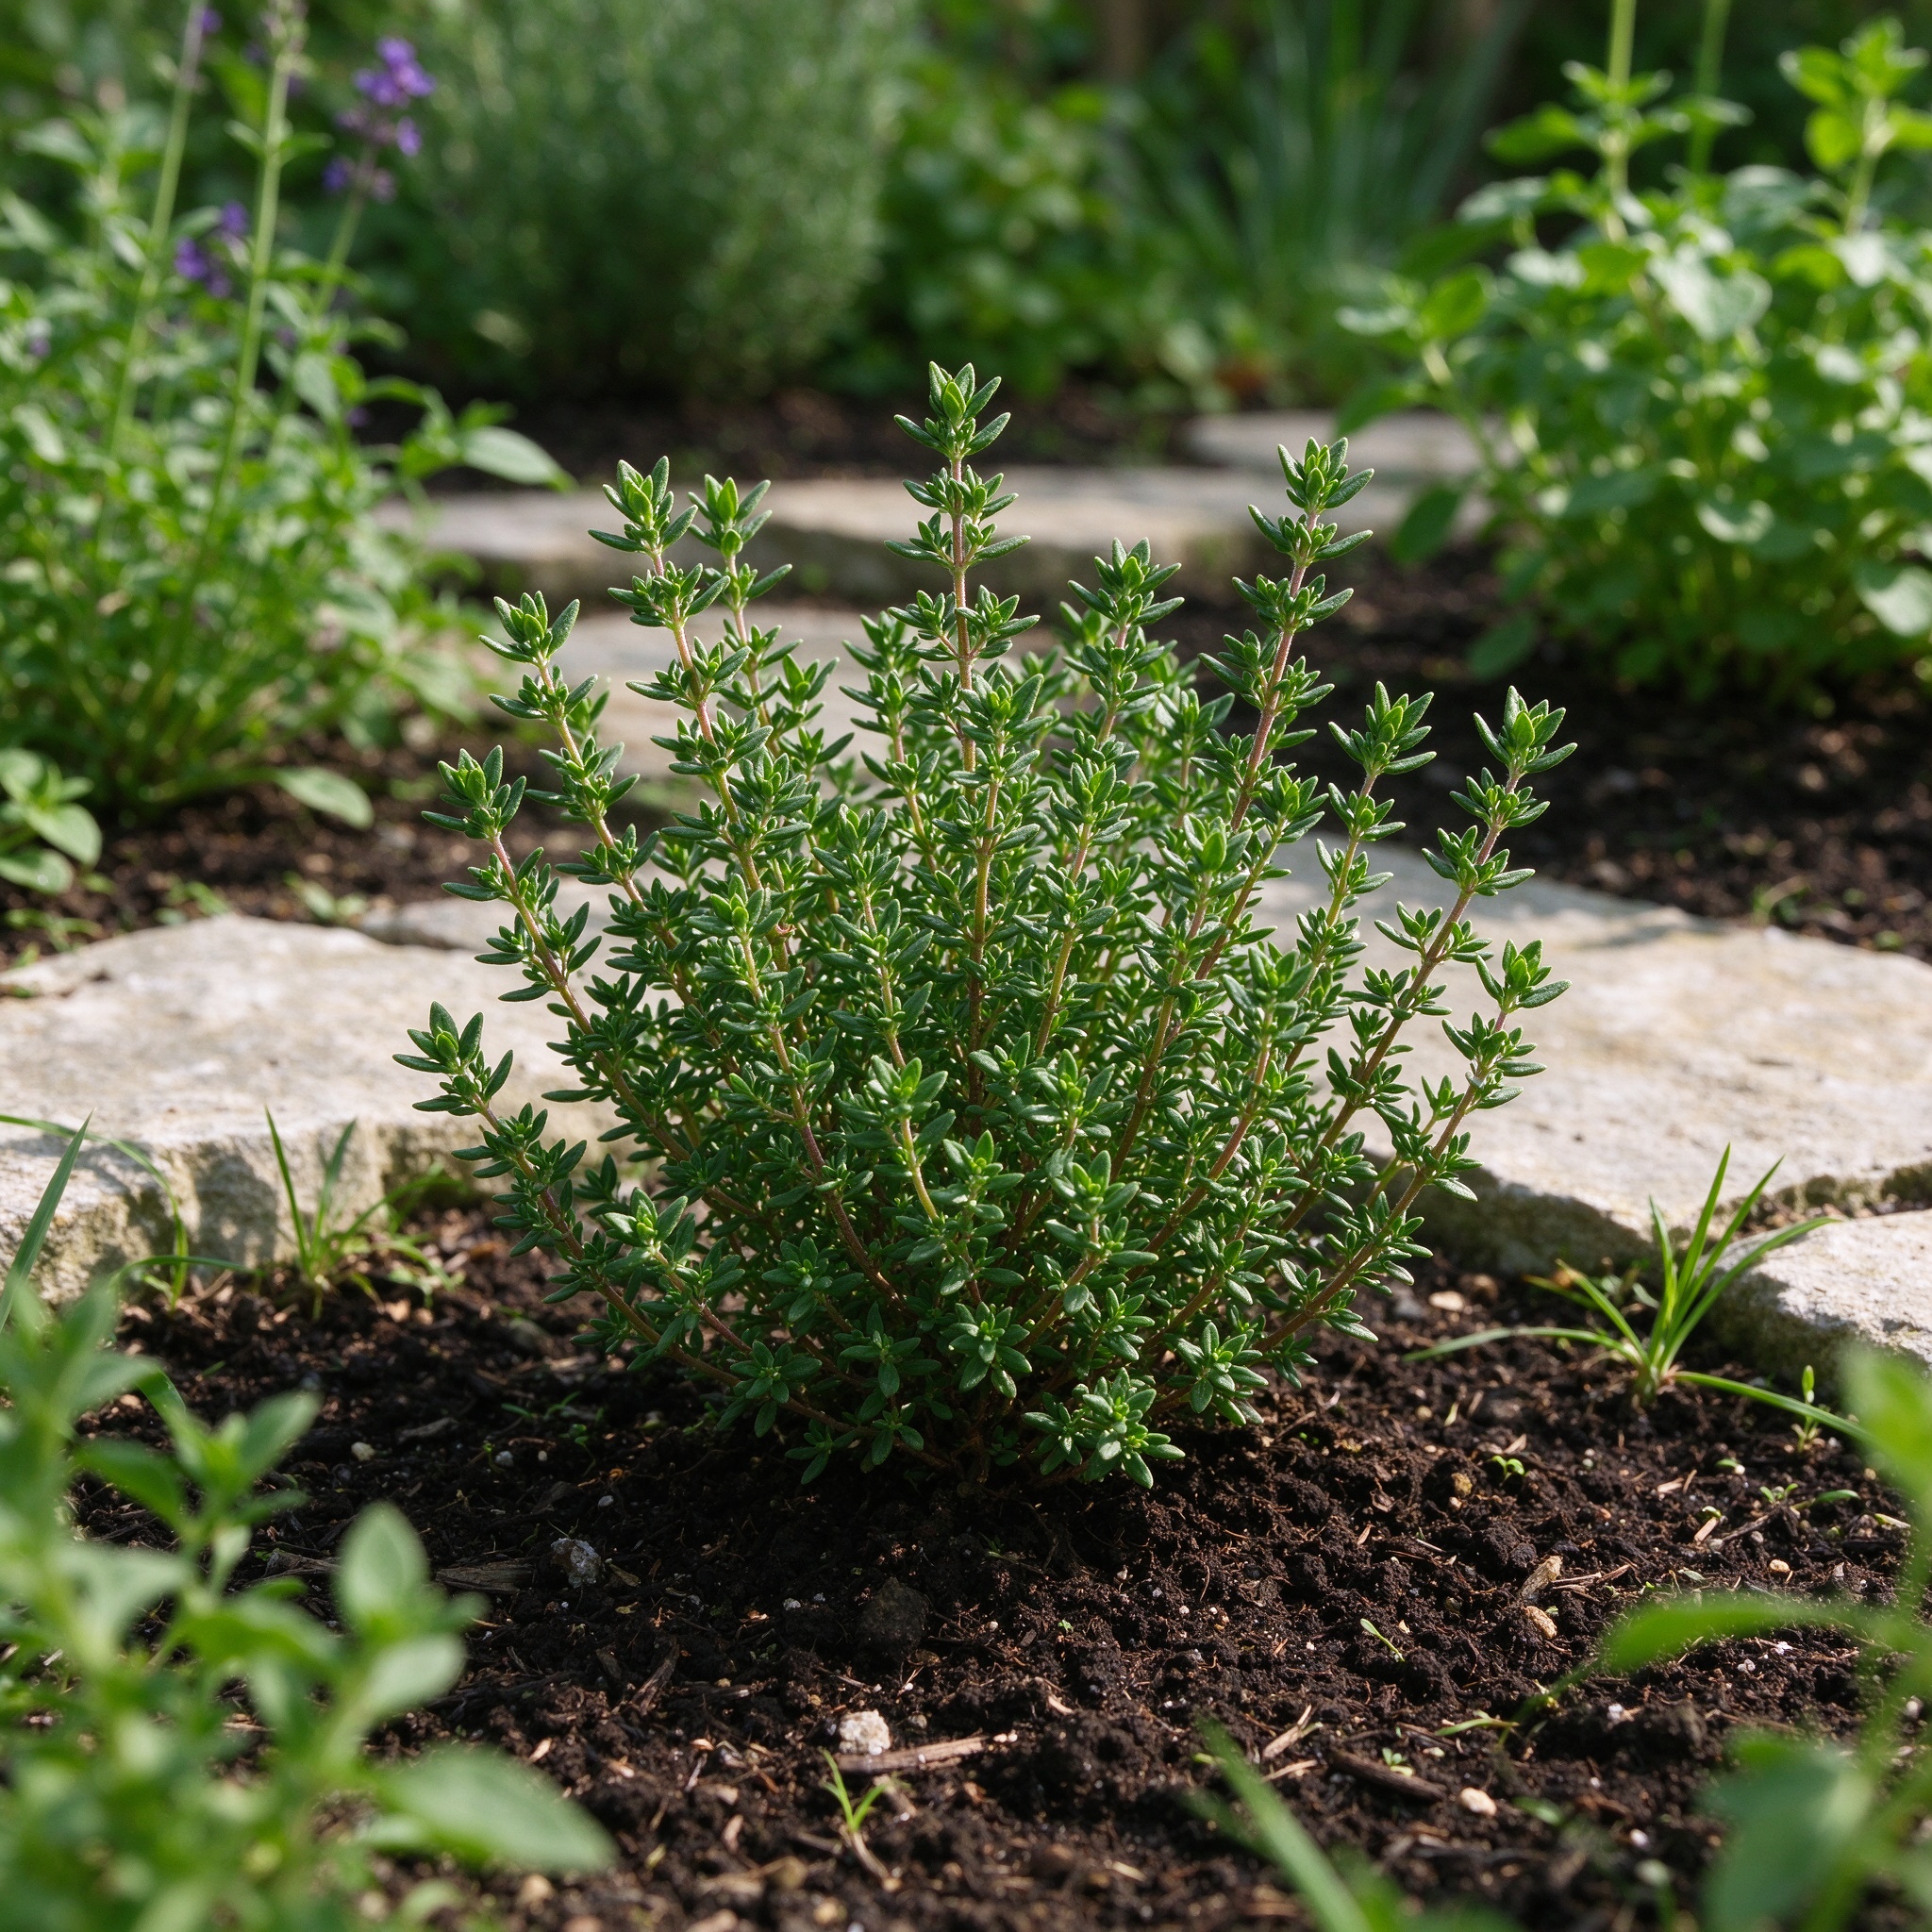
(6–8 weeks)- •A 3-inch tip cutting roots in sterile sand or vermiculite, then is potted up. Once the root ball fills the pot, plant it outside after frost.
- •Growth is modest in the first season.
 3
Mounding growth
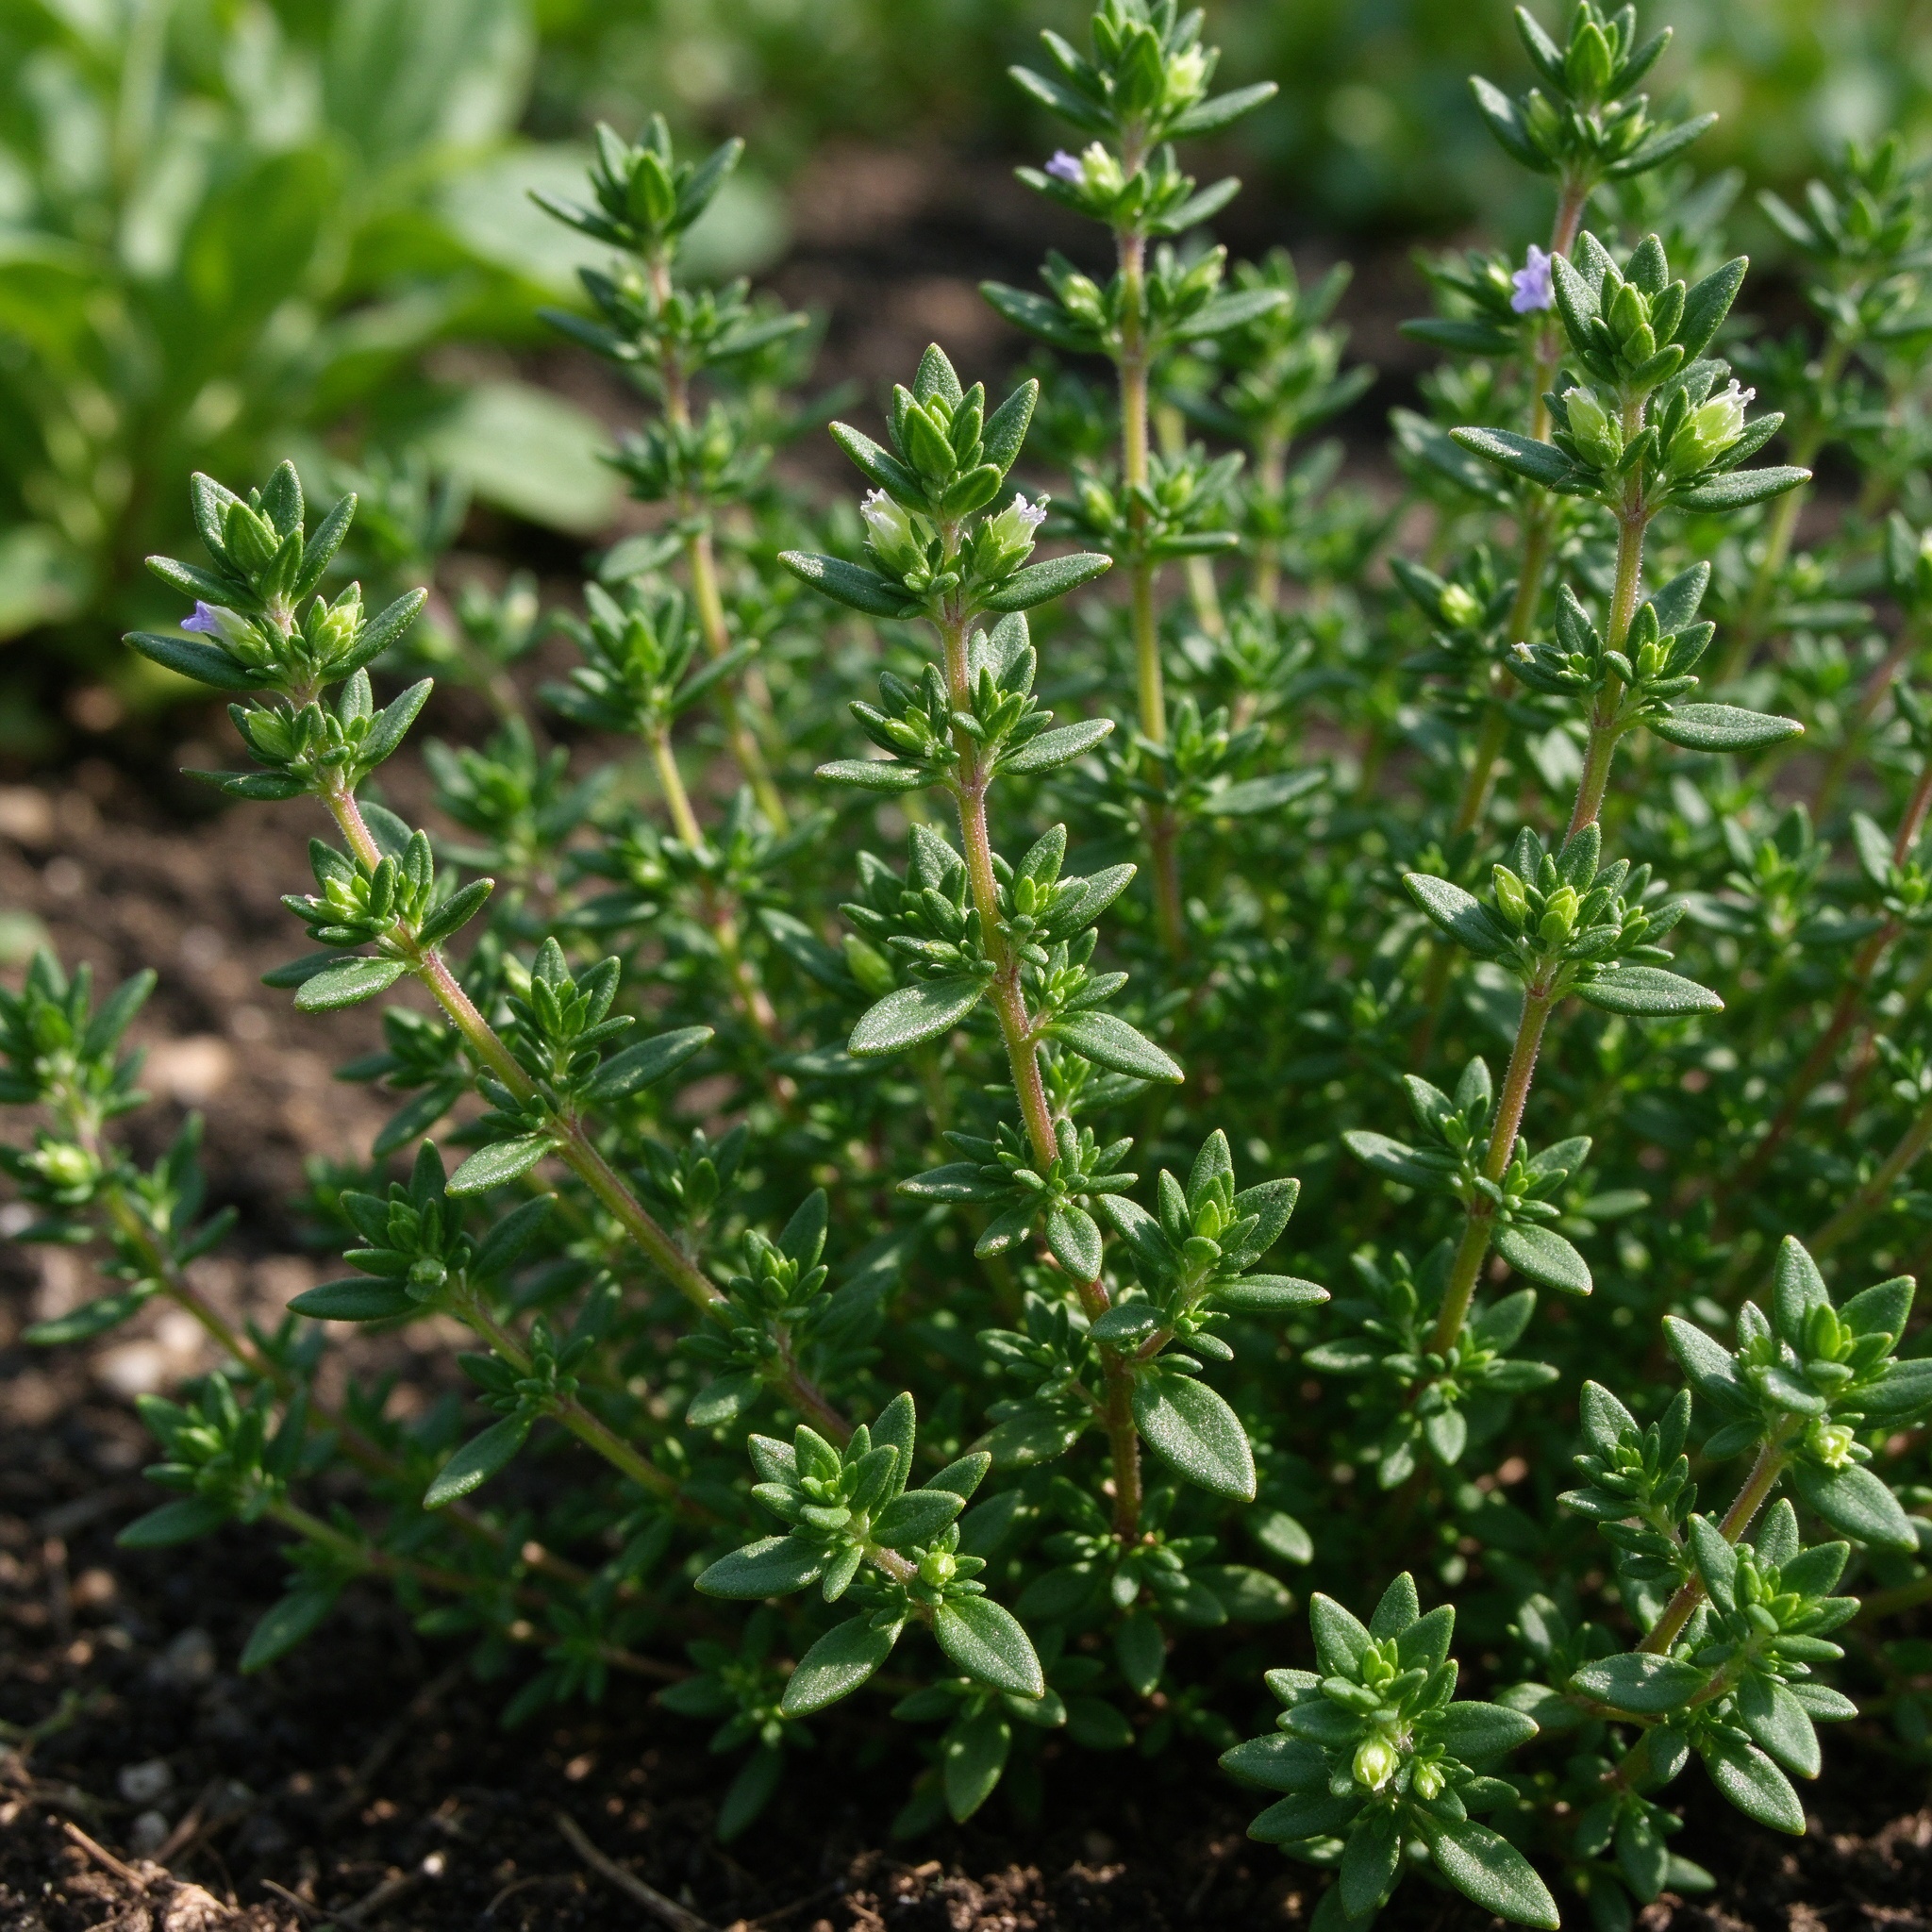
(Spring to summer)- •The plant spreads into a low, dense mat of tiny aromatic leaves.
- •This is the main harvest window: snip stems before bloom, keep it sheared, and water only when the soil dries fully.
- 4
Flowering and division
(Early summer, then years 3–4)- •Pale purple or white flower spikes attract bees in late spring. After bloom, shear back by one third.
- •Once the center turns woody and bare, dig and divide the clump to renew it.
💧 Detailed Care Guide
☀️ Light Requirements
- •Thyme demands full sun, 6 to 8 hours a day, and truly suffers in shade.
- •Indoors, grow it on the sunniest windowsill or under lights; sparse, leggy growth usually means it is not getting enough light.
💧 Watering
- •Water deeply only when the soil is completely dry. Once established, thyme is very drought-tolerant and hates wet feet.
- •Overwatering and poorly drained soil are the main reasons plants decline. A gravel mulch keeps crowns dry.
🌡️ Temperature
- •Thyme is hardy in zones 5 to 9 and tolerates frost, cold, and dry winters much better than soggy ones.
- •It prefers the Mediterranean rhythm of cool moist winters and hot dry summers. Mulch lightly after the ground freezes in cold regions.
🌱 Soil & Fertilizer
Soil:
- •Plant in sharply drained, sandy or rocky, even poor soil, pH neutral to alkaline.
- •Thyme actually performs best in lean, fast-draining ground; rich, heavy soil makes it floppy and short-lived.
- •Add sand or grit to clay rather than compost.
Fertilizer:
- •Thyme needs almost no feeding.
- •A light top-dressing of compost in early spring is plenty; heavy fertilizer produces weak, leafy growth that rots in winter.
- •Potted plants appreciate only a dilute feeding once or twice a season.
📝 Step-by-Step Planting Guide
- 1
Start from plants or cuttings, not seed
- •Thyme seed is tiny and germinates slowly and unevenly, taking 14 to 28 days, so most gardeners buy started plants or clip 3-inch tip cuttings.
- •Dip cut ends in rooting hormone and plant in sterile sand or vermiculite; roots form in about 6 weeks.
- •Pot them up and let the root ball develop before planting out.
- •Keep the cuttings in bright, indirect light and cover them loosely with a plastic bag to hold humidity until new growth appears.
- 2
Plant in sandy, rocky ground in full sun
- •Choose the driest, sunniest spot you have: a rock garden, a raised bed edge, or along a wall where water drains away quickly.
- •Thyme loves lean, sandy, fast-draining soil at neutral to alkaline pH.
- •If your ground is clay, dig in coarse sand and grit instead of rich compost, which would hold too much moisture.
- 3
Space plants 9–12 inches apart, shallow
- •Set young plants or divisions about 9 to 12 inches apart, at the same depth they grew in their pots.
- •Thyme spreads into a low mat, so give each clump room to widen. Water in once, then let the surface dry.
- •A thin gravel mulch around the clump keeps the crown dry and blocks weeds.
- 4
Water sparingly, deep only when dry
- •After establishment, water thyme deeply only when the soil has completely dried out. In most seasons that means once every week or two at most.
- •Soggy soil is the enemy: yellowing, bare centers, and rotting stems almost always trace back to too much water or poor drainage.
- •Potted thyme checks dry fastest.
- 5
Shear after bloom and divide every few years
- •Once flowers fade in early summer, shear the plants back by about one third to keep them compact and push fresh leafy growth.
- •Trim whenever they get leggy, but never cut into hard old wood.
- •Every 3 to 4 years, dig up the woody clump in early spring and divide it, replanting the young outer shoots and discarding the dead center.
🌱 Recommended Varieties
Culinary English and French thymes
- •The everyday cooking thymes, quick to establish from cuttings. 'Broadleaf English' has broad small leaves, white flowers, and a sweeter fragrance.
- •'Narrow Leaf French' carries fine gray leaves and white flowers for classic French cooking.
- •'Silver Posie' offers larger leaves with white margins, ornamental but still kitchen-worthy.
Main landscape and French thymes
- •Reliable garden thymes that form tight mounds. 'Provencal' has tiny gray-green leaves, white flowers, and a strong citrus-herb aroma.
- •'Orange Balsam' carries narrow orange-scented leaves and lavender flowers.
- •'German Winter' is a hardy selected strain that stands up well to cold winters.
Specialty and lemony thymes
- •Flavored heirloom thymes beloved in cooking and tea. Lemon thyme ('Citriodorus') adds a bright lemon lift to fish and roast chicken.
- •Caraway thyme ('Heriorum') smells of caraway and makes a low ground cover.
- •'Doone Valley' offers golden variegated leaves and is grown more as an ornamental ground cover than for cooking.
🪴 Growing in Containers
- Use a shallow, wide pot:
- •Thyme has a shallow, spreading root system.
- •A wide, shallow container works better than a deep one; half-barrels or bulb pans suit the plant's horizontal habit and dry evenly.
- Fill with gritty, fast mix: Use potting soil blended with coarse sand, perlite, or pumice, or a cactus mix. Thyme rots in heavy peat-based mix; the grittier the better for a potted herb.
- Top-dress with gravel:
- •A thin layer of decorative gravel on the soil surface keeps the crown dry, looks neat, and reflects warmth.
- •It also stops soil from splashing onto the tiny leaves when watering.
- Grow in the hottest sun: Set the pot where it gets 6 to 8 hours of direct sun. A hot, bright patio or step is ideal; shade turns thyme sparse, leggy, and prone to disease.
- Water when fully dry; feed lightly:
- •Soak the pot when the soil has completely dried, then let it drain freely.
- •Feed at most once or twice a season with dilute liquid fertilizer; too much food makes potted thyme weak and floppy.
✂️ Pruning & Maintenance
- ✓
Shear by one third after flowering
- •Once the late-spring blooms fade, cut the whole mound back by about one third.
- •This prevents a woody, open center and pushes fresh, tender leafy growth for harvest.
- ✓
Trim whenever it gets leggy
- •Snip stray long shoots through the season to keep a neat cushion shape.
- •Regular light trimming is both harvest and pruning, and rewards you with compact, aromatic growth.
- ✓
Never cut into hard old wood
- •Thyme rarely resprouts from bare, brown stems. Always cut above green leafy growth.
- •A branch that is fully bare should be removed at the base and replaced by division or cuttings.
- ✓
Divide woody clumps every 3–4 years
- •In early spring, dig up the clump and split it into young outer pieces with roots. Replant those and discard the dead, woody center.
- •This renewal keeps the planting productive for years.
🐛 Pest & Disease Control
Common Pests
Aphids
Symptoms:- •Small pale insects cluster on tender new shoots, causing curled, distorted leaves and sticky honeydew; new growth may stunt.
- •Usually appears on soft, lush growth from too much fertilizer.
Control:- •Knock them off with a strong spray of water and repeat. Encourage lady beetles and lacewings.
- •Cut back on nitrogen, which pushes the soft growth aphids love, and spray insecticidal soap on heavy colonies.
Spider mites
Symptoms: Fine pale stippling covers tiny leaves, which bronze and dull; faint webbing may show on branch tips during hot, dry spells.Control:- •Mist the plants and wash leaf undersides, which mites dislike.
- •Avoid dust buildup around the plants, and treat outbreaks with insecticidal soap or horticultural oil on a cool day.
Leafhoppers
Symptoms: Small wedge-shaped insects hop or fly off when disturbed; leaves develop pale stippling and curl, and growth can weaken in heavy infestations.Control:- •Use row covers over young plants and keep weeds down nearby.
- •Knock them off with water sprays, and apply insecticidal soap or neem oil to persistent populations. Remove and discard badly infested tips.
Whiteflies
Symptoms: Tiny white insects cloud up when the plant is brushed, feeding on leaf undersides and leaving yellowing foliage and sticky honeydew.Control:- •Hang yellow sticky traps and spray leaf undersides with insecticidal soap.
- •Improve air circulation and avoid excess nitrogen, which keeps foliage soft and inviting.
Common Diseases
Root rot
Symptoms: Plants wilt and yellow despite dry-looking soil, stems rot at the crown, and the center of the clump collapses. Caused by constantly wet, poorly drained ground.Control:- •Plant in sharply drained, sandy soil and water only when fully dry.
- •Dig out badly rotted plants, improve drainage with grit, and replant thyme in a new spot rather than the old wet hole.
Gray mold (Botrytis)
Symptoms: Fuzzy gray growth covers stems and leaves in cool, wet, crowded conditions, causing the affected parts to collapse and decline.Control:- •Space plants for air movement, water at the base, and trim out dead foliage.
- •Improve ventilation by thinning the clump, and remove infected sprigs rather than composting them.
Fungal leaf spot (Alternaria)
Symptoms: Small brown or tan spots with darker borders appear on leaves, enlarging and sometimes dropping out to make holes; worse in wet seasons.Control: Avoid overhead watering and handle foliage only when dry. Rake up fallen leaves, space for airflow, and apply a copper or sulfur spray if the problem recurs.Rhizoctonia crown rot
Symptoms: Reddish-brown lesions girdle the lower stem and roots, turning leaves yellow-brown and causing the plant to wilt in the day and recover slightly at night.Control: Provide excellent drainage, avoid overwatering, and don't bury the crown. Remove affected plants and solarize or replace the soil before replanting.Powdery mildew
Symptoms: A pale powdery coating spreads over leaves and stems in humid, still air, distorting new growth and weakening the plant over time.Control:- •Give full sun and good airflow, avoid crowding, and prune open the center of the mound.
- •Mild cases can be sprayed with neem oil or a baking-soda foliar treatment.
🍅 When to Harvest
- •Cut the top 5 to 6 inches of stems just before flowering, when oil content peaks. Leave at least 5 inches of growth and never cut into the hard wood.
- •Harvest in the morning after dew dries; two or more cuts per season are possible. Hang sprigs to dry or freeze them.
❓ Frequently Asked Questions
- 1
What is the best way to start thyme?
- •Buy a started plant from a nursery, or take 3-inch tip cuttings from a healthy thyme.
- •Clip just below a node, strip the lower leaves, dip in rooting hormone, and plant in sterile sand or vermiculite. Roots form in about 6 weeks.
- •Growing from seed is possible but slow and uneven, taking 14 to 28 days, and seedlings are tiny.
- •Once cuttings root, grow them on in small pots until the root ball fills the container, then plant out after all frost danger has passed.
- 2
How often should I water thyme?
- •Much less than you think.
- •After the plant is established, water deeply only when the soil has completely dried out, which is usually every week or two at most.
- •Thyme is drought-tough and hates wet feet; overwatering is the leading cause of a dying thyme.
- •Potted plants dry faster and may need checking once a week.
- 3
Is thyme winter-hardy?
- •Yes, common thyme is hardy in USDA zones 5 to 9 and survives cold winters reliably, especially in well-drained soil.
- •It dislikes frozen, waterlogged roots more than cold itself.
- •In cold regions, after the ground freezes, apply a light winter mulch of evergreen boughs or straw to shield the crown from alternating freeze and thaw, which is the real killer of evergreen herbs in winter.
- 4
Can I grow thyme from seed?
- •You can, but it is frustratingly slow: seeds are tiny, germination takes 14 to 28 days and is uneven, and seedlings need months to reach a useful size.
- •Most gardeners prefer cuttings or nursery plants, which stay true to the parent's flavor and fill in a single season.
- •If you do sow, press seeds onto the surface rather than burying them, since they need light to sprout.
- 5
How do I harvest and dry thyme?
- •Cut the top 5 to 6 inches of stems just before the plant flowers, when the essential oils are strongest.
- •Leave at least 5 inches of growth and never cut into the hard wood. Harvest in the morning after dew dries.
- •Hang small bunches in a dark, airy place, or freeze sprigs.
- •Store dried leaves in an airtight jar, and crush the leaves just before using so the fragrance lasts as long as possible.
- 6
Why is my thyme woody and bare in the center?
- •Woody, open centers are normal on thyme after 3 to 4 years, especially when the plant has not been sheared or the soil is too rich or wet.
- •Shear by one third after bloom each year, avoid heavy fertilizer, and divide the clump in early spring: dig it up and replant the young outer shoots, discarding the dead middle.
Source:
NC State Extension Gardener Plant Toolbox — https://plants.ces.ncsu.edu/images/plants/thymus-vulgaris/
NC State Extension Gardener Plant Toolbox — https://plants.ces.ncsu.edu/images/plants/thymus-vulgaris/
The Old Farmer's Almanac — https://www.almanac.com/plant/thyme
Photo credit: NC State Extension
Images courtesy of NC State Extension under CC BY license. Thank you to the photographers who make these educational images available.
License: CC BY-NC 2.0 / CC BY 4.0