
How to Grow Celery: Complete Guide
- •Celery (Apium graveolens) is a cool-season biennial in the carrot family (Apiaceae), grown as an annual for its crisp, juicy stalks and aromatic leaves.
- •It descends from wild smallage (Apium graveolens var.
- •secalinum) of the Mediterranean and North Africa, where it grows in damp, rich ground; that heritage explains why modern celery demands steady moisture and fertile soil to produce the thick, non-stringy stalks sold at markets.
- •Unlike fast leafy greens, celery needs a long, relatively cool growing season—often 120 to 140 days from seed to harvest—and it is one of the more patient crops a home gardener can attempt.
- •The seeds are among the smallest in the vegetable garden, germinate slowly and unevenly, and must be left on the soil surface because light triggers sprouting.
- •Three cultivated groups exist: stalk celery (var.
- •dulce), the familiar ribbed bunch sold raw and in soups and stir-fries; celeriac or root celery (var.
- •rapaceum), grown for a knobby edible root; and leaf celery (var. secalinum), harvested for its parsley-like foliage.
- •Celery stalks are eaten raw with dips, chopped into salads, stews, stocks and mirepoix, while the leaves season broths and dressings.
- •Celery seed itself comes only from the second-year flowering plant described later in this guide.
- •Because it is a cool crop, celery bolts prematurely after a cold snap or sustained heat, at which point stalks turn bitter and fibrous.
- •It is non-toxic to cats and dogs, though a few pets may have a mild food sensitivity and should not be fed large quantities.
📋 Quick Facts
Scientific Name: Apium graveolens
Family: Apiaceae
Category: Vegetable
USDA Zones: 2–10 (grown as an annual; hardy biennial overwintered only in mild zones)
Light:
- •Celery needs full sun, at least 6 to 8 hours of direct sunlight each day, to build thick stalks.
- •In warm southern gardens, a little afternoon shade keeps roots cool and slows bolting through the hottest weeks, but deep shade produces weak, leggy plants that fail to form a proper bunch.
Water:
- •Constant moisture is celery's single most critical need; its roots are shallow, just a few inches deep, and the plant suffers quickly in dry soil.
- •Provide roughly 1 to 1.5 inches of water per week and water at the base rather than over the foliage.
- •If celery goes without water, stalks become small, stringy, tough, hollow and bitter.
- •Apply a 2 to 3 inch organic mulch after transplanting to conserve moisture, cool the root zone and suppress weeds, and check the soil daily in hot, dry weather so it never dries out.
Temperature:
- •Celery is a cool-season crop that grows best with daytime temperatures near 60 to 70°F (16 to 21°C) and mild nights.
- •Seed germinates most reliably at 70 to 75°F (21 to 24°C). Growth slows below 50°F (10°C), and a cold spell right after transplanting triggers bolting.
- •Sustained heat above 80°F (27°C) makes stalks bitter, fibrous and prone to sending up a flower stalk; protect plants with shade cloth and extra mulch during heat waves rather than expecting a warm-weather harvest.
Soil:
- •Grow celery in moisture-retentive, rich loam with a pH between 5.8 and 6.8.
- •Before planting, loosen the soil 12 to 15 inches deep and work in 2 to 4 inches of aged manure or well-rotted compost; celery roots need both fertility and a crumbly structure.
- •The soil should hold water without becoming soggy, so improve heavy clay with compost and avoid fast-draining sand that dries between waterings.
- •Because roots are shallow, future fertilizer and compost are applied on top of the soil rather than mixed deeply under the plant.
Harvest:
- •Begin harvesting when stalks are about 8 inches tall and the bunch reaches 2 to 3 inches in diameter.
- •Cut or snap the outer stalks from the outside in so the center continues to grow; you can also harvest the whole plant at soil level when it reaches market size.
- •Keep picking from summer through autumn until a hard frost stops growth. Celery tolerates a light frost but not repeated hard freezes.
- •If soil is mounded around the base, plants can hold in the garden for about a month in cool weather.
- •Refrigerate unwashed stalks in a plastic bag; they will keep for several weeks, and chopped pieces can be frozen for later soups and stocks.
Common Problems: Bolting, Hollow or stringy stalks, Bitter flavor, Slugs, Aphids, Early blight, Aster yellows.
📅 When to Plant
- •Start celery indoors 10 to 12 weeks before your last spring frost date for a spring crop.
- •For a fall crop, sow seed in time to transplant seedlings about 10 to 12 weeks before your first fall frost.
- •Because the seed is tiny and slow to sprout, pre-soak it in warm water overnight, then surface-sow it onto sterile seed-starting mix; do not cover the seed with soil, since it needs light to germinate.
- •Keep the medium at 70 to 75°F (21 to 24°C) during the day and 60 to 65°F (15 to 18°C) at night under plastic or a humidity dome.
- •Germination can take about one week or as long as three weeks, so remain patient and keep the surface evenly moist.
- •Transplant seedlings outdoors only after the soil reaches at least 50°F (10°C) and nighttime temperatures stay above 40°F (4°C); a cold shock right after setting out plants is a common cause of premature bolting.
- •Set plants 8 to 10 inches apart in rows 18 to 36 inches apart and water them thoroughly after planting.
🌱 Growing Stages
 1
Germination
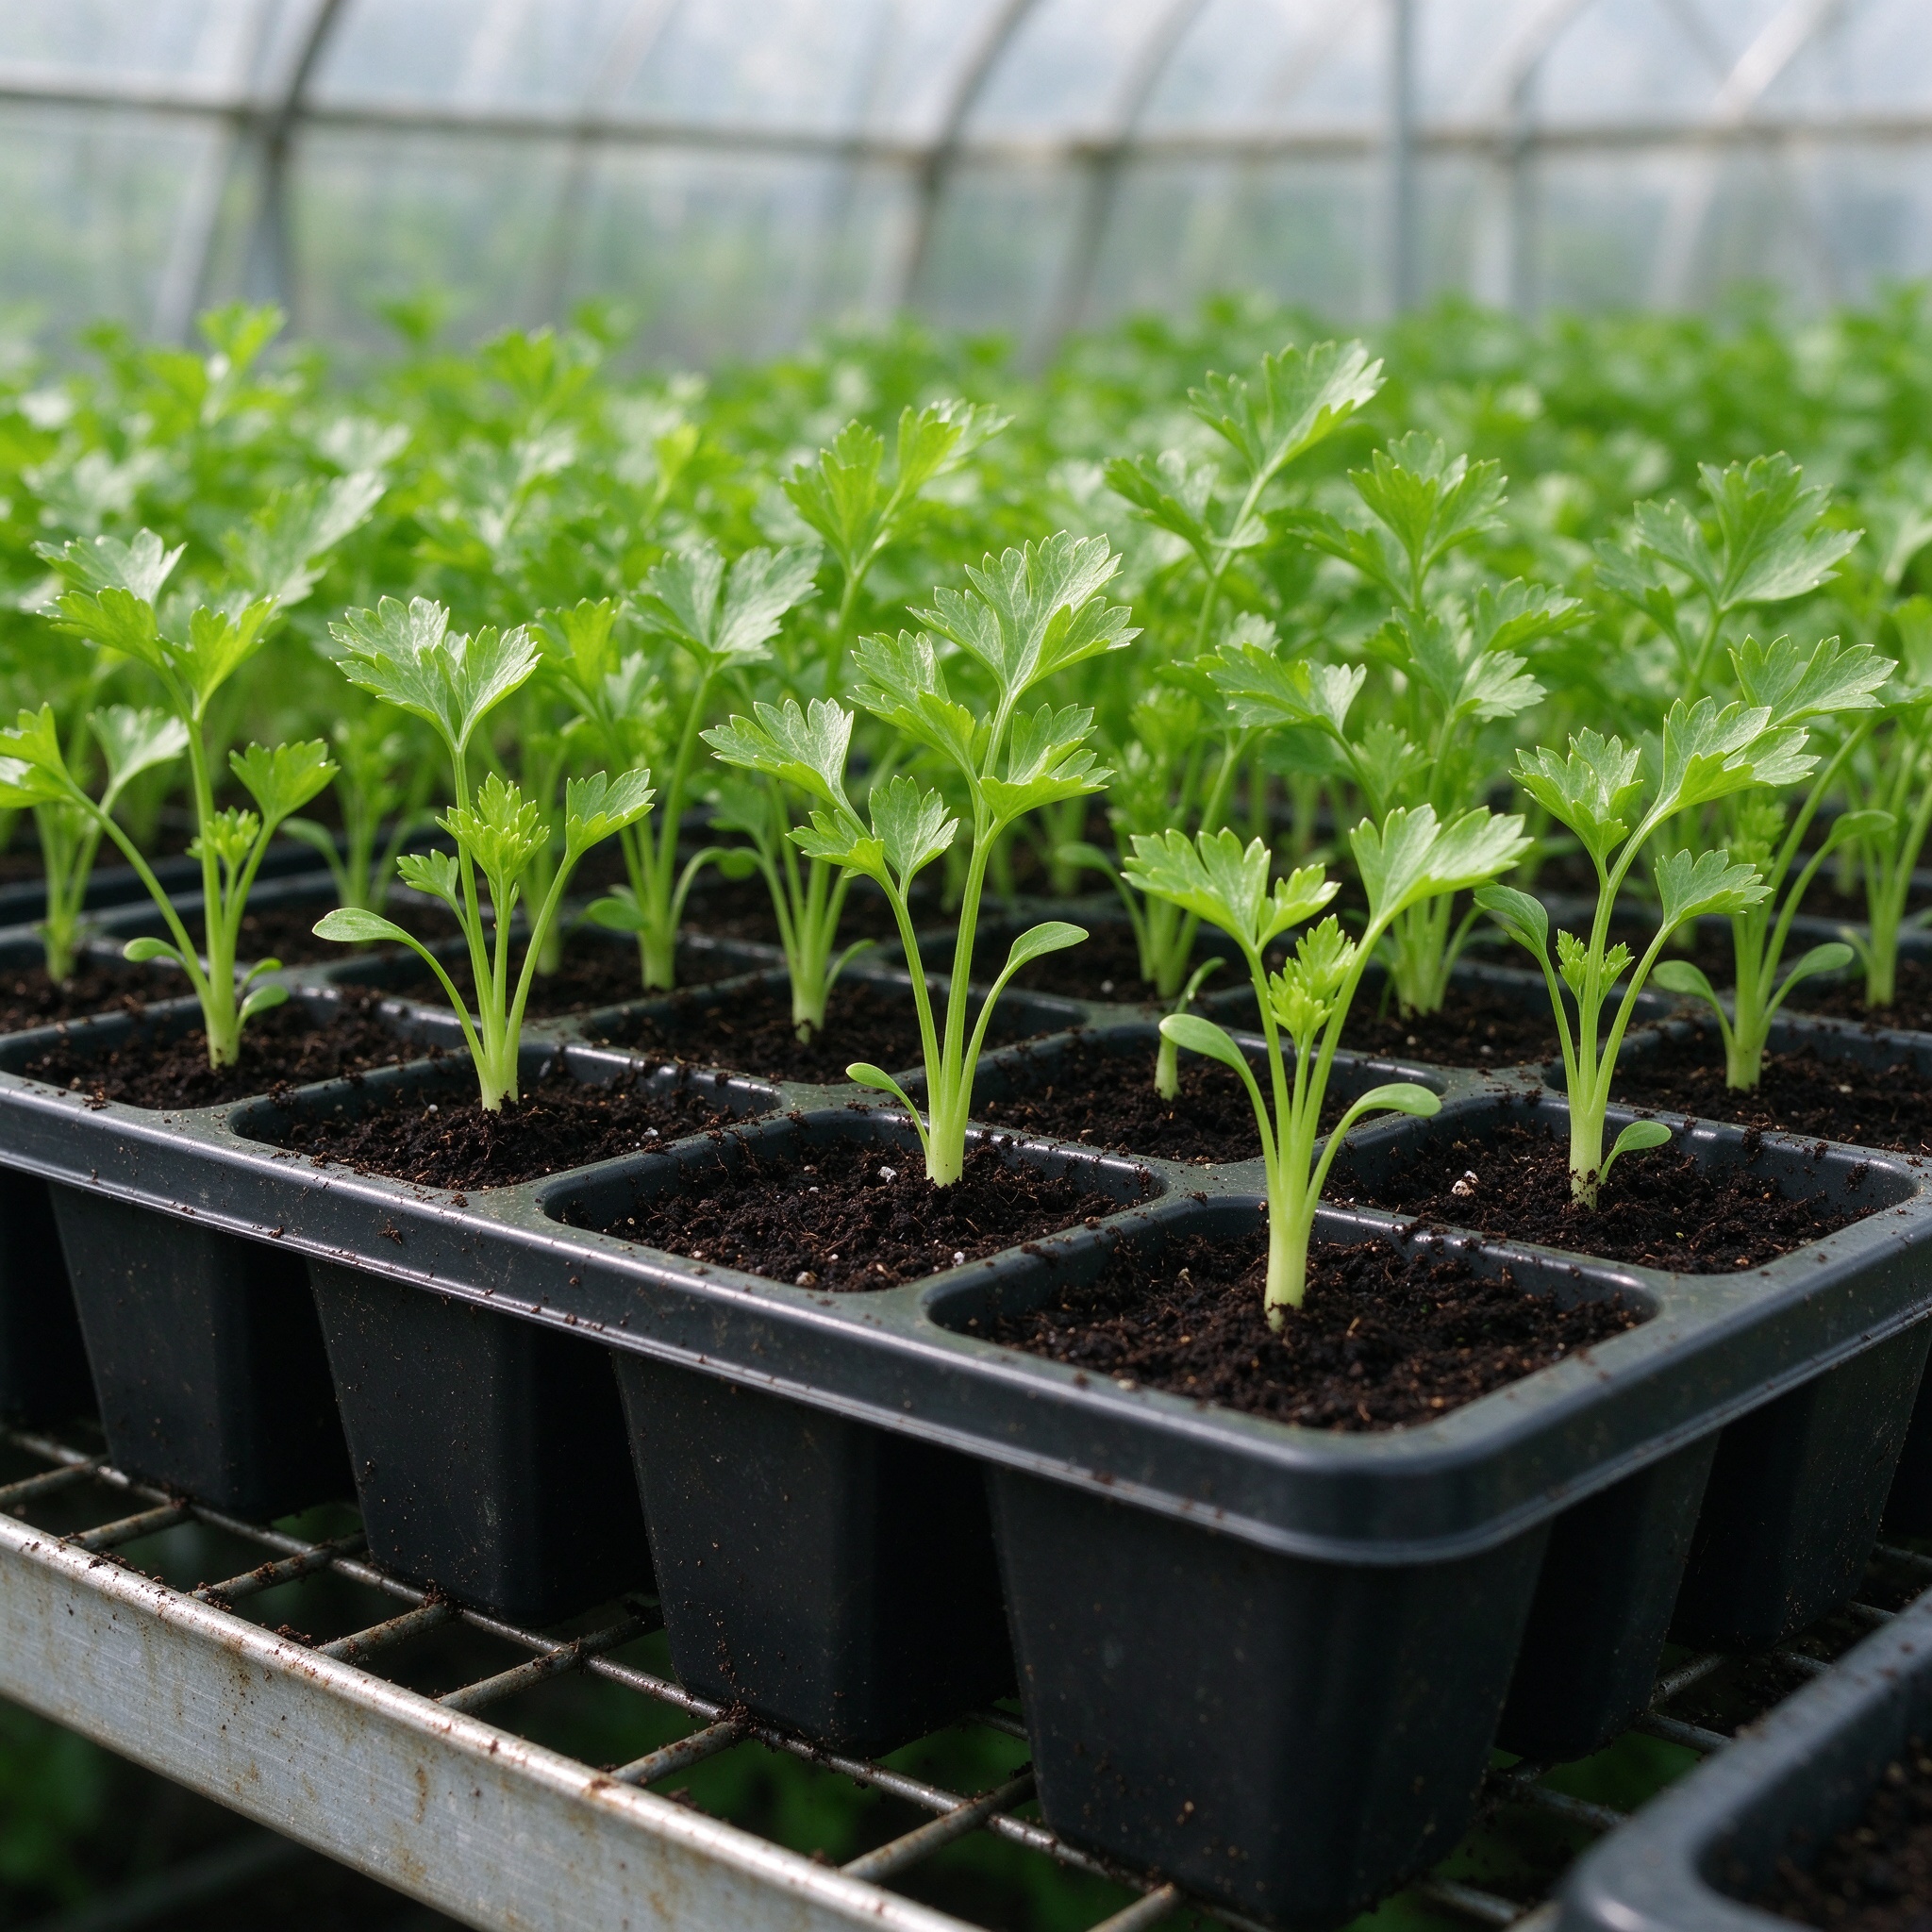
(7 days to 3 weeks)- •Tiny celery seeds swell and send a root down into warm, moist seed-starting mix at 70 to 75°F (21 to 24°C).
- •Because they are sown on the surface and need light, keep the cover vented and misted rather than soaking the tray.
- •Sprouting can be uneven; some seed may not appear until nearly three weeks, so do not discard the flat prematurely.
- •Once cotyledons unfold, move the seedlings under bright grow lights to prevent leggy growth.
 2
Seedling
(6 to 10 weeks indoors)- •The young plant grows its first true celery leaves with distinctive scalloped edges.
- •Thin or transplant to one plant per cell, keep the light close and water carefully so the mix never stays waterlogged; damping-off can wipe out seedlings in warm, wet conditions.
- •This stage ends when plants are about 2 inches tall and ready to be hardened off for the garden.
 3
Establishment and stalk growth
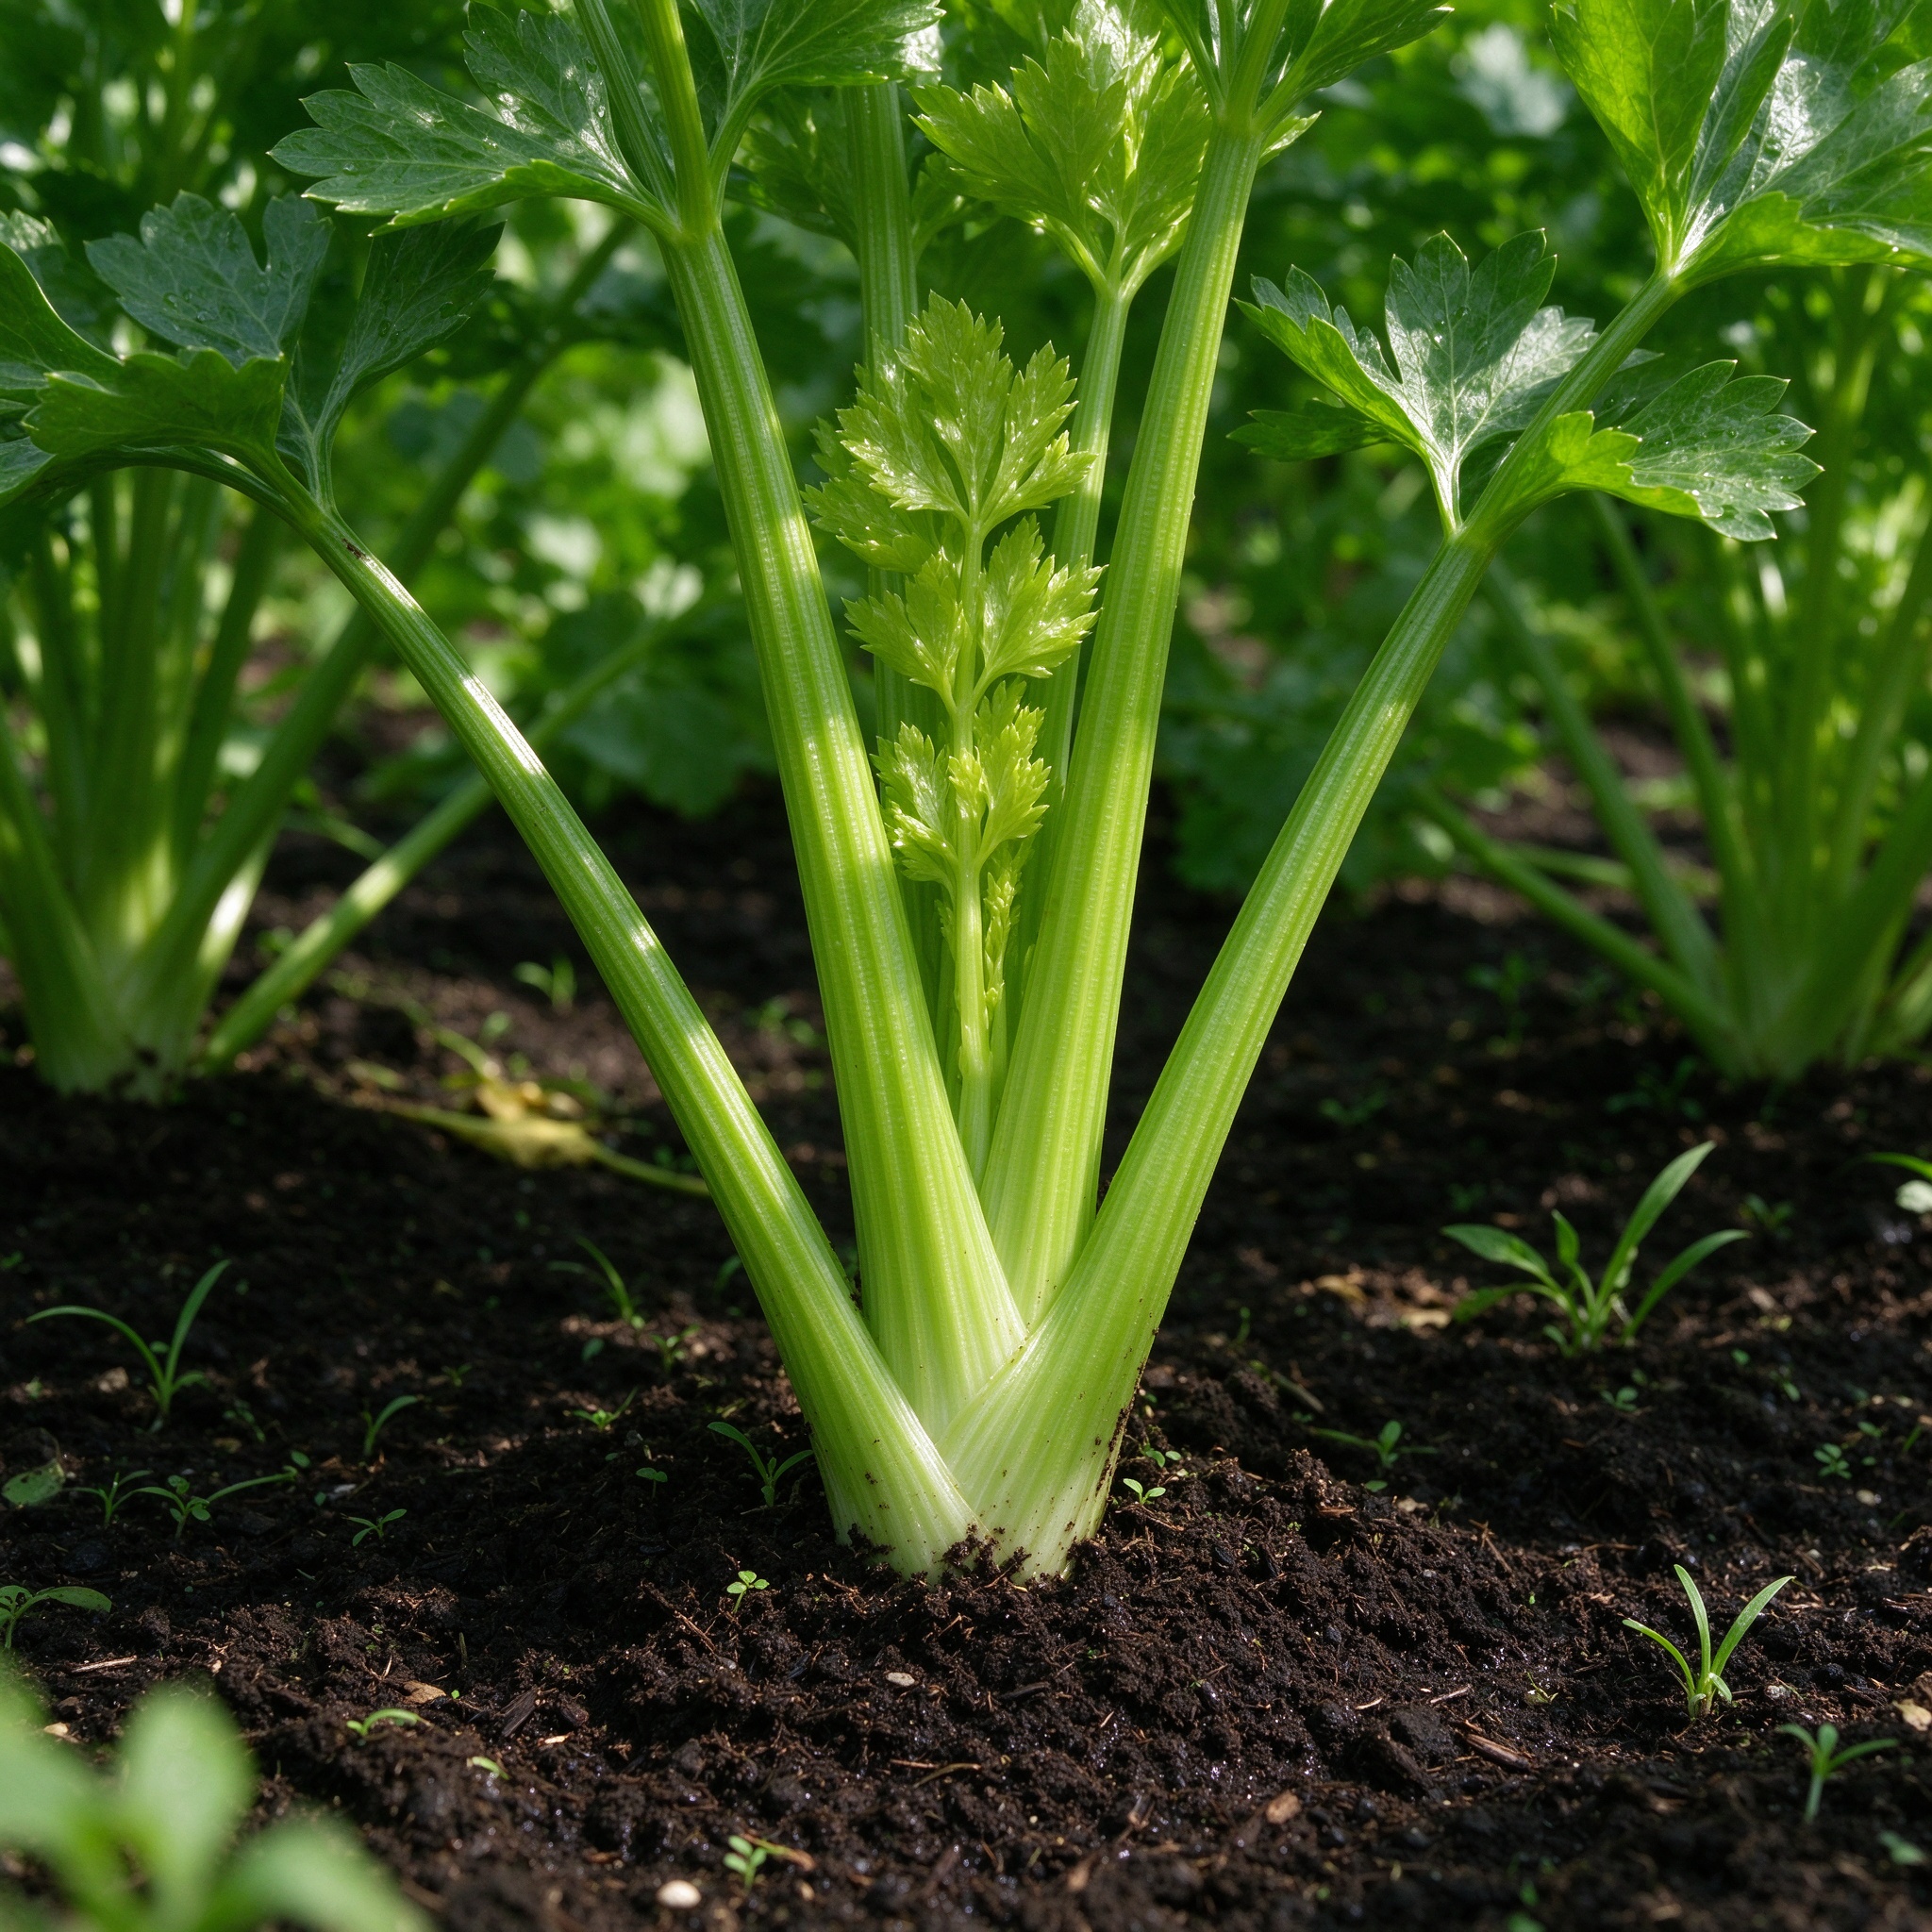
(Weeks 3 to 10 after transplanting)- •After transplanting into cool, rich, moist soil, plants expand their basal leaves and begin to stack edible ribs.
- •Mulch and side-dressing support steady growth; blanching begins as stalks approach a foot tall.
- •This is when lack of water or a heat wave most often produces stringy, hollow or bitter stalks, so monitor moisture daily and shade plants during extreme heat.
- 4
Maturity, harvest and biennial reset
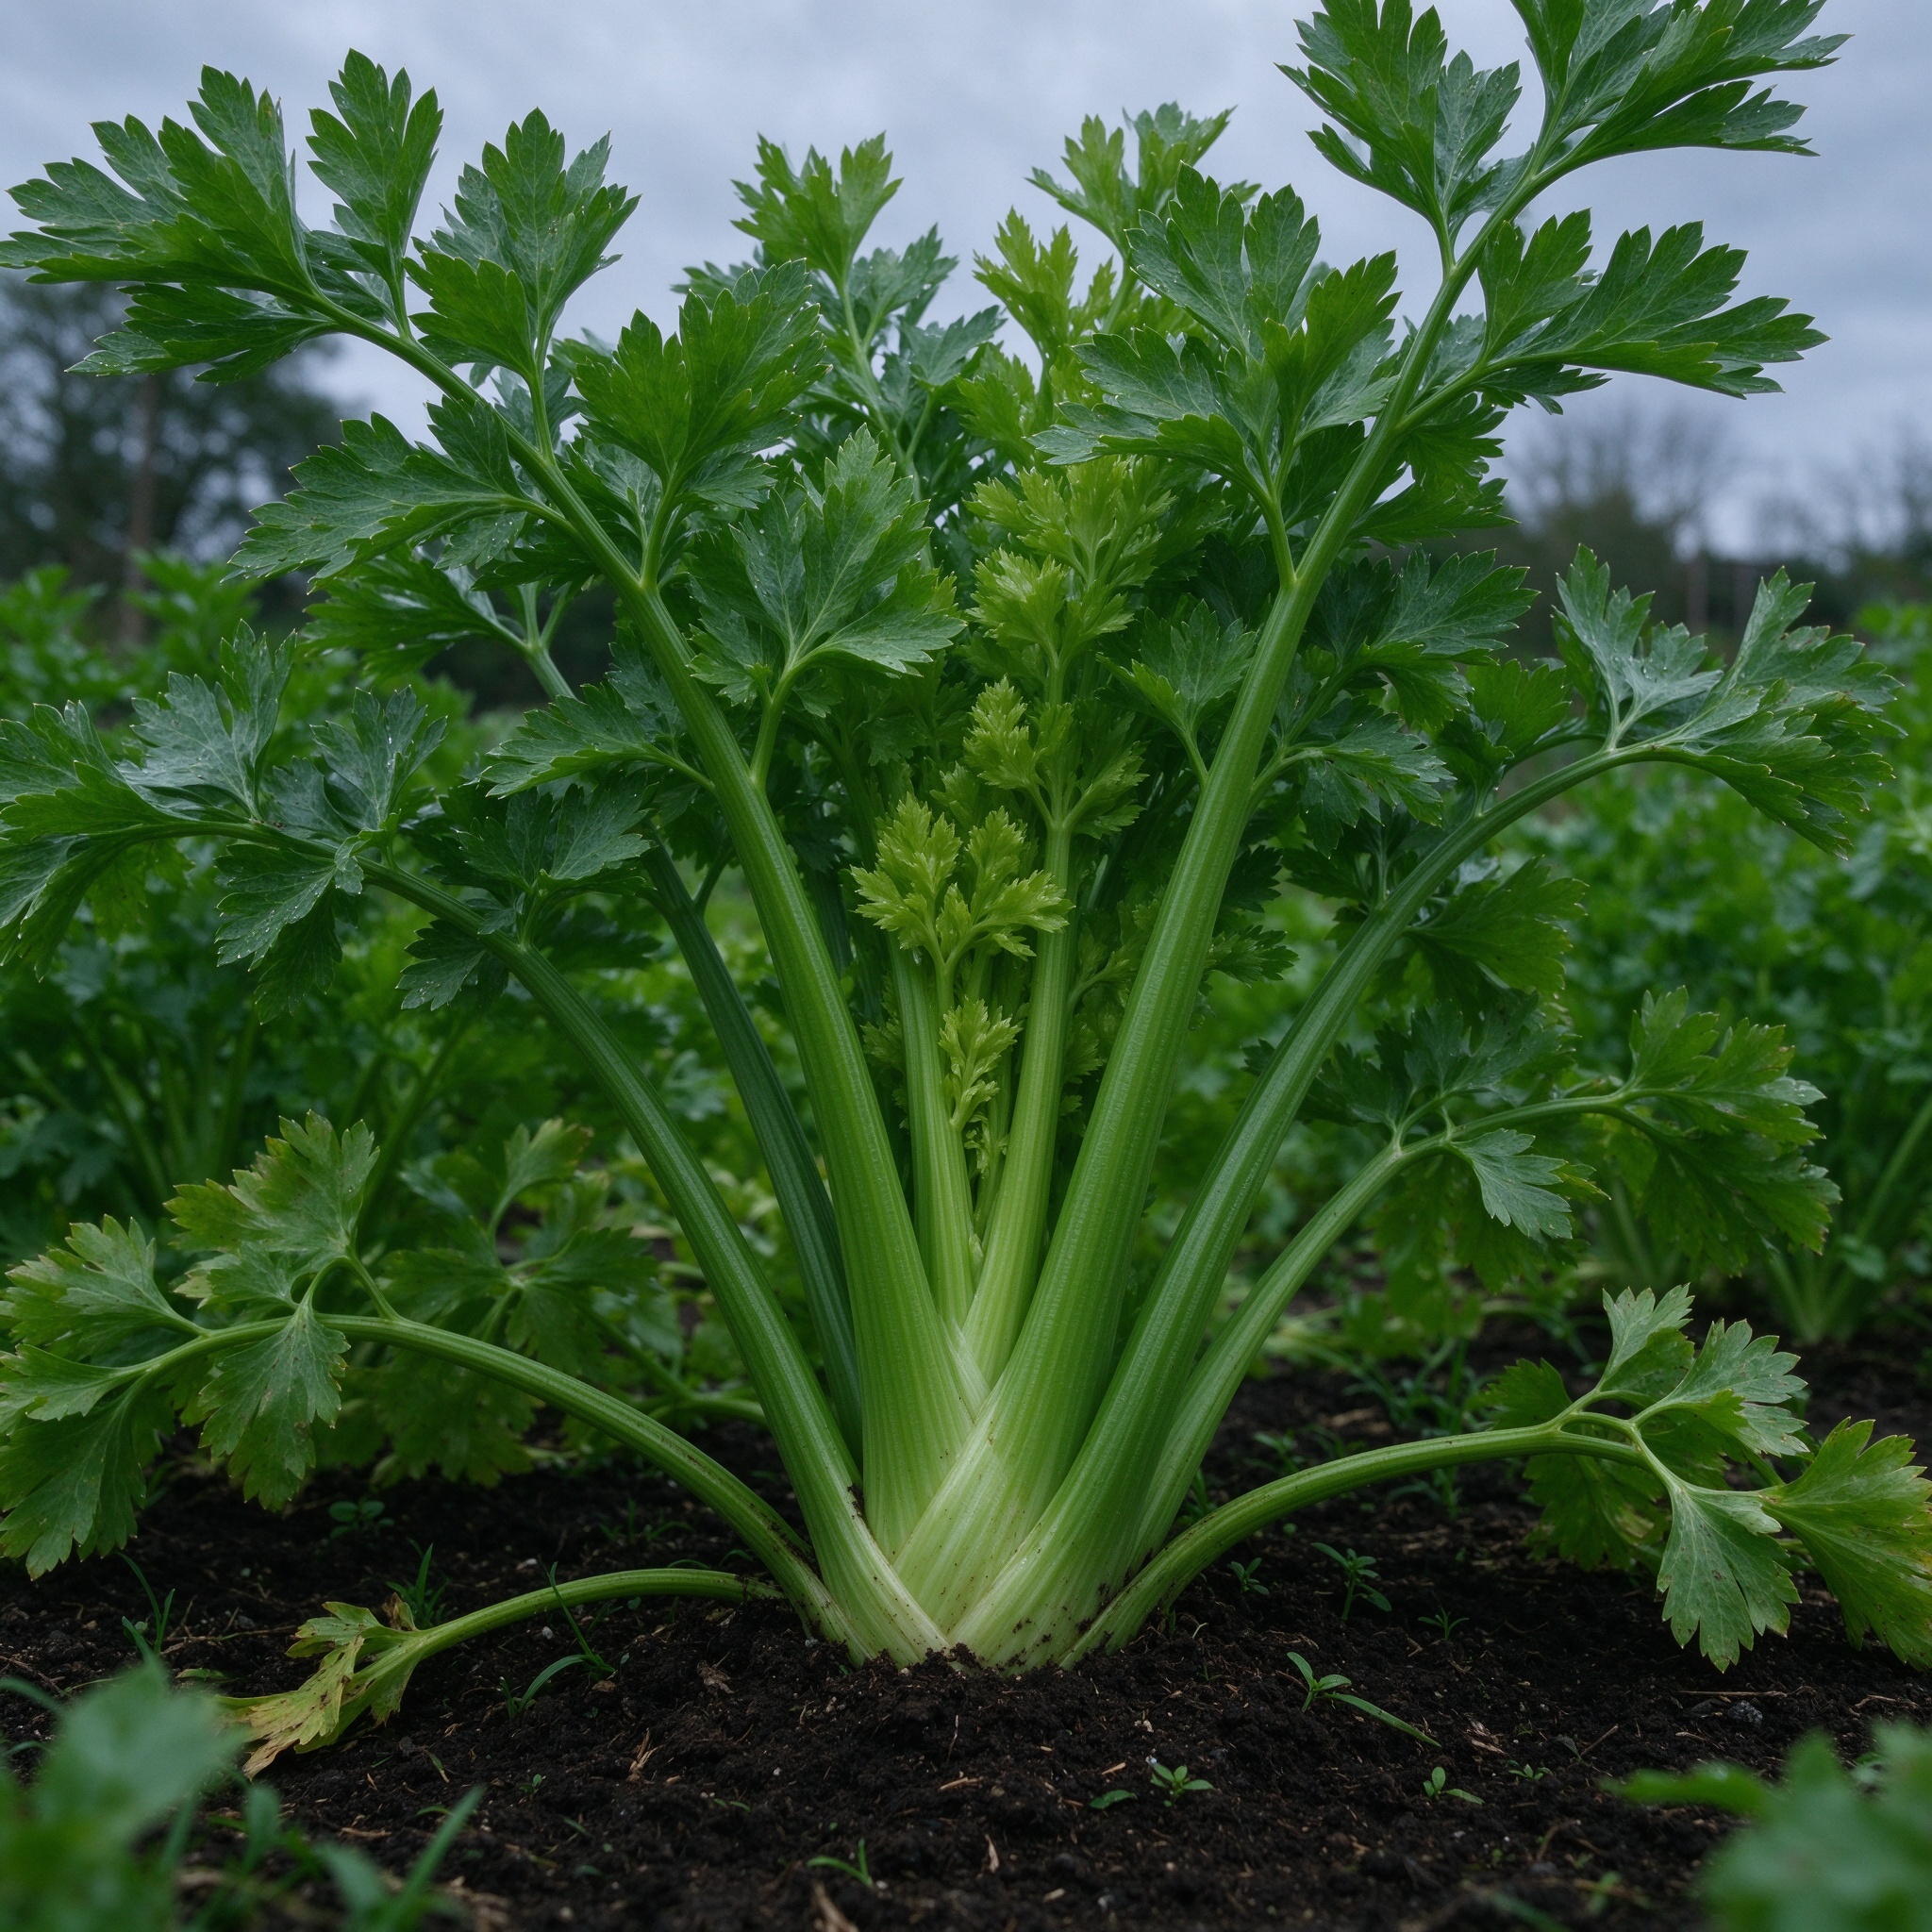
(10 to 14 weeks after transplanting)- •Bunches mature as outer stalks reach 8 inches and a deep green color; harvest from the outside in for a prolonged supply.
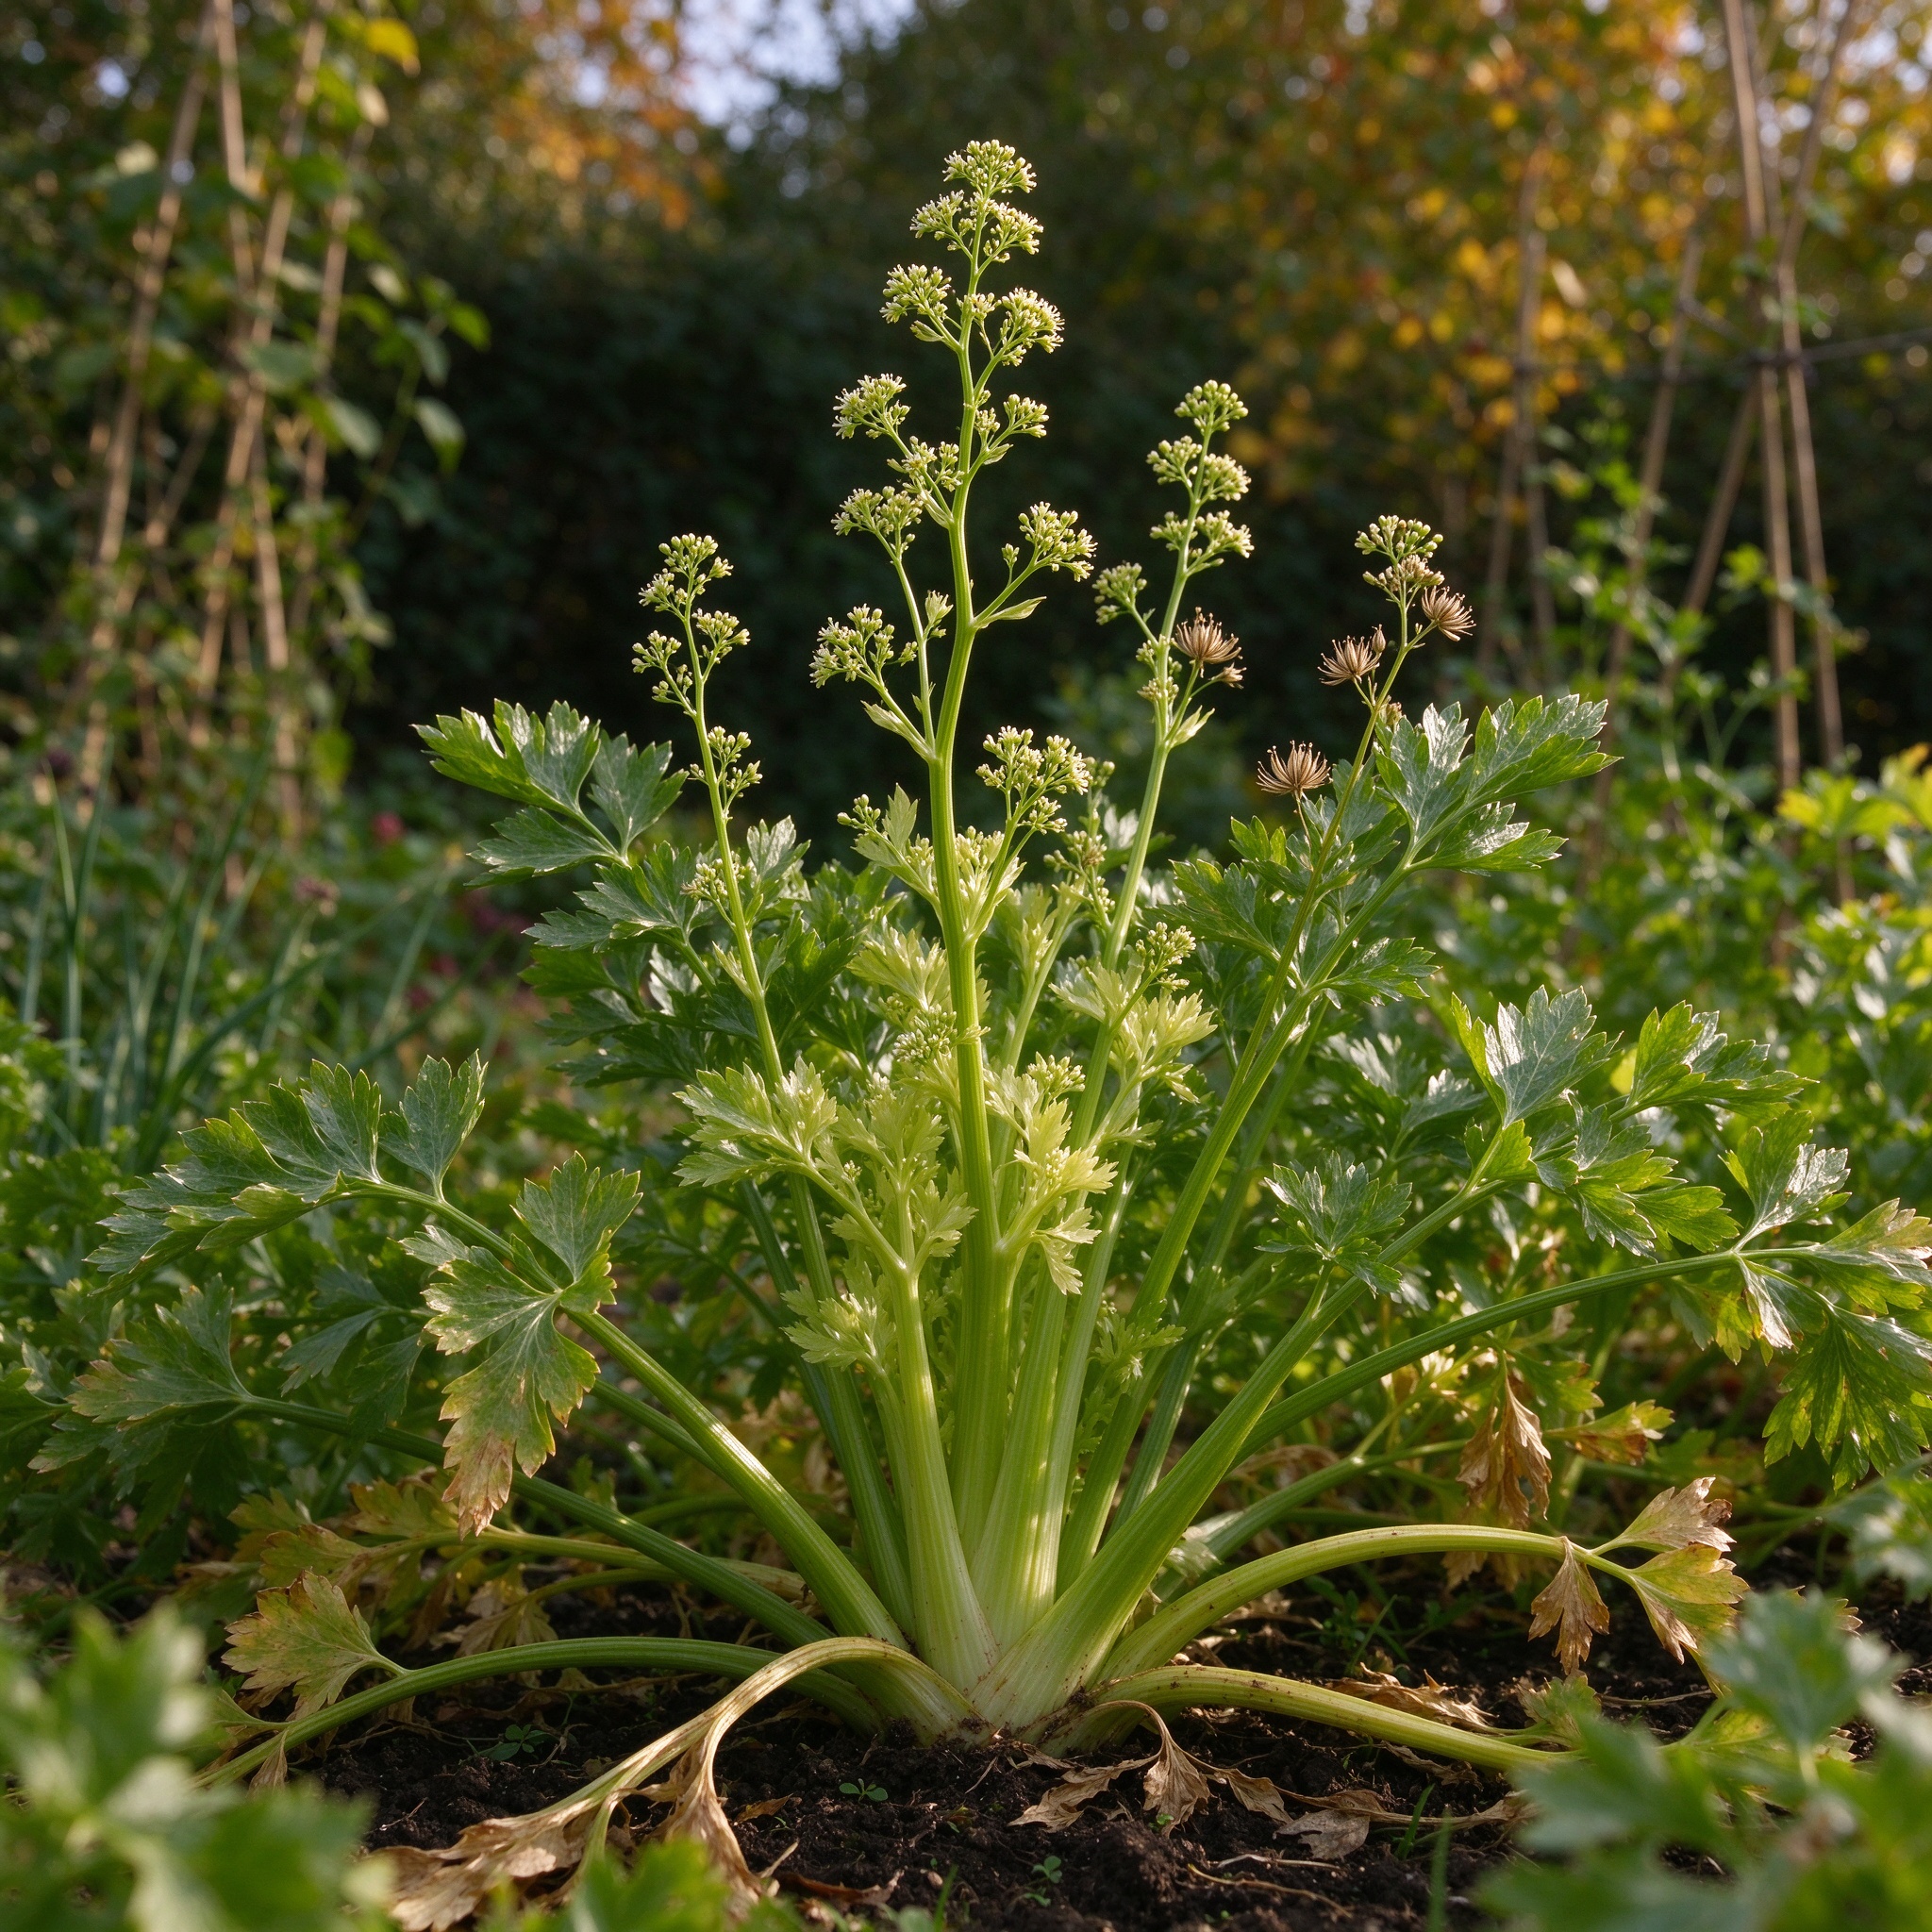
- •A celery plant that survives winter enters its second year: it sends up a tall branching flower stalk bearing white umbels, sets tiny black-brown seeds, and dies after seed ripens.
- •Gardeners saving seed let these second-year heads mature and dry before collection.
💧 Detailed Care Guide
☀️ Light Requirements
- •Celery needs full sun, at least 6 to 8 hours of direct sunlight each day, to build thick stalks.
- •In warm southern gardens, a little afternoon shade keeps roots cool and slows bolting through the hottest weeks, but deep shade produces weak, leggy plants that fail to form a proper bunch.
💧 Watering
- •Constant moisture is celery's single most critical need; its roots are shallow, just a few inches deep, and the plant suffers quickly in dry soil.
- •Provide roughly 1 to 1.5 inches of water per week and water at the base rather than over the foliage.
- •If celery goes without water, stalks become small, stringy, tough, hollow and bitter.
- •Apply a 2 to 3 inch organic mulch after transplanting to conserve moisture, cool the root zone and suppress weeds, and check the soil daily in hot, dry weather so it never dries out.
🌡️ Temperature
- •Celery is a cool-season crop that grows best with daytime temperatures near 60 to 70°F (16 to 21°C) and mild nights.
- •Seed germinates most reliably at 70 to 75°F (21 to 24°C). Growth slows below 50°F (10°C), and a cold spell right after transplanting triggers bolting.
- •Sustained heat above 80°F (27°C) makes stalks bitter, fibrous and prone to sending up a flower stalk; protect plants with shade cloth and extra mulch during heat waves rather than expecting a warm-weather harvest.
🌱 Soil & Fertilizer
Soil:
- •Grow celery in moisture-retentive, rich loam with a pH between 5.8 and 6.8.
- •Before planting, loosen the soil 12 to 15 inches deep and work in 2 to 4 inches of aged manure or well-rotted compost; celery roots need both fertility and a crumbly structure.
- •The soil should hold water without becoming soggy, so improve heavy clay with compost and avoid fast-draining sand that dries between waterings.
- •Because roots are shallow, future fertilizer and compost are applied on top of the soil rather than mixed deeply under the plant.
Fertilizer:
- •Celery is a moderate to heavy feeder that responds to steady, gentle feeding. Mix compost or aged manure into the bed before transplanting.
- •In the second and third months of growth, side-dress each plant with one tablespoon of a 5-10-10 fertilizer placed 3 to 4 inches away from the stalks, or scratch aged compost and comfrey pellets into the soil between plants.
- •A modest nitrogen supply supports leafy growth, but over-feeding concentrates salts that can burn shallow roots, so dilute liquid fertilizer to half strength and water it in well.
📝 Step-by-Step Planting Guide
- 1
Start seed indoors 10 to 12 weeks before last frost
- •Because celery seed is tiny and germinates slowly, begin it in flats of sterile seed-starting mix 10 to 12 weeks before your expected last spring frost.
- •Soak the seed in warm water overnight to soften the tough coat, then tap it from the packet onto the surface so seeds fall about an inch apart; press them in but do not cover them, since they sprout in light.
- •Cover the tray with plastic wrap or a humidity dome and keep the medium at 70 to 75°F (21 to 24°C) during the day and 60 to 65°F at night.
- •Germination may take one to three weeks.
- •Once seedlings appear, raise a fluorescent grow light 3 inches above them and run it 16 hours a day, misting regularly to keep the mix moist.
- •When seedlings are about 2 inches tall, transplant them into individual peat pots or deeper flats spaced 2 inches apart.
- 2
Prepare a moisture-retentive, rich bed
- •Choose a full-sun site and loosen the soil 12 to 15 inches with a garden fork or tiller.
- •Work in 2 to 4 inches of aged manure or compost and rake the bed level, correcting pH to between 5.8 and 6.8 with a soil test if available.
- •The goal is a loose, fertile soil that holds moisture yet drains; amend heavy clay with extra compost and improve sandy soil with organic matter so it does not dry between waterings.
- •Lay a moisture-retentive mulch base ready to apply after transplanting.
- 3
Harden off and transplant after the soil warms
- •Ten days to two weeks before setting plants out, begin hardening them off by cutting water slightly and placing them in a sheltered, shady outdoor spot for a couple of hours the first day, gradually increasing sun and exposure.
- •Transplant only after the soil reaches at least 50°F (10°C) and nights stay above 40°F (4°C); a cold shock now causes bolting.
- •Set seedlings 8 to 10 inches apart, with rows 18 to 36 inches apart, and water thoroughly to settle the roots.
- •Use row covers for the first 4 to 5 weeks to exclude pests while plants establish.
- 4
Mulch, feed and blanch the stalks
- •After plants are established, spread a 2 to 3 inch layer of straw, leaves or compost around them to conserve moisture, cool the shallow root zone and block weeds.
- •In the second and third months, side-dress with compost or 5-10-10 fertilizer away from the stalks.
- •To produce pale, mild stalks free of bitterness, blanch by mounding soil against the stems as they reach about a foot tall, or wrap individual bunches with cardboard tubes, milk cartons or brown paper secured with string, leaving the leaves uncovered.
- •Tie growing stalks together loosely so they do not sprawl. Weed shallowly, because the roots are easily damaged.
- 5
Harvest outer stalks and protect from frost
- •When stalks reach about 8 inches tall, begin picking from the outside in, snapping or cutting mature ribs so the center keeps producing.
- •Harvest whole bunches before a hard frost; celery survives only a light freeze.
- •In mild climates a plant may overwinter and send up a flower stalk the following spring.
- •If you want celery seed, leave a few plants in place through the winter under mulch; the second-year cycle is described in the seed-saving FAQ.
- •Refrigerate harvested stalks in a plastic bag for several weeks or freeze chopped pieces for stocks.
🌱 Recommended Varieties
'Tall Utah 52–70'
- •The classic open-pollinated green celery, ready in about 90 to 100 days, with tall, robust 10 to 12 inch stalks and good bolt tolerance for mid-length seasons.
- •It has the deep green ribs and strong celery flavor used in soups, stocks and mirepoix, and it holds well in the garden into autumn.
'Golden Self-Blanching'
- •An early, compact variety that produces pale, crisp, mildly sweet stalks with little or no hilling required.
- •It grows well in raised beds and containers, matures around 85 days, and suits gardeners who want tender, golden ribs without the work of wrapping each bunch in cardboard.
'Brilliant' celeriac
- •Selected for a smooth, round, knobby root rather than long stalks, this variety forms a dense corm used in soups, purées and roasted vegetable dishes; its outer leaves are still edible as a seasoning.
- •It tolerates cool soil well and matures about 100 days after transplanting, typically lifted before the first hard winter frost.
🪴 Growing in Containers
- Use a deep, moisture-retentive container:
- •Grow one celery plant per 5-gallon (19-liter) pot at least 12 inches deep, with drainage holes in the bottom.
- •Celery roots spread rather than descend deeply, so a wide pot performs better than a narrow one.
- •Fill it with a rich, peat-based potting mix amended with compost, and set a saucer beneath to catch runoff because containers dry fast in sun and wind.
- Keep potted celery moist and shaded in heat:
- •Check the pot daily and water when the top half-inch feels dry; container celery can use 1 to 2 inches of water per week and often more on hot days.
- •Feed with half-strength balanced liquid fertilizer every three to four weeks, mulch the surface, and move pots into light afternoon shade during heat waves.
- •Tie stalks loosely together or insert a small support to keep the bunch upright and stop it from sprawling over the pot edge.
✂️ Pruning & Maintenance
- ✓
Harvest outer ribs to shape the bunch
- •There is no need to prune celery for bushiness; instead, remove mature outer stalks from the outside in as they reach 8 inches, which lets the center produce fresh ribs for weeks.
- •Cutting the whole bunch at once ends production, so selective picking extends the harvest and keeps the plant compact.
- ✓
Remove bolted flower stalks and weed shallowly
- •If a plant sends up a central flower stalk after heat or cold stress, cut it out near the base to buy a little more leaf harvest, although flavor will already have turned bitter.
- •Weed by hand or with a shallow hoe between plants, taking care not to disturb the shallow root system; thick organic mulch does most of the weeding for you.
🐛 Pest & Disease Control
Common Pests
Aphids
Symptoms:- •Clusters of small green or black insects gather on tender new growth and the undersides of leaves, curling foliage and leaving sticky honeydew that coats stalks and feeds sooty mold.
- •Heavy populations distort young stalks and slow growth.
Control:- •Blast colonies off with a strong stream of water, then spray insecticidal soap or horticultural oil on undersides while leaves are shaded.
- •Keep row covers on young plants, encourage ladybugs and lacewings, and remove weeds that host aphids at the edge of the bed.
Cabbage looper (celery caterpillar)
Symptoms:- •Pale green or striped caterpillars chew irregular holes through leaves and stalks and leave dark frass on foliage; loops of the body identify cabbage loopers as they move along the plant.
- •Young leaves can be skeletonized within a few days during warm weather.
Control:- •Handpick caterpillars in the cool morning, drop them into soapy water, and use row covers over transplants to stop moths laying eggs.
- •On established plants, apply Bacillus thuringiensis (Bt) to leaf surfaces where worms feed; it targets caterpillars without harming beneficial insects.
Slugs and snails
Symptoms:- •Irregular holes and ragged edges appear on leaves and stalks, followed by a glistening slime trail; seedlings can disappear overnight.
- •Moist mulch and shade suit slugs, so young celery often suffers most after transplanting.
Control:- •Handpick at night with a flashlight, trap slugs under boards or in shallow containers of beer sunk to the rim, and lay a 1-inch copper strip or food-grade diatomaceous earth around plants.
- •Avoid thick bark mulch directly against the stalks, water in the morning rather than evening, and keep the base of each plant open to airflow.
Aster leafhopper
Symptoms:- •Slender green insects hop from plant to plant; more importantly, they transmit the phytoplasma that causes aster yellows.
- •Infected celery yellows, stunts, produces small, distorted shoots and bitter stalks, and may cluster tiny yellow leaves at the growing tip.
Control:- •Protect young plants with fine row covers and remove broadleaf weeds and wild hosts around the garden where leafhoppers feed.
- •Rogue and destroy any plant showing aster yellows symptoms, since the disease is not curable; control the leafhopper vector with insecticidal soap to slow spread between rows.
Common Diseases
Early blight (Cercospora apii)
Symptoms:- •Small yellowish spots appear on older leaves and stalks, enlarging into round gray-brown lesions with a pale center; affected foliage dies back and ribs can become marked and disfigured.
- •Spores spread by splashing water and high humidity.
Control:- •Rotate celery and other Apiaceae crops out of the same bed for at least three years, space plants for airflow, and water at the base rather than overhead.
- •Remove crop debris at season's end and apply a fixed-copper fungicide at the first sign of spots if weather stays wet.
Fusarium yellows
Symptoms:- •Leaves turn yellow and plants stunt, often on one side first; cutting into the lower stem reveals brownish vascular discoloration.
- •Warm soil and stressed plants favor the soil-borne fungus, which causes gradual wilting even with adequate moisture.
Control:- •Plant resistant or tolerant cultivars where the disease has appeared before, rotate non-related crops for several years, and remove and destroy infected plants.
- •Avoid working wet soil, keep roots undamaged during transplanting, and maintain steady water and fertility to reduce plant stress.
Aster yellows (phytoplasma)
Symptoms:- •New growth turns pale yellow and clusters into a witches' broom of tiny, narrow leaves; stalks stunt and flavor turns bitter or off.
- •Symptoms resemble nutrient deficiency but continue to spread to nearby plants after leafhopper feeding.
Control:- •There is no cure for the phytoplasma.
- •Pull and bag infected plants immediately, control aster leafhoppers with row covers and soap sprays, and eliminate weed hosts such as dandelion and plantain around the garden border.
- •Replant the affected space with a non-Apiaceae crop after rogueing all symptomatic plants.
Root rot and damping-off
Symptoms:- •Seedlings collapse at the soil line in a warm, wet flat, while older plants show brown, soft roots, yellow leaves and slow decline when soil never drains.
- •Caused by soil-borne oomycetes and fungi that thrive in overwatered, compacted ground.
Control:- •Start seedlings in fresh, sterile seed-starting mix and avoid overwatering; let the surface dry between mistings.
- •Grow in well-drained raised beds, thin plants for air circulation, and remove any rotting plant along with the soil around its crown.
- •Healthy root growth depends on cool, loose, aerated soil rather than constant saturation.
🍅 When to Harvest
- •Begin harvesting when stalks are about 8 inches tall and the bunch reaches 2 to 3 inches in diameter.
- •Cut or snap the outer stalks from the outside in so the center continues to grow; you can also harvest the whole plant at soil level when it reaches market size.
- •Keep picking from summer through autumn until a hard frost stops growth. Celery tolerates a light frost but not repeated hard freezes.
- •If soil is mounded around the base, plants can hold in the garden for about a month in cool weather.
- •Refrigerate unwashed stalks in a plastic bag; they will keep for several weeks, and chopped pieces can be frozen for later soups and stocks.
❓ Frequently Asked Questions
- 1
How to grow celery from seeds?
- •Celery must be started early indoors because it needs a long, cool season.
- •Sow tiny seeds 10 to 12 weeks before your last spring frost, soaking them overnight and spreading them on the surface of sterile seed-starting mix without covering, since light is required for germination.
- •Keep the medium at 70 to 75°F (21 to 24°C) by day and 60 to 65°F by night under a humidity dome; sprouting takes one to three weeks.
- •Grow seedlings under a bright light, thin to one plant per cell, and harden them off before transplanting into rich, moist soil after the soil reaches 50°F (10°C) and nights stay above 40°F (4°C).
- •Set them 8 to 10 inches apart and water consistently; the most common failure is letting the young flat or bed dry out during germination.
- 2
How to save celery seeds?
- •Celery is a biennial, so it does not set seed in its first growing season.
- •Keep one or more plants through winter in mild climates, or mulch them heavily in colder zones to survive freezing; in USDA zone 7 and below, overwintered plants usually need protection and may not survive harsh winters.
- •In its second spring the plant sends up a tall, branching stalk topped with white flower umbels; after bloom, the tiny seeds mature and turn dark brown or black.
- •Cut the seed heads just before they shatter, enclose them in a paper bag and hang them in a warm, dry place until seeds drop, then thresh, winnow chaff and store the seed in an airtight jar away from heat and light.
- •Save seed only from open-pollinated, non-hybrid varieties; hybrids will not come true, and plant different celery varieties at least a quarter mile apart to keep seed pure.
- 3
Why is my celery stringy, hollow or bitter?
- •Stringy, hollow or bitter stalks almost always trace to stress rather than the variety.
- •Dry soil produces small, fibrous, hollow ribs; heat above 80°F (27°C) and a cold shock cause bolting, after which stalks turn bitter and send up flower stalks; letting plants reach full maturity in warm weather also toughens the ribs.
- •Fixes include watering consistently (1 to 1.5 inches per week), mulching to cool the roots, shading during heat waves, blanching stalks to reduce bitterness, and harvesting outer ribs before they overmature.
- 4
How much sun does celery need?
- •Celery needs full sun of at least 6 to 8 hours a day to form a thick bunch.
- •In warm southern gardens, a few hours of afternoon shade helps keep roots cool and delays bolting, but more than light shade produces leggy, weak plants with thin stalks.
- •If your site is mostly shaded, grow self-blanching varieties in containers you can move into the best available light.
- 5
Can celery be grown in containers?
- •Yes, but give the plant depth and room for moisture.
- •One plant fits a 5-gallon pot at least 12 inches wide and deep, filled with a rich, compost-amended potting mix.
- •Because pots dry quickly, check daily, keep the soil evenly moist, feed half-strength liquid fertilizer every few weeks, and move the pot to afternoon shade during hot weather.
- •Self-blanching varieties perform best in containers because they do not need hilling.
- 6
When is celery ready to harvest?
- •Harvest when stalks are about 8 inches tall and the bunch is 2 to 3 inches in diameter, picking outer ribs first so the center keeps growing.
- •Collect before a hard frost; celery tolerates one light freeze but not repeated cold.
- •In warm-season regions, aim to finish harvest in spring or fall rather than through summer heat, which makes stalks bitter.
- •Store unwashed stalks in a plastic bag in the refrigerator for several weeks.
Source:
NC State Extension Gardener Plant Toolbox — Apium graveolens — https://plants.ces.ncsu.edu/images/plants/apium-graveolens/
The Old Farmer's Almanac — Celery — https://www.almanac.com/plant/celery
UMass Amherst New England Vegetable Management Guide — Celery and Celeriac — https://nevegetable.org/crops/celery-and-celeriac
Photo credit: NC State Extension
Images courtesy of NC State Extension under CC BY license. Thank you to the photographers who make these educational images available.
License: CC BY-NC 2.0 / CC BY 4.0